Kid;s Art & Growing Project: Make Chia Pets


Water :: Earth :: Wind :: Fire
Art and Art Education with the Elements

 Our local Habitat for Humanity has a depot for sourcing used building materials, called ReStore. I love to stop in regularly to see what they have that I might up-cycle into something useful, even though we are not building or remodeling right now.
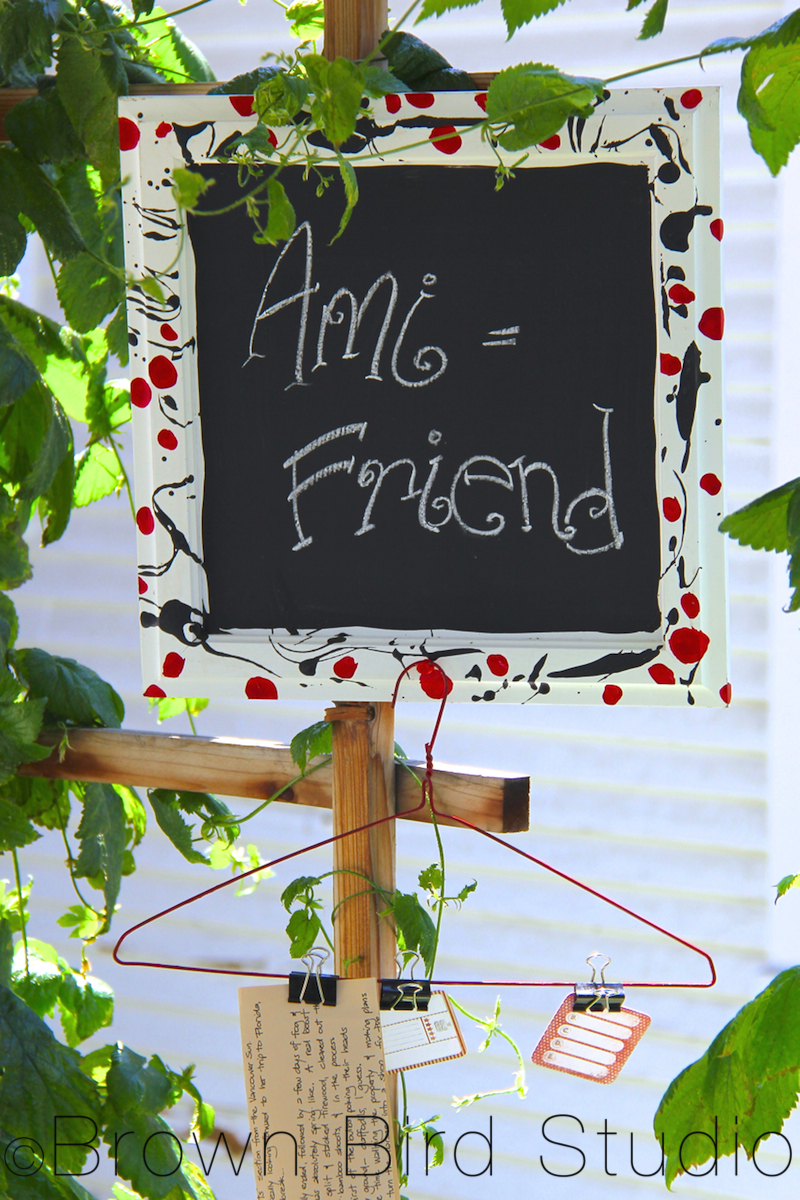
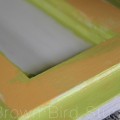
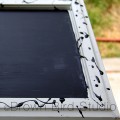
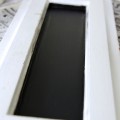
Last week I went to ReStore specifically to find something I could turn into small chalkboard signs with Ema and Adia and I scored! I found some old white frame and flat panel kitchen cupboard parts that already had that slight shabby-chic look that’s so popular now. I already had a can of chalkboard paint, though if I didn’t I would be writing now about making our own chalkboard paint.
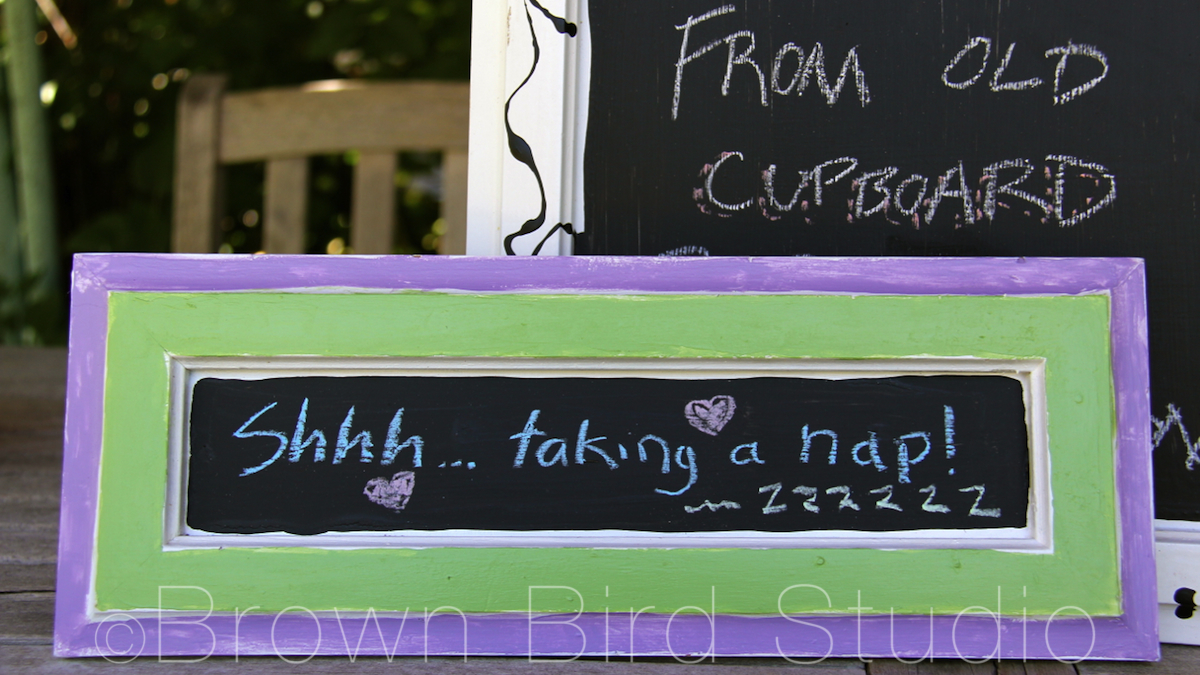
The girls painted two drawer fronts to use as signs on their bedroom door. We also made one for my kitchen, and another for Jaime’s office.
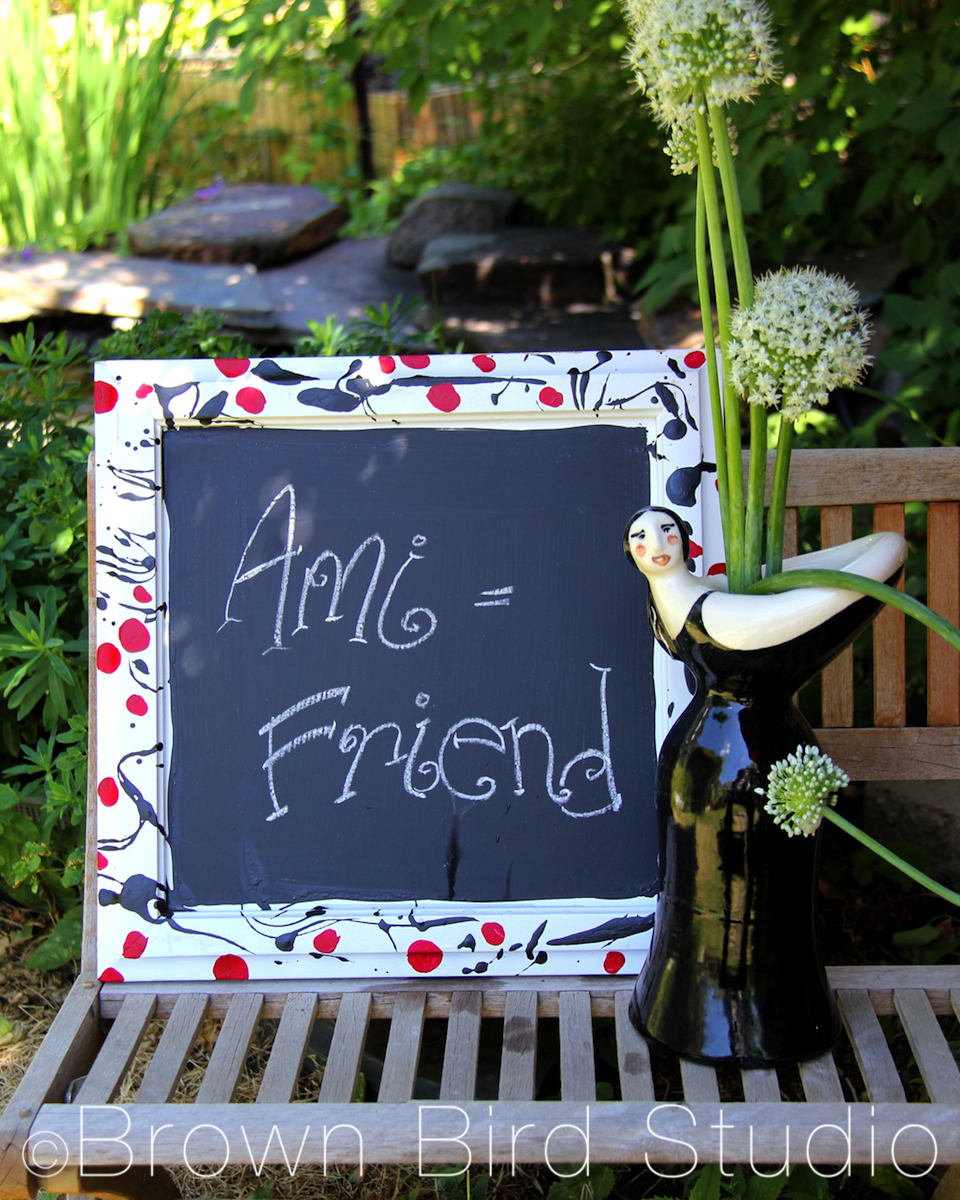
Here is how we made our chalkboard signs:
Supplies Needed:
Instructions:
Additions we made to Jaime’s sign: we added a red painted wire clothes hanger and some clips so Jaime can hang notes, photos, whatever. Like it?
Links and Other Chalkboard Ideas:

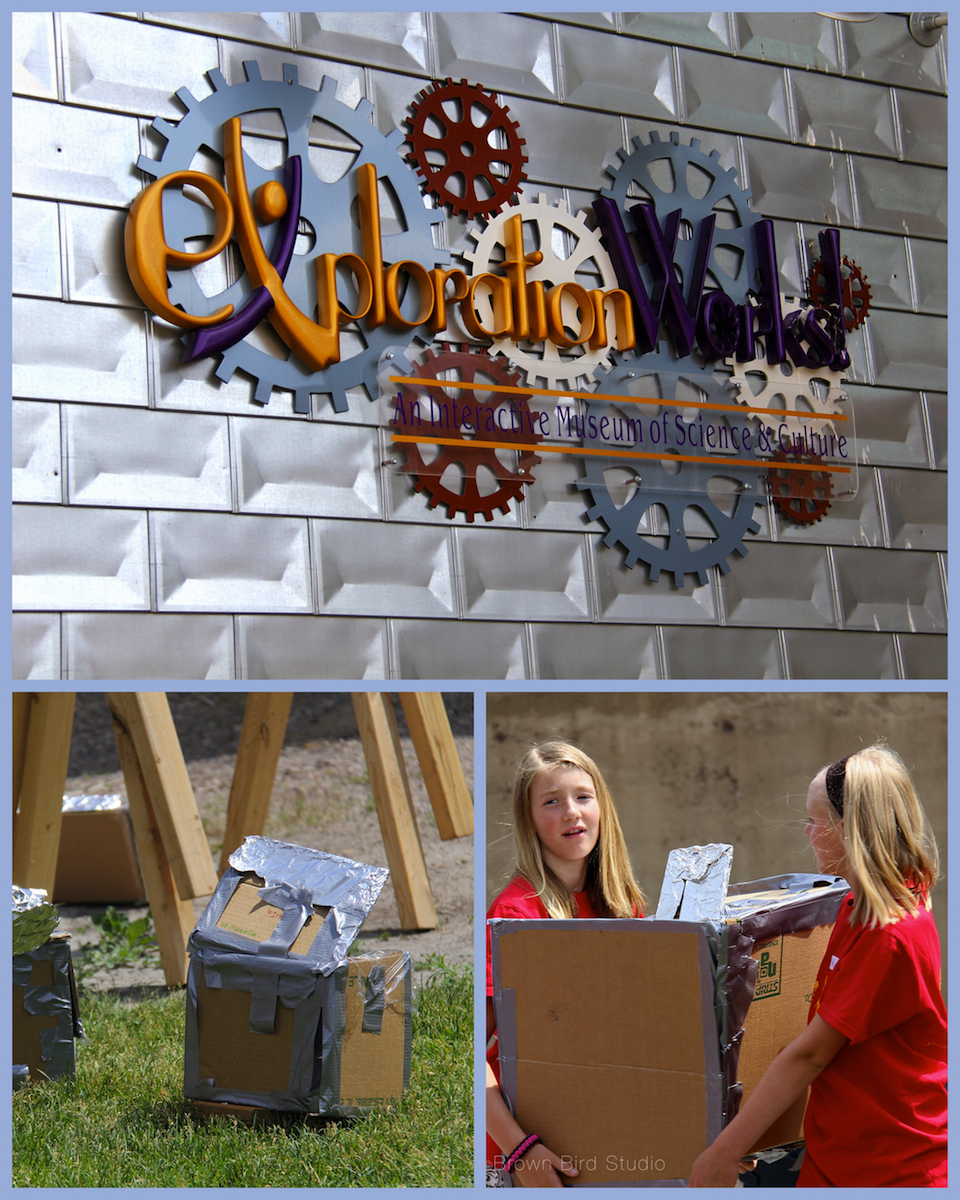
It has been 10 days since Ema and Adia and I spent the day together making art, playing with Charlie and doin other summer kid stuff. I actually missed them. And I think maybe they might have missed playing with me too. When I picked them up at the Exploration Works Science Museum at noon, they both gave Charlie and me big hugs and smiles.
So … we went to a fast food place for lunch (it shall remain unnamed — grin) just to do something totally unexpected and different. The girls liked it. (I remembered why I don’t eat there.)
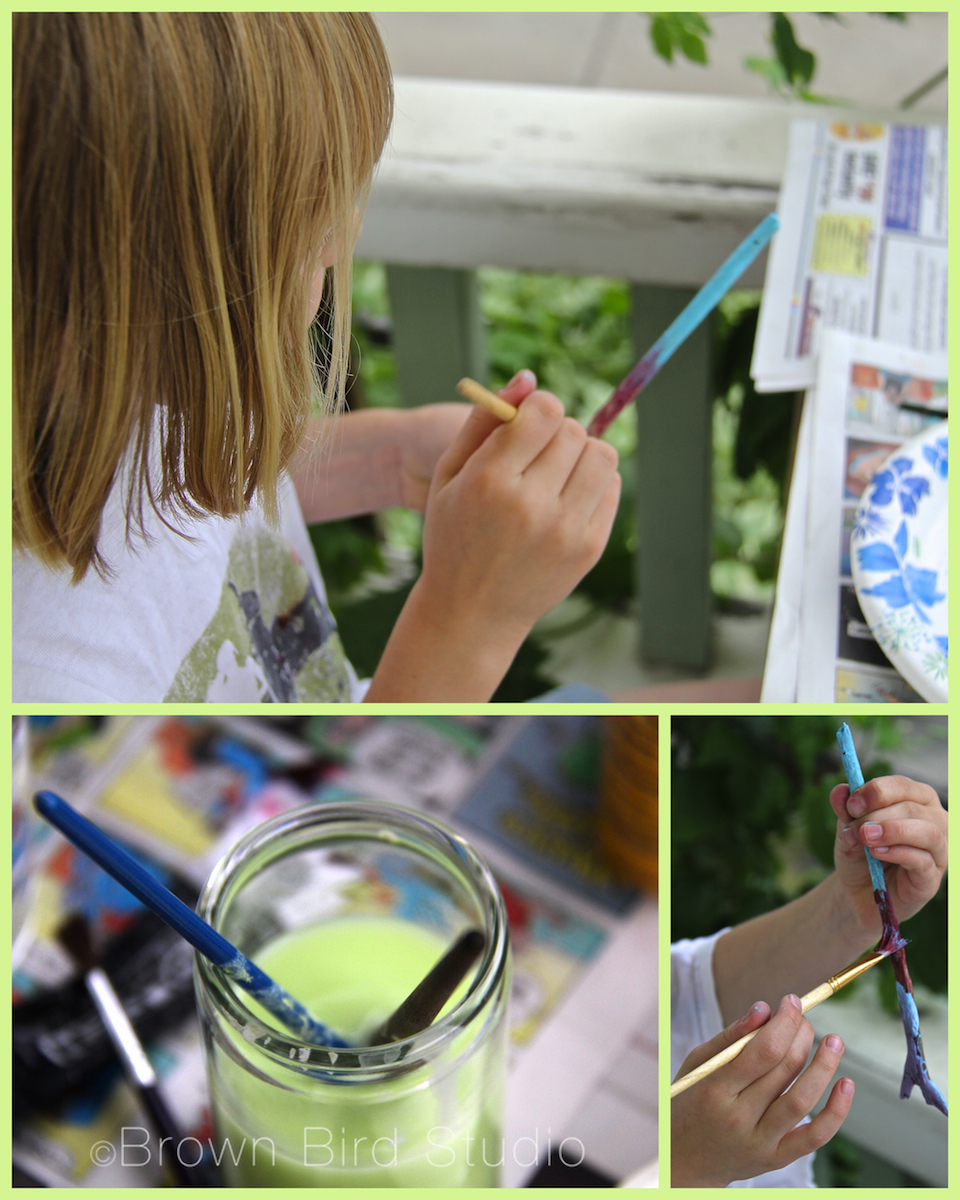
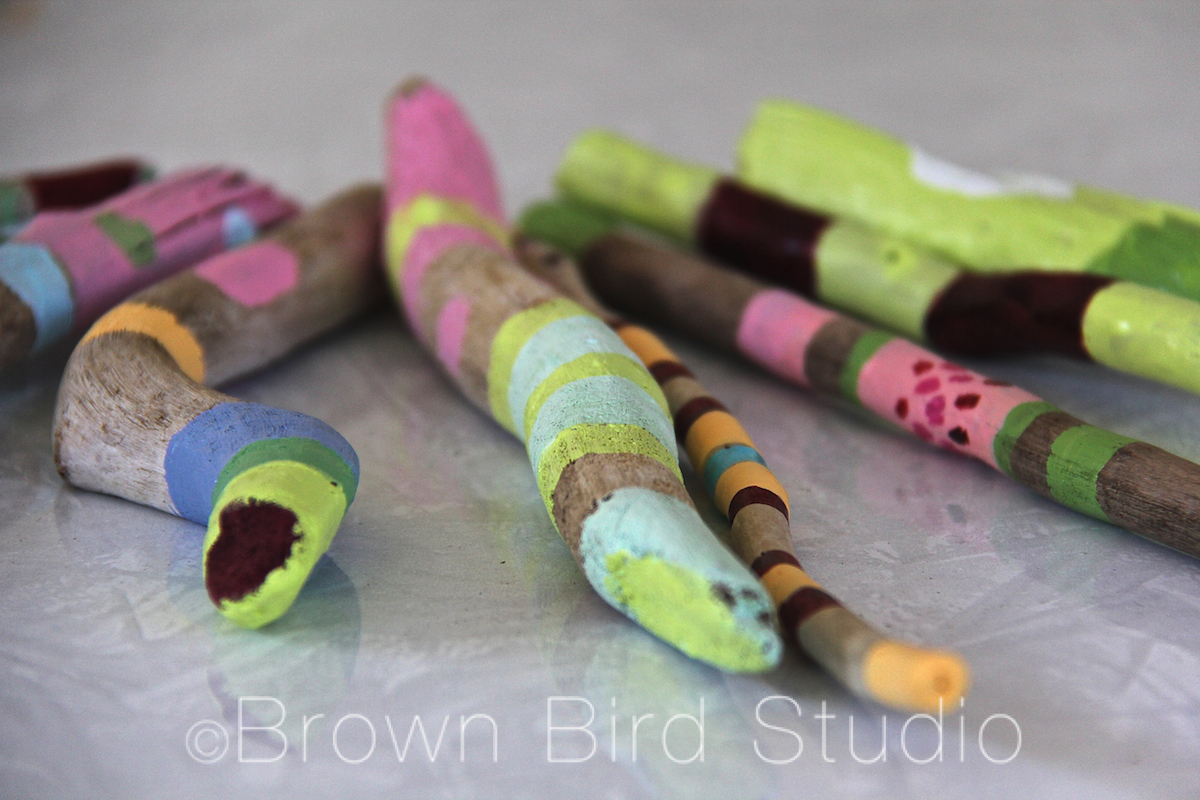
Thunder and a sweet summer rain kept us company while we painted our sticks. It’s my favorite kind of weather — a warm thunderstorm when you’re nice n’ dry on the porch so you can feel the hairs rising on your skin but you don’t get drenching wet. Welp, that was fun! And definitely something 8 to 10 year olds can handle.
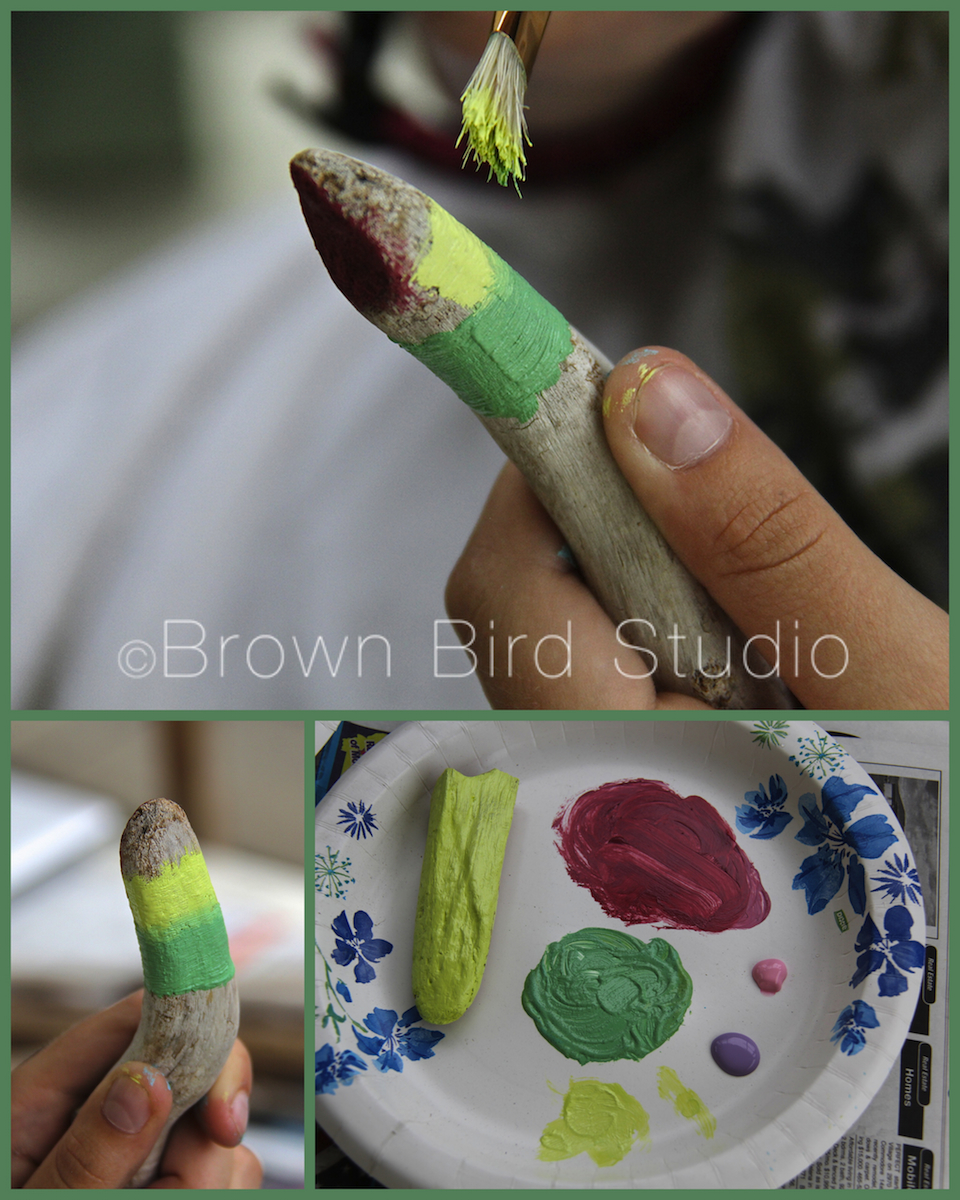

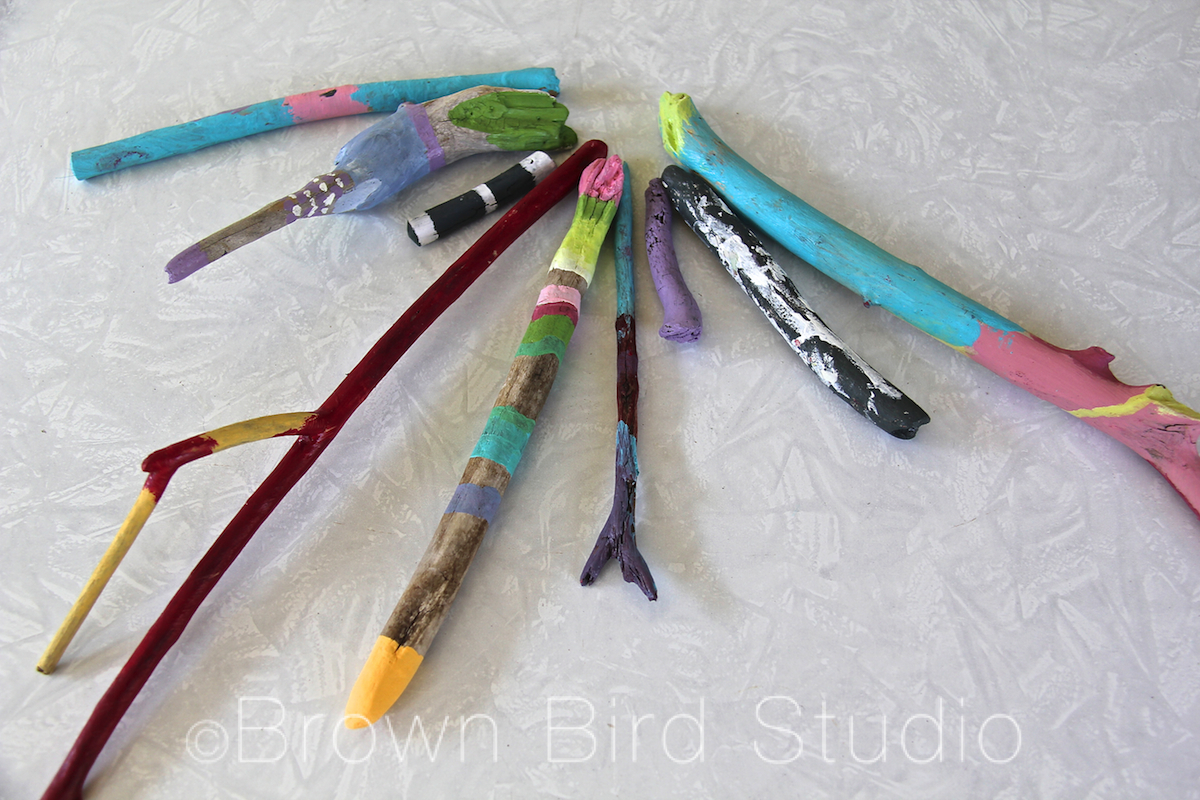
Tomorrow it’s time to turn in our Chalk It Up Helena applications. We will have a cooking lesson (Pepperoni Pizza Puffs) and try to finish our stick projects. We’ll show you the finished results next time, okay?
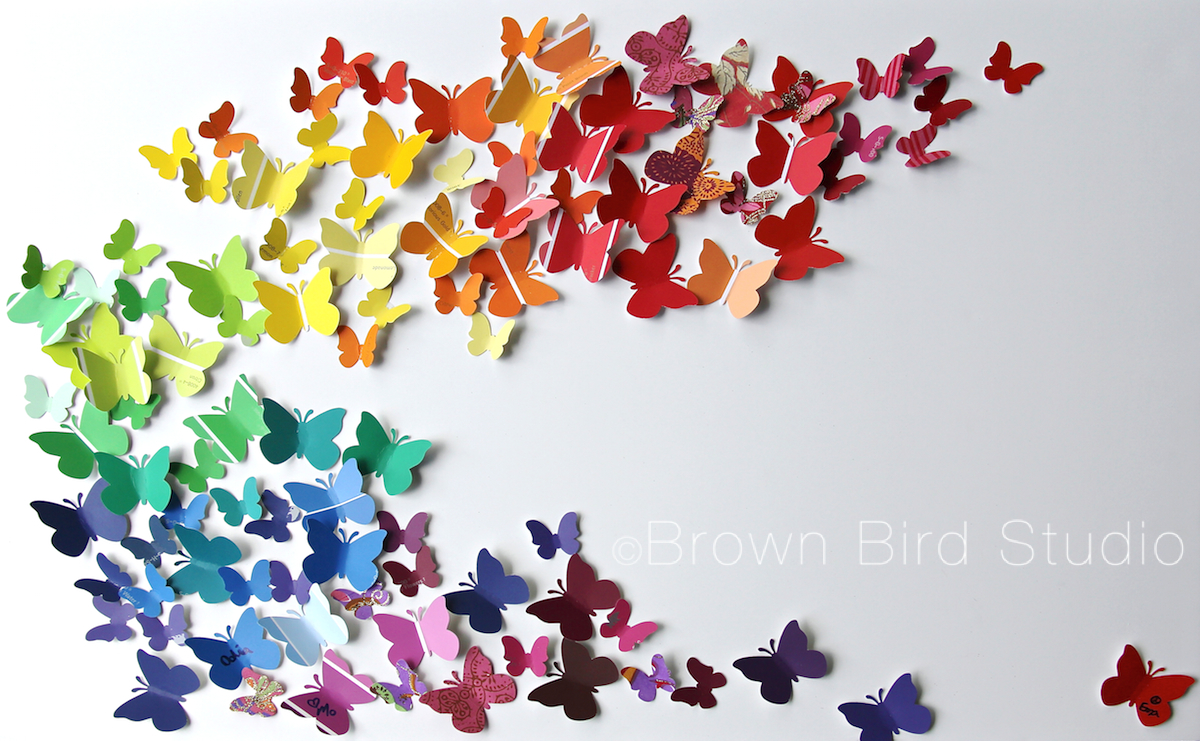
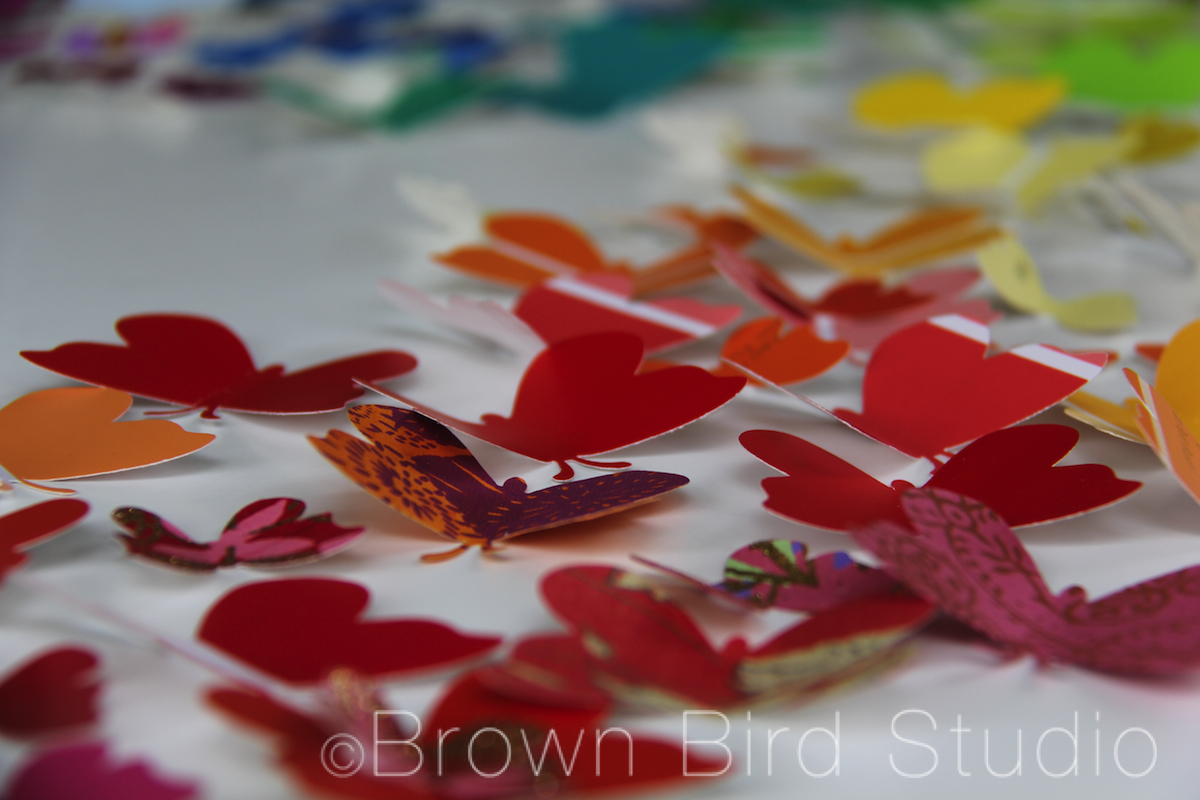
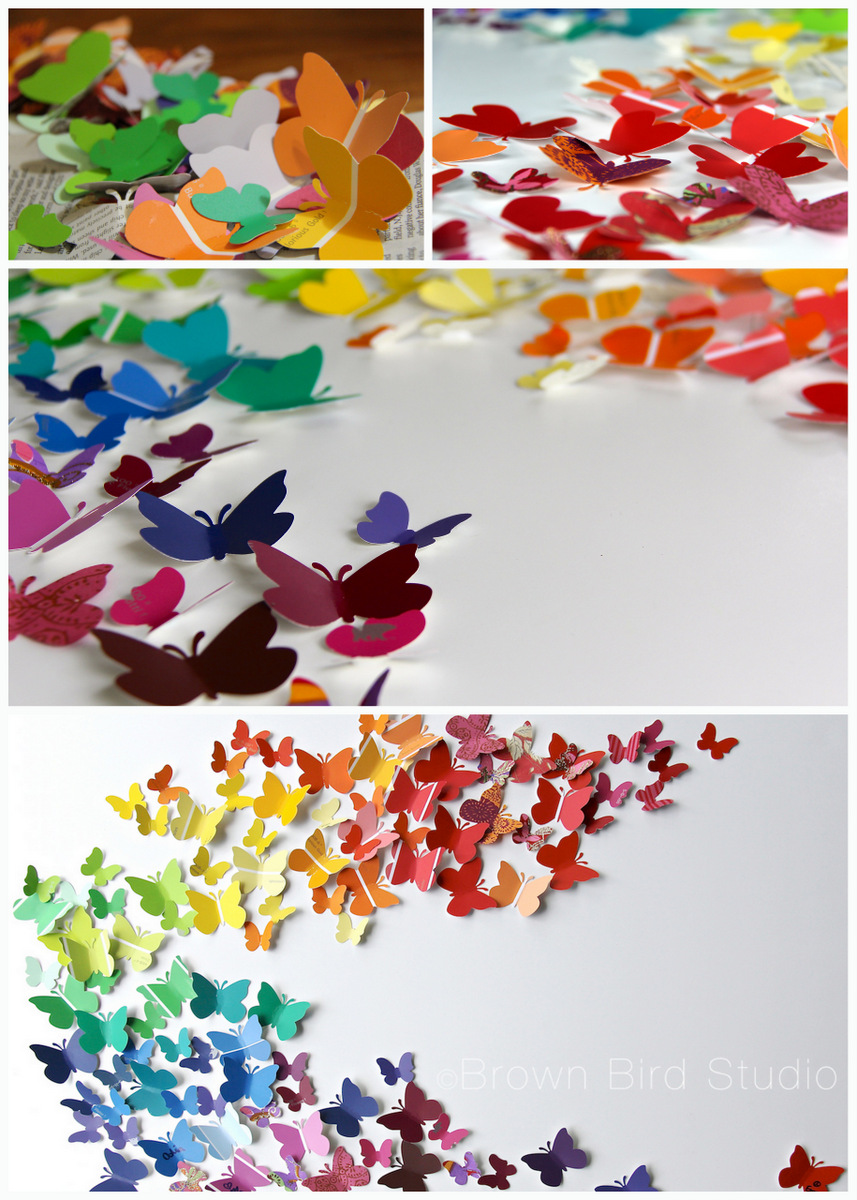 One of the projects I did with the girls this week was to create this piece of wall art for their mom’s office wall. (Her office is so totally in need of bright beautiful art to cheer up the grayness. heh.)
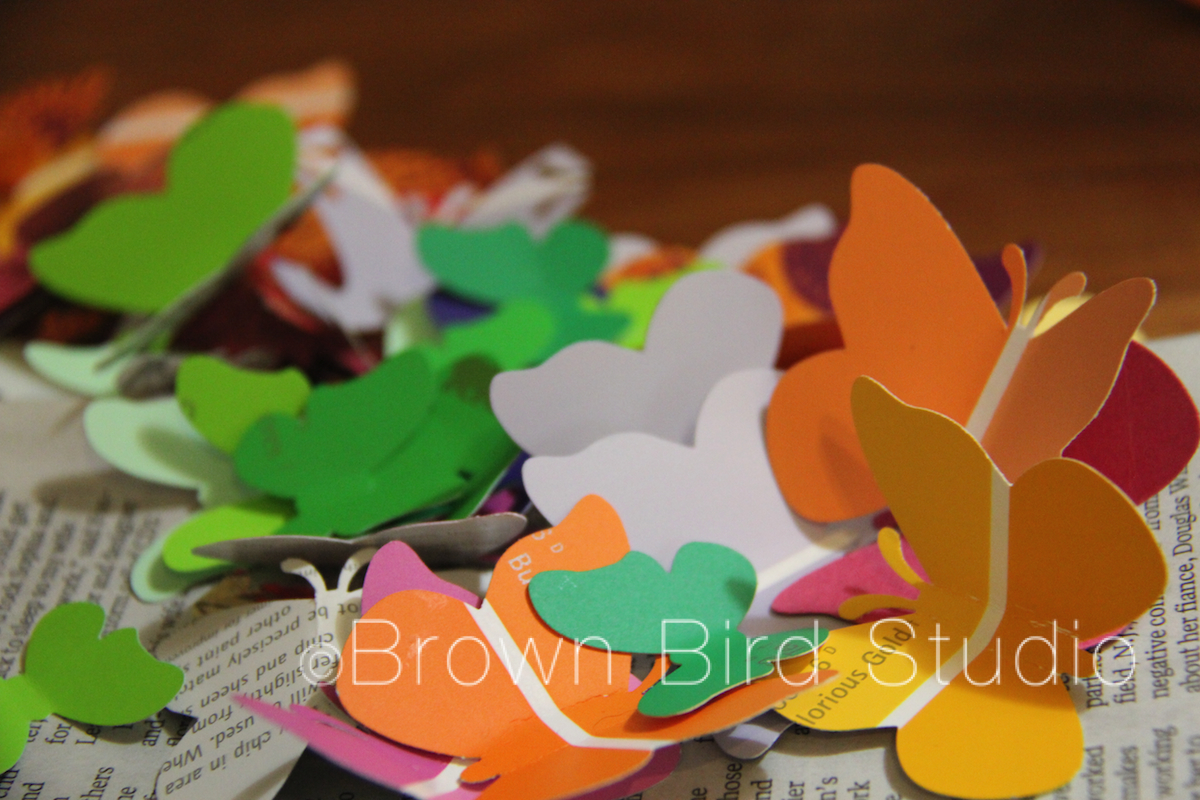 We used the paint samples you can get at hardware stores. Home Depot was kind enough to let us have a big handful of samples for free. The girls picked out the colors, punched the shapes with paper punches and bent the wings to make the butterflies look three dimensional. We also used some leftover pieces of printed papers I had lying around, to add variety.
Next we worked together to come up with the swoosh shape and I glued them onto a large piece of foam core. I wanted to use a large stretched canvas, painted white, but my supply budget for the summer wouldn’t stretch quite that far and I didn’t feel like stretching my own canvas. You could also use a piece of nice 1/4 inch birch plywood with sanded edges … maybe leave the natural wood color, or paint with white acrylic or indoor wall paint.
 We used Craft Glue to attach the butterflies to the foam core. I thought about using hot glue but decided it would be too messy and overkill, since the little butterflies are so lightweight.
We have a rainbow thing goin’ on in this butterfly swarm, but we could as easily have chosen to use a different color scheme. You could even do an “ombre” design — the great thing about paint samples — there are so many colors, and if you get the sample cards that have 4 or 5 shades of color on each, well that would be just easy!
Glue or stick some hangers on the back and voila! You have a colorful work of happy art. Total cost for this project: $3.00 (I already owned the paper punches. These are expensive, but maybe find someone who would lend you theirs … or plan to spend many evenings hand cutting hundreds of shapes.)
Supply List: craft glue, foam core (stretched canvas or 1/4 inch plywood panel may also be used), lots of paint sample chips, paper punches, one or two picture hangers for the back

Ema and Adia are spending lots of time with me this summer, just chillin, havin fun, learnin some stuff and makin some art. So far, I think we are using this first week to get used to each other, test limits, and figure out what we want to do for the rest of the summer. It’s been interesting and … I am very tired each evening. I think they might be too. I think that is a good thing.
I promised the girls I would teach them how to make blog posts, so every once in awhile Ema and/or Adia will be a guest blogger here on Water::Earth::Wind::Fire. I hope you enjoy their posts. At first, I will take dictation, typing pretty much exactly what they tell me to type. At some point, I will let them do the entire post. So, here goes, with the girls’ first ever blog post….

Ema writes:
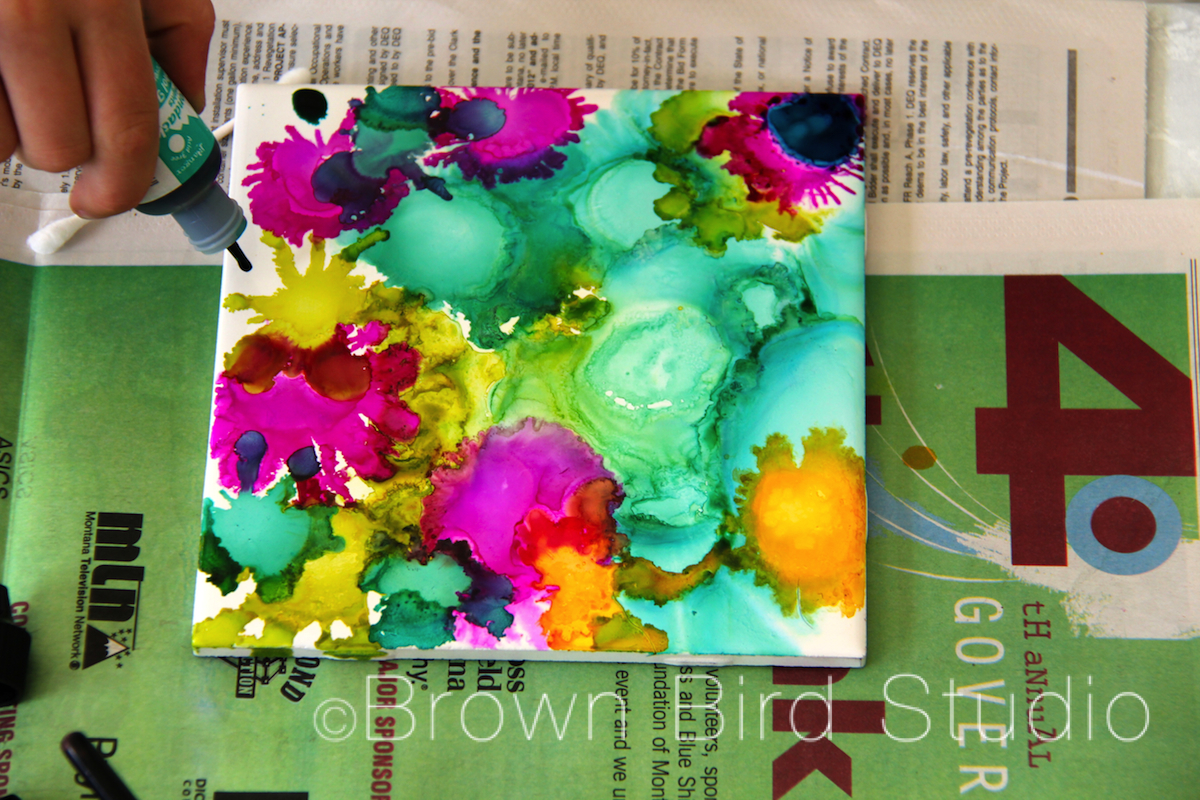
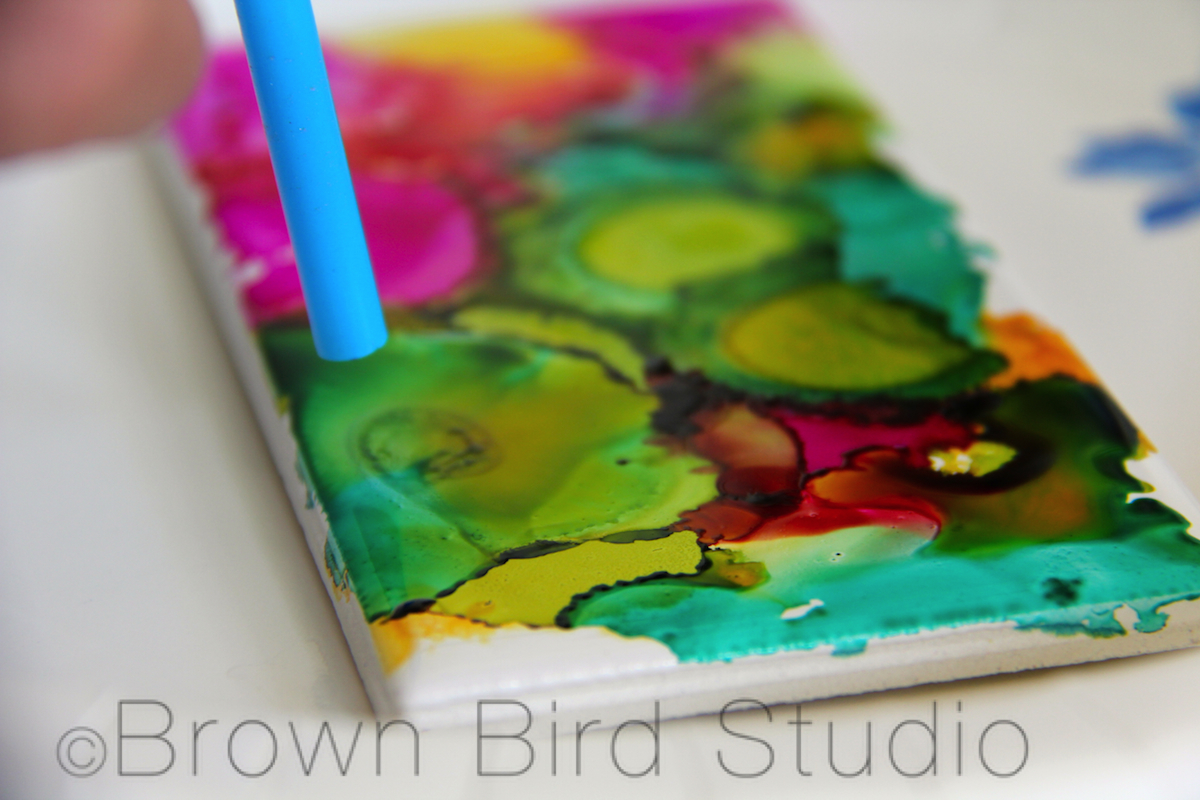
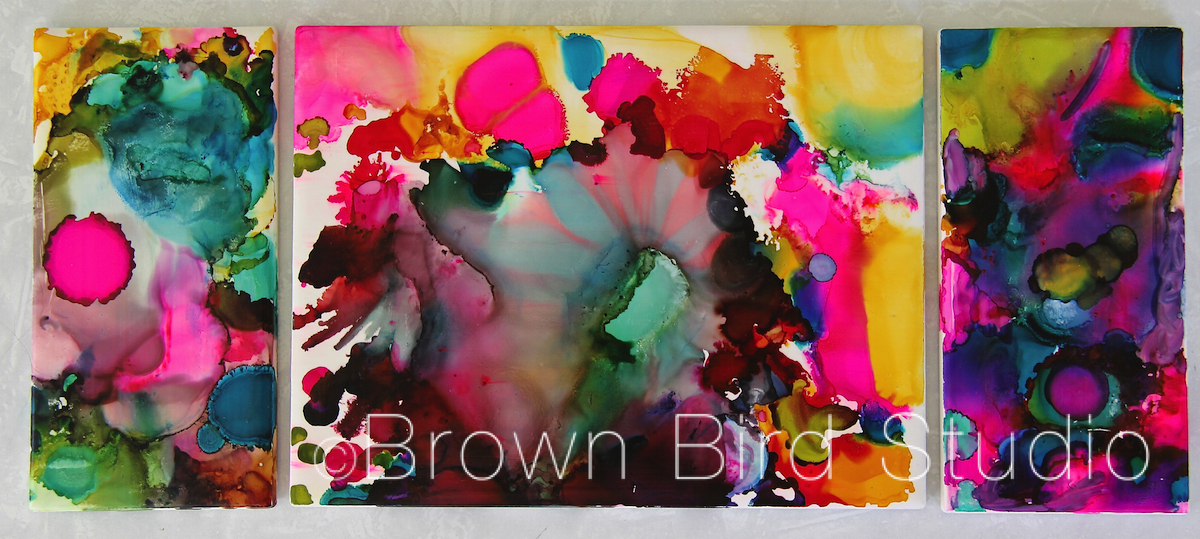
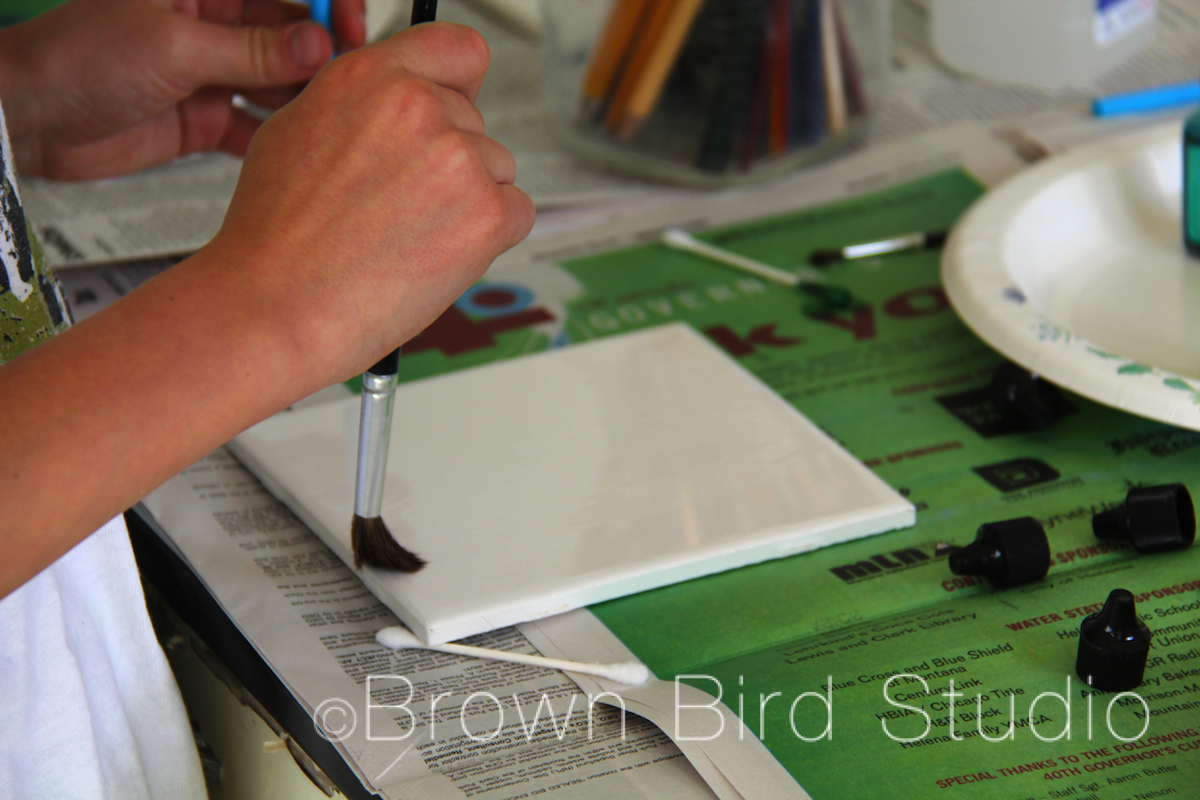
We wanted to make something nice for my mom’s office, so we made these tiles. We saw these on Pinterest, and we saved them to our summer fun Pinterest board and this is one of the projects my sister and I both wanted to do this summer. This was a creative and fun project. I would recommend this to children and their parents. To do one tile it takes about 5 minutes. Well, after you get everything set up, it goes really fast.
We made practice tiles first and my favorite one turned out to be my practice tile (that’s my practice tile, below.) It was my favorite because it had a lot of bright, different colors. I would describe the design as 3 different colored wax seals (like the ones on old envelopes) laying on top of each other. I really like that.
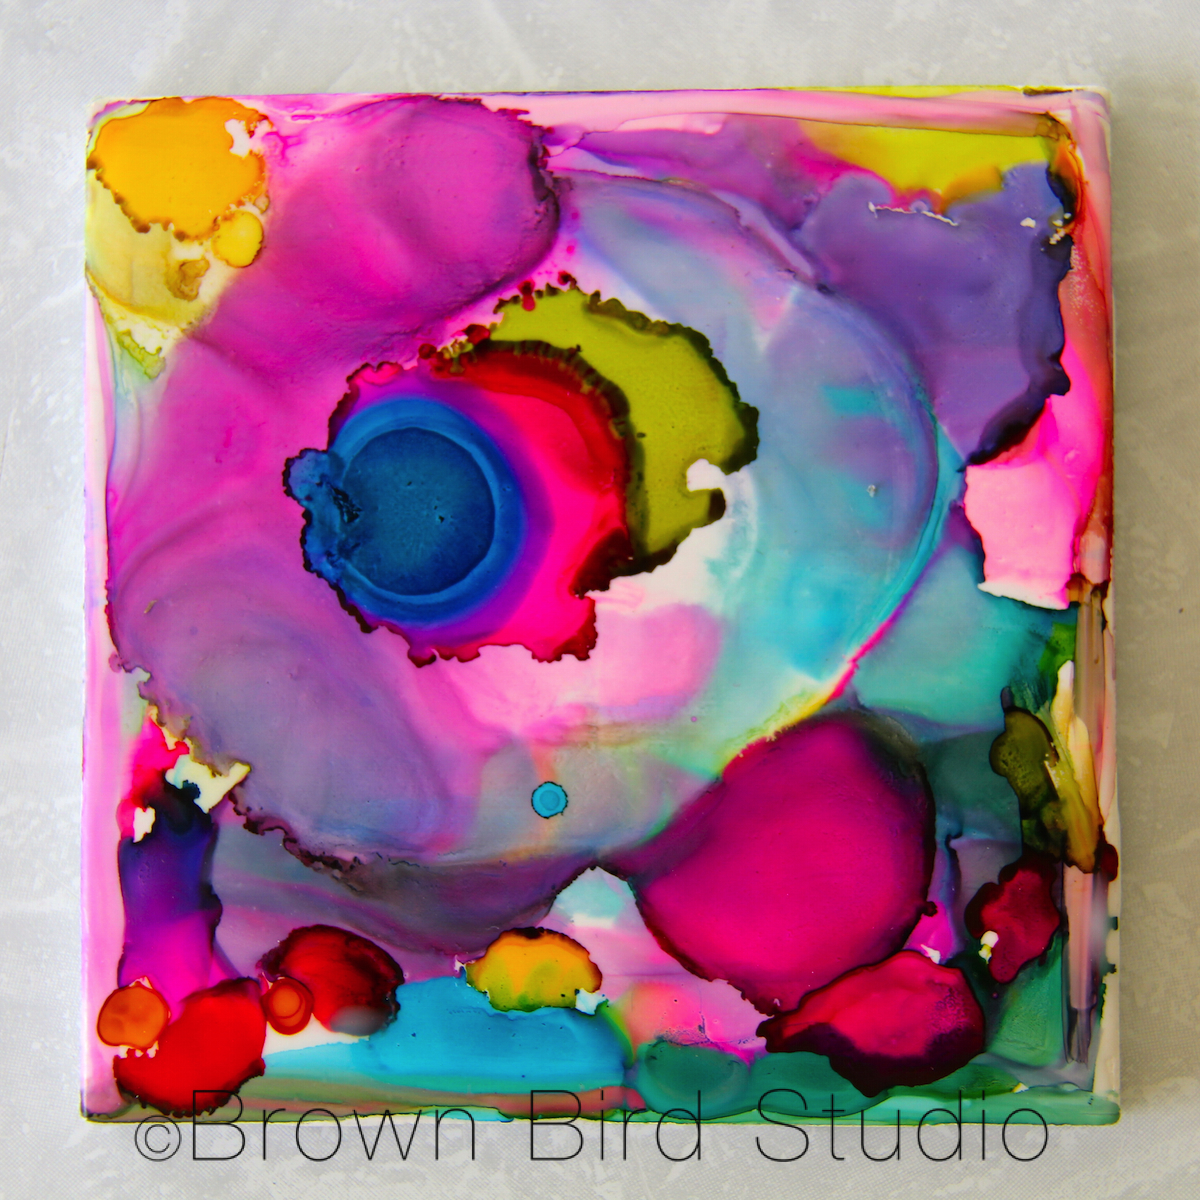
Here are the three tiles Ema made to go together as a triptych:
Editor’s note: Ema’s sister, Adia, made the list of supplies and wrote the instructions below:


Above is Adia’s finished triptych of tiles for her mom’s office. Adia writes:
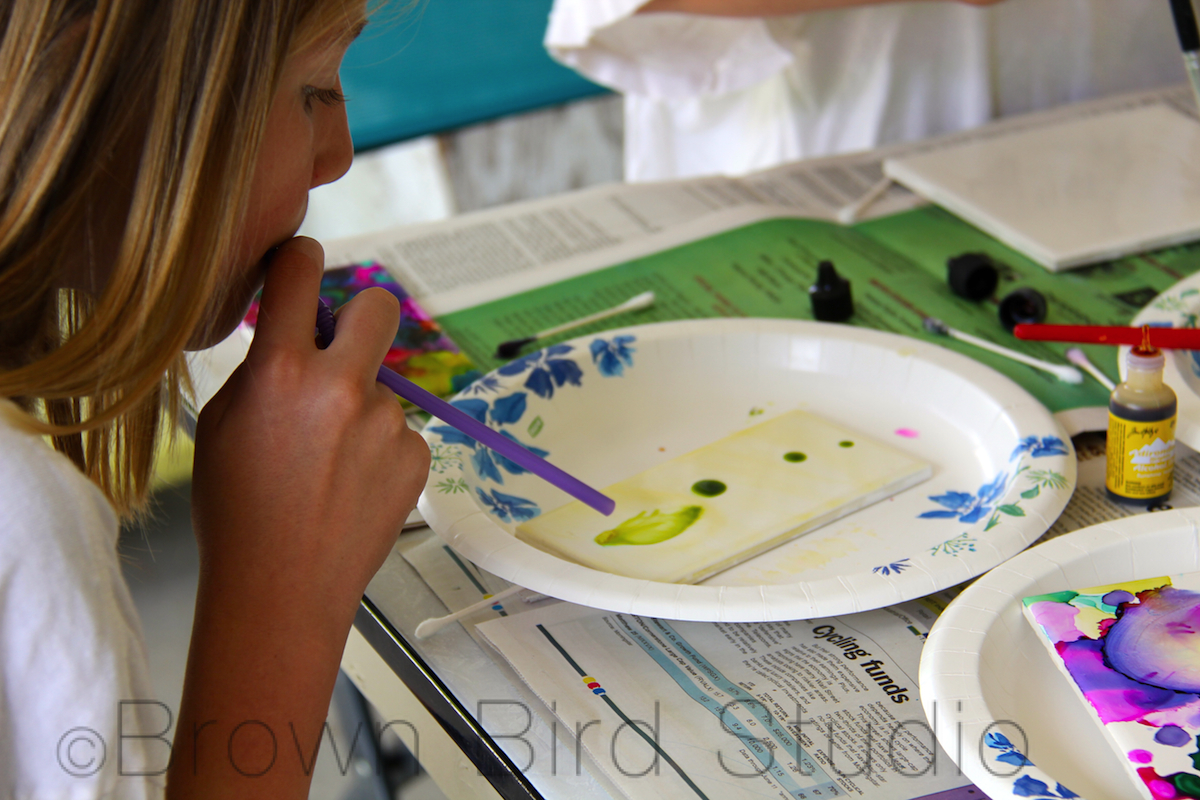
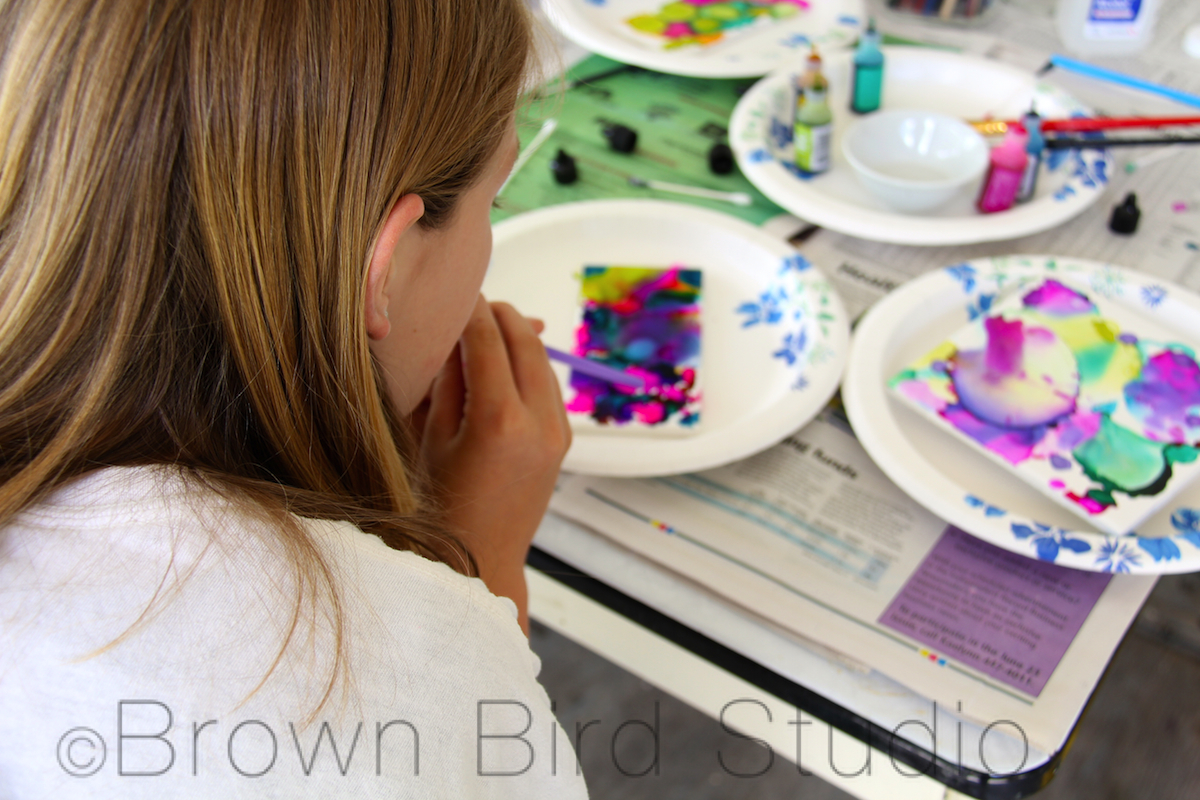
My favorite part of making the tiles was Strawmania. That is what you do with a bendy straw when you blow through it onto the tile. It expands the ink blobs. You can blow colors together and mix them. Sometimes the color goes wherever it wants to go, which looks cool sometimes and other times it makes a big grey blob. If you get a gray blob, you can always add more alcohol and then add another color to make it colorful. That fixes it. This is something I will probably want to do again. Next time I will use less colors so my tiles don’t get big gray blobs. Here is my favorite tile (below). I am squirting the ink on it: