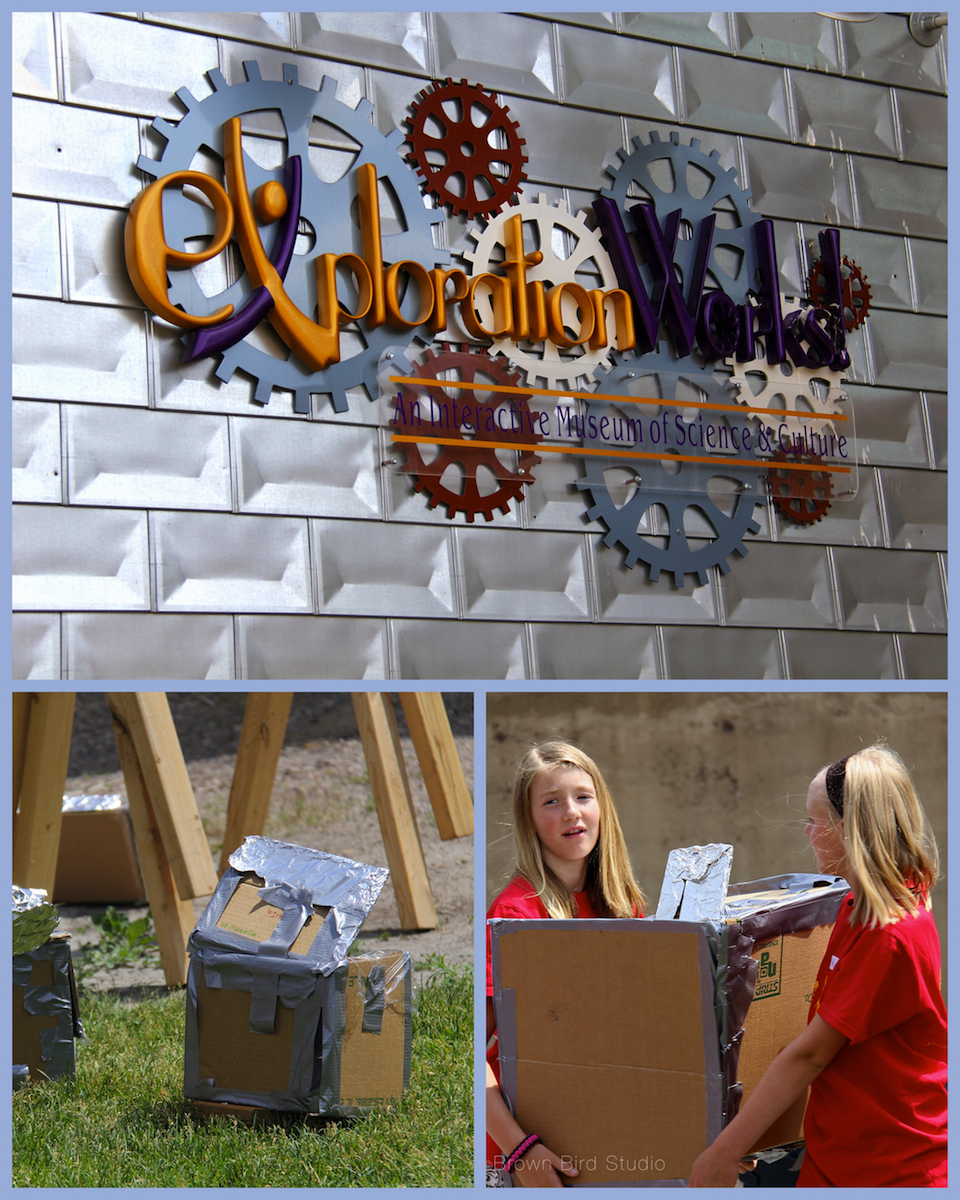
It has been 10 days since Ema and Adia and I spent the day together making art, playing with Charlie and doin other summer kid stuff. I actually missed them. And I think maybe they might have missed playing with me too. When I picked them up at the Exploration Works Science Museum at noon, they both gave Charlie and me big hugs and smiles.
So … we went to a fast food place for lunch (it shall remain unnamed — grin) just to do something totally unexpected and different. The girls liked it. (I remembered why I don’t eat there.)
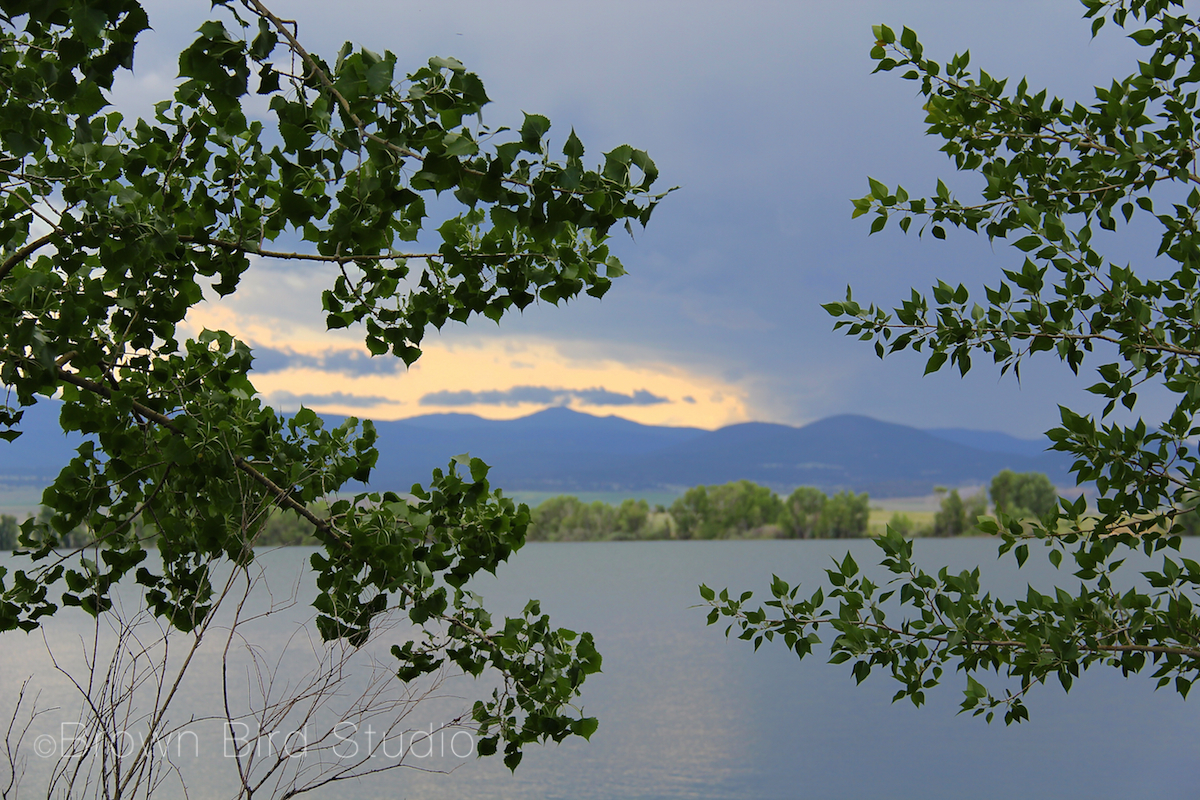
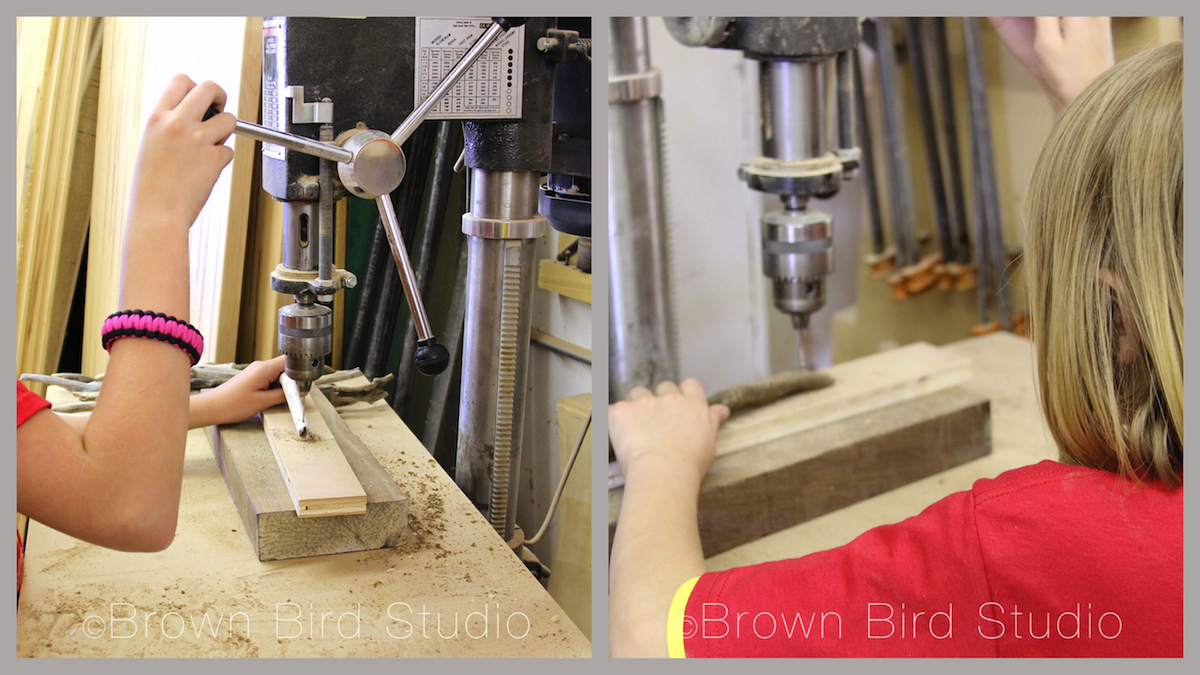
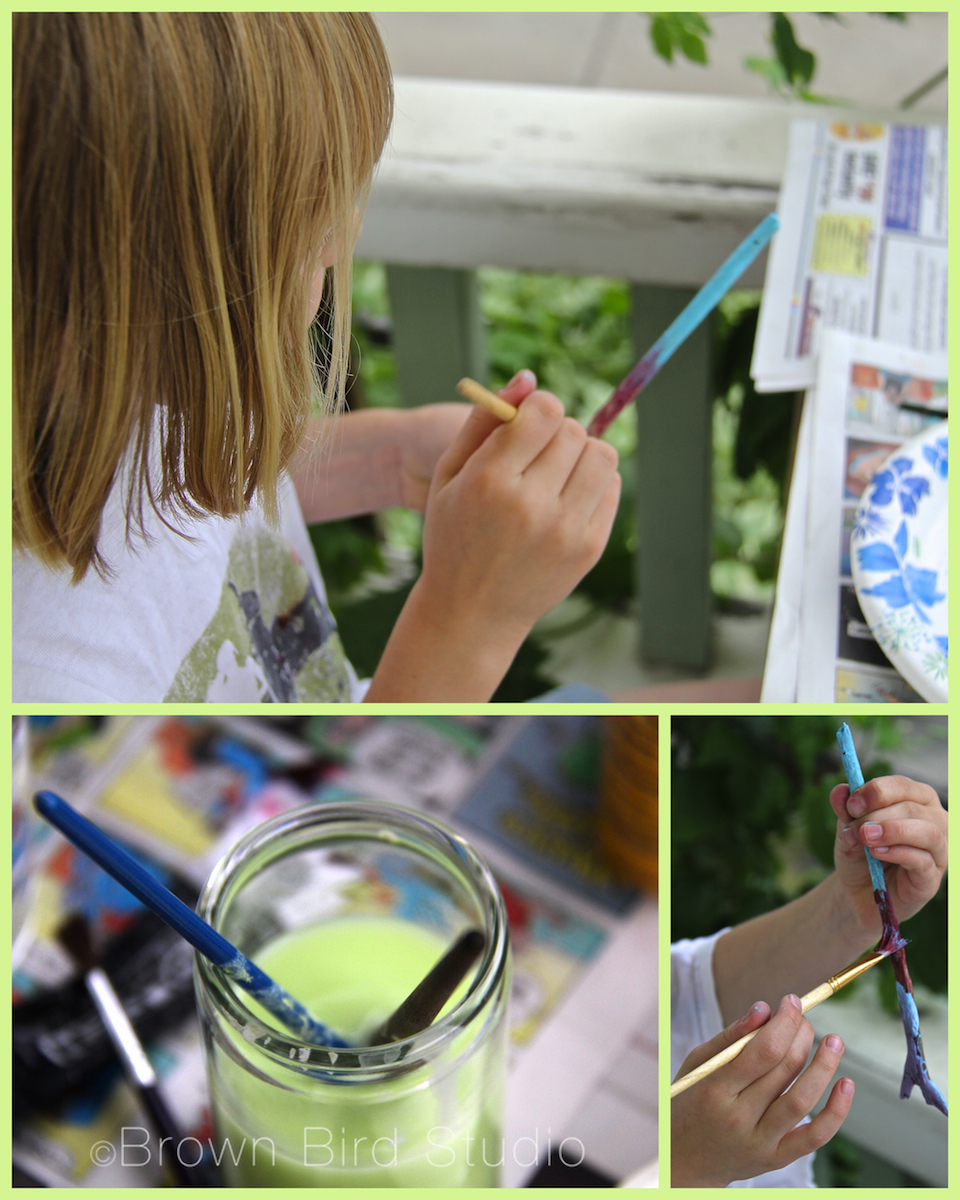
After lunch we headed out to the lake to collect sticks for our afternoon art project. Charlie also wanted to get in the water and show us his favorite trail. We could tell there was a thunderstorm brewing over the town.Back in town, Tim let us use his shop’s drill press to make holes in our sticks.Adia stayed absorbed in this activity for a long time — she’s the one who colors outside the lines.
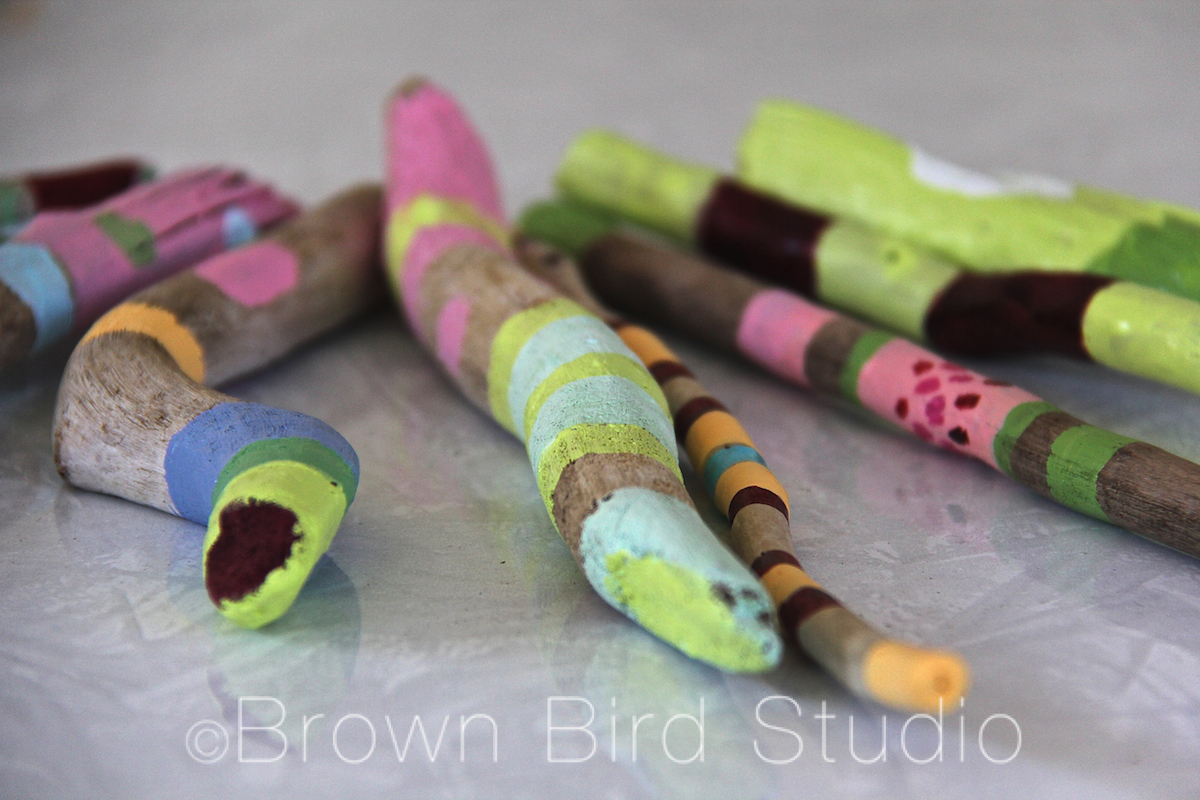
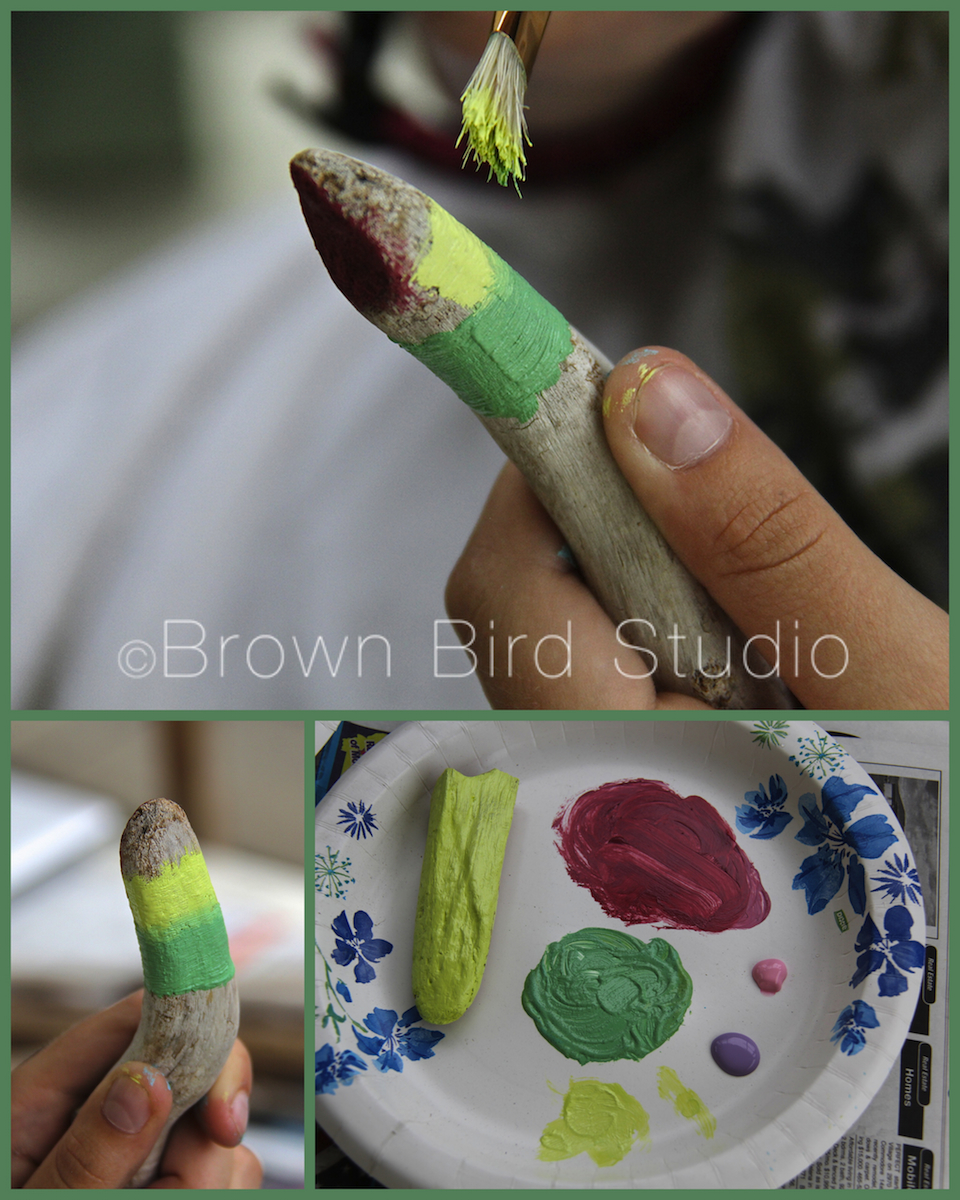
Thunder and a sweet summer rain kept us company while we painted our sticks. It’s my favorite kind of weather — a warm thunderstorm when you’re nice n’ dry on the porch so you can feel the hairs rising on your skin but you don’t get drenching wet. Welp, that was fun! And definitely something 8 to 10 year olds can handle.
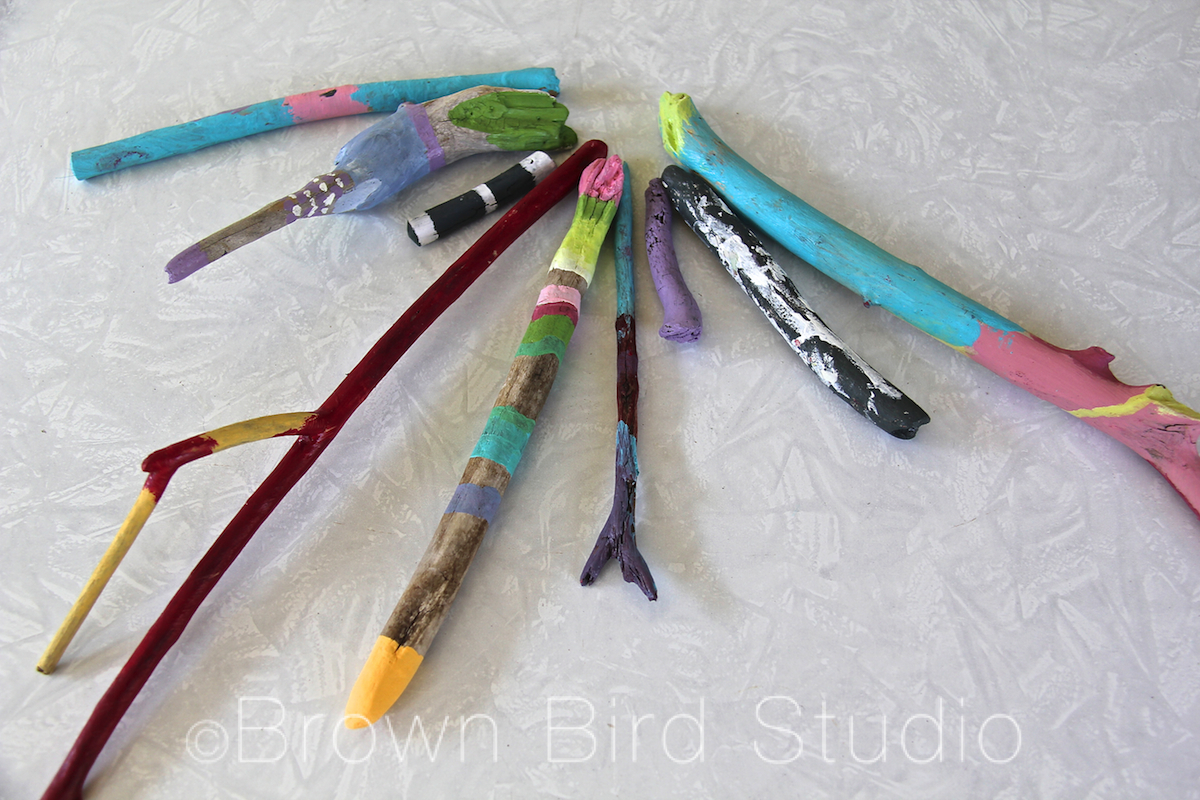
Ema is meticulous … taking her time and considering each brush stroke. Her color choices are fun!Ema’s finished artful sticks, ready to be threaded and hung tomorrowAdia’s awesome finished sticks, ready to be threaded and hung as a sculpture tomorrow
Tomorrow it’s time to turn in our Chalk It Up Helena applications. We will have a cooking lesson (Pepperoni Pizza Puffs) and try to finish our stick projects. We’ll show you the finished results next time, okay?
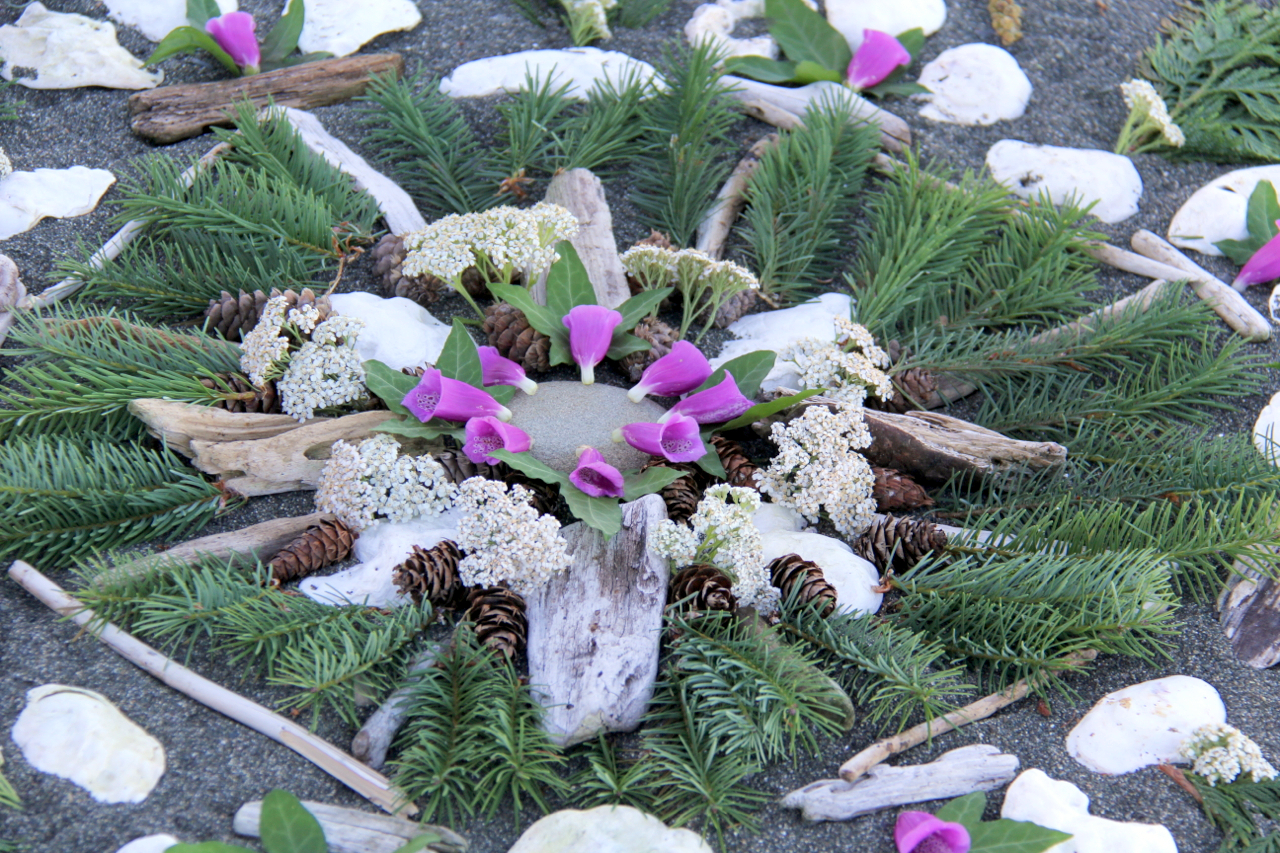
Making mandalas from natural objects you find on-site can be a playful or a quiet meditative activity.
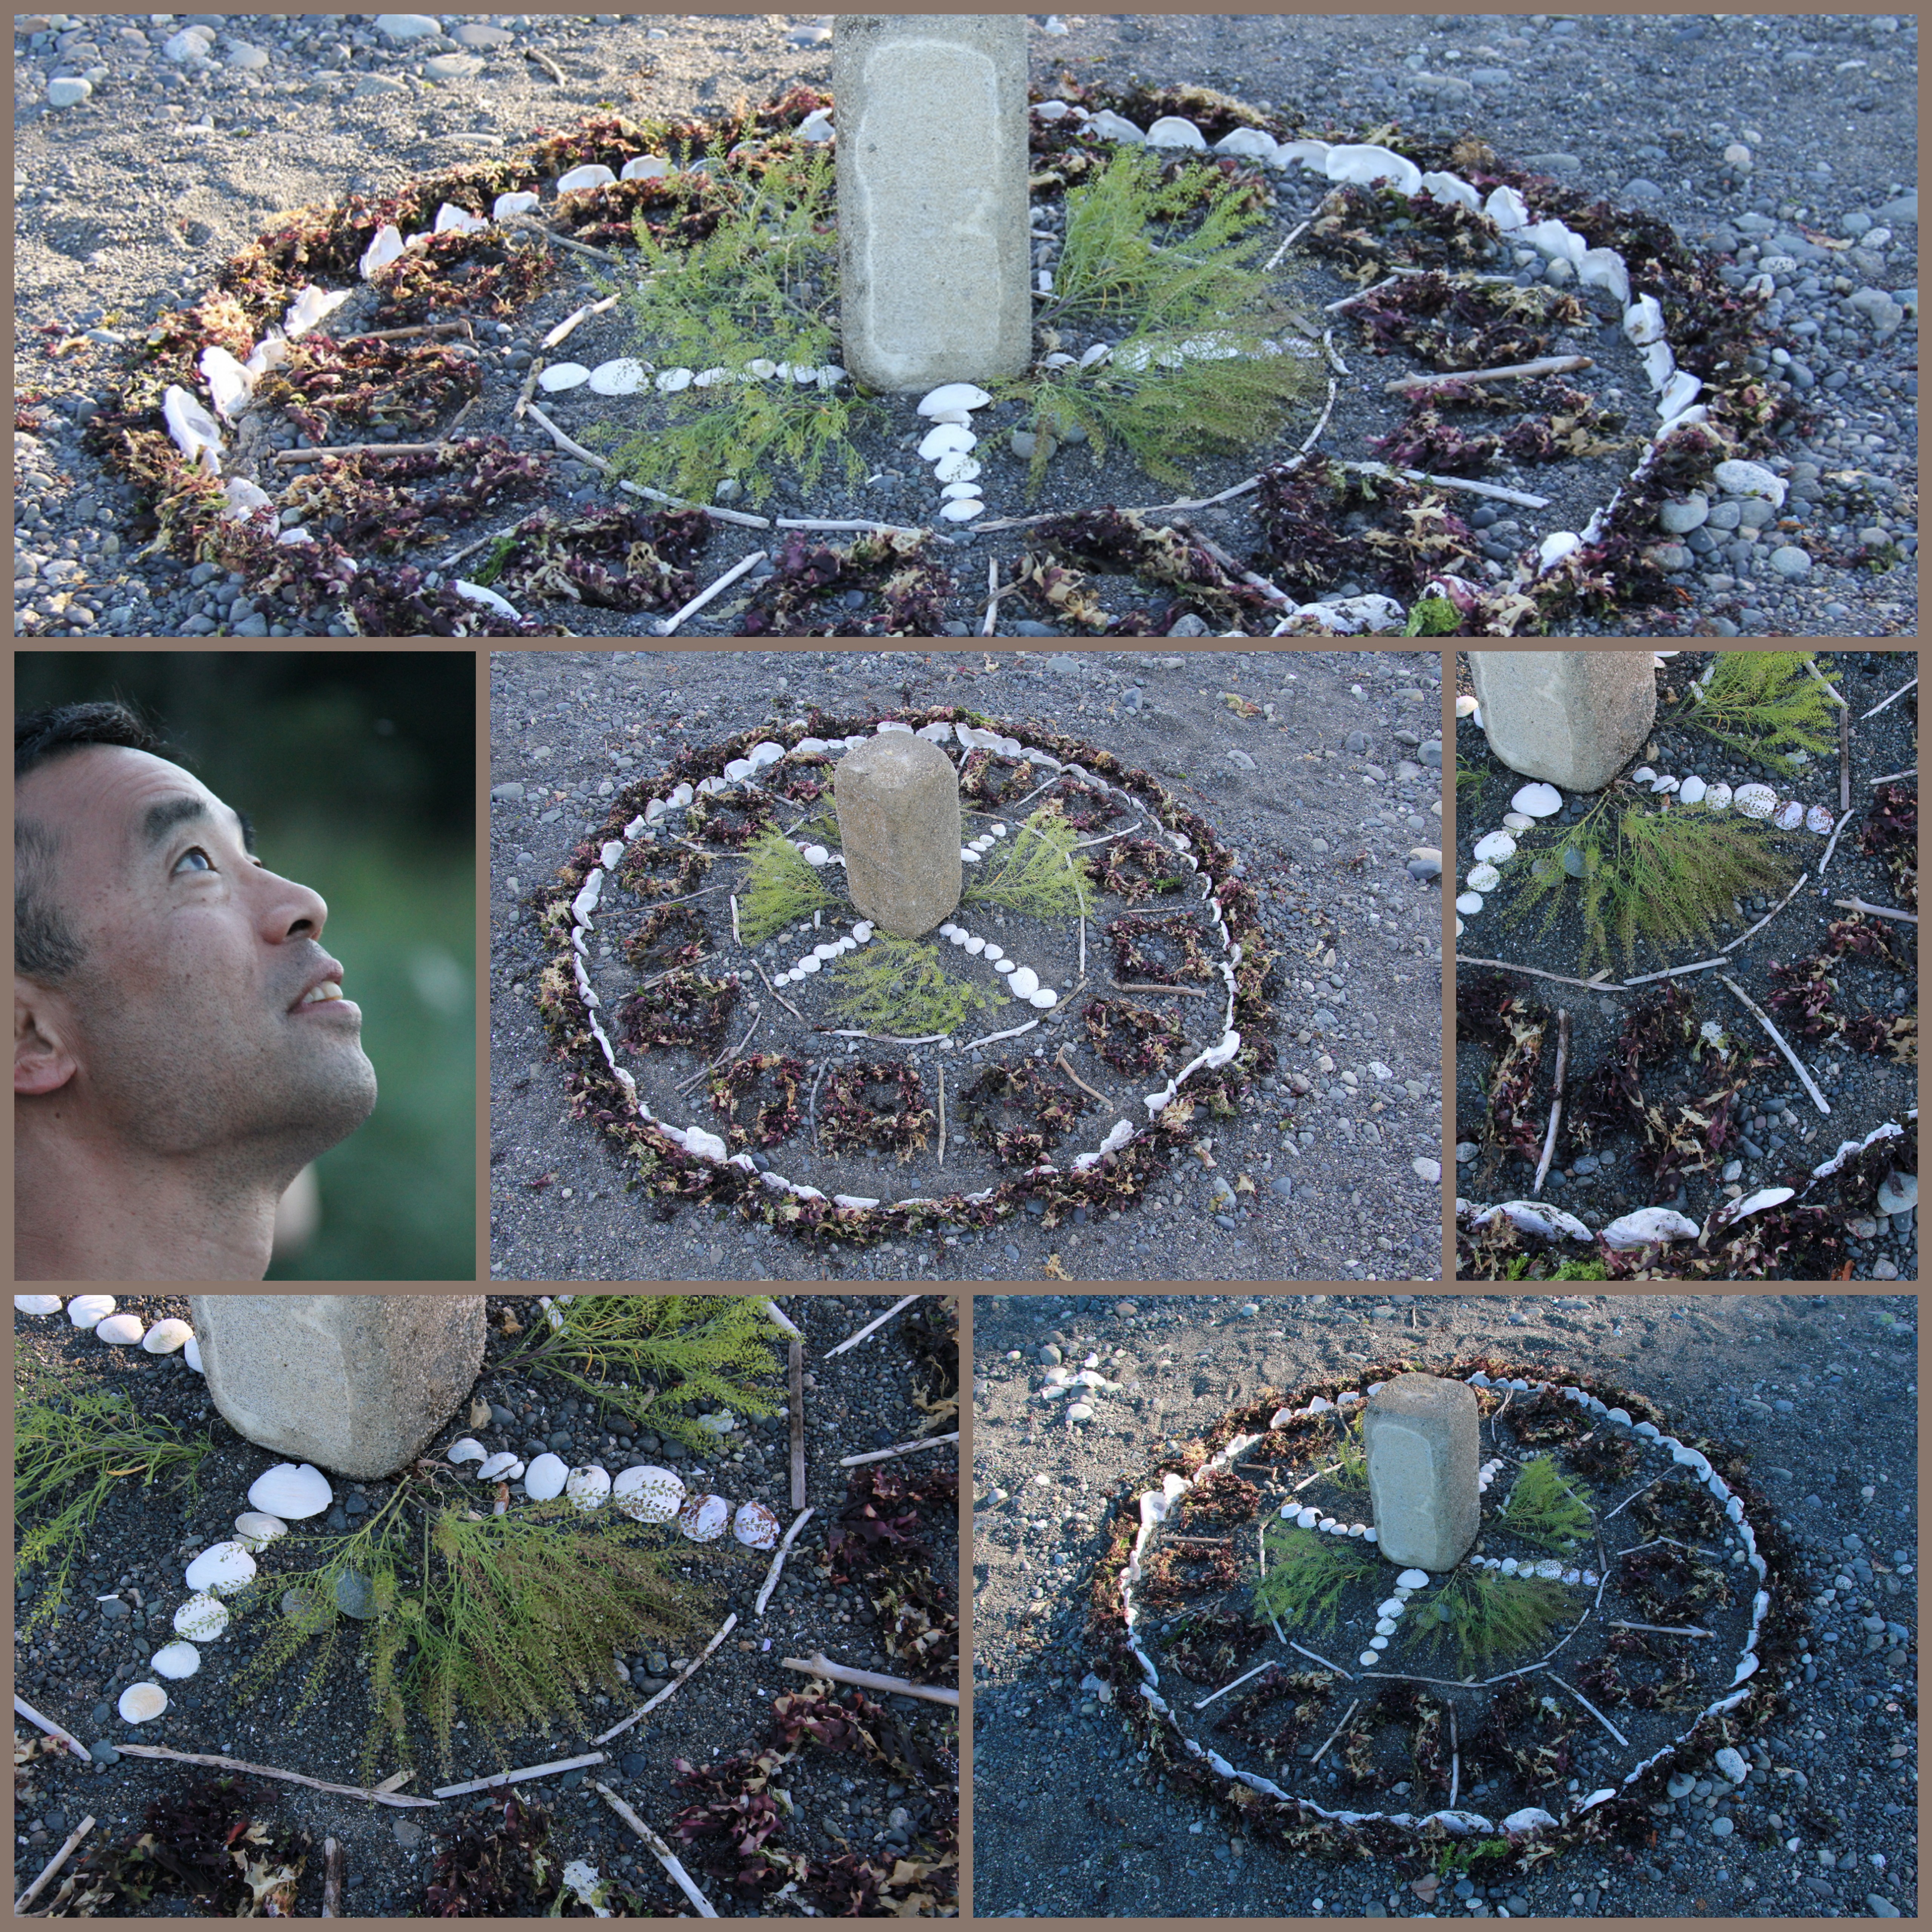
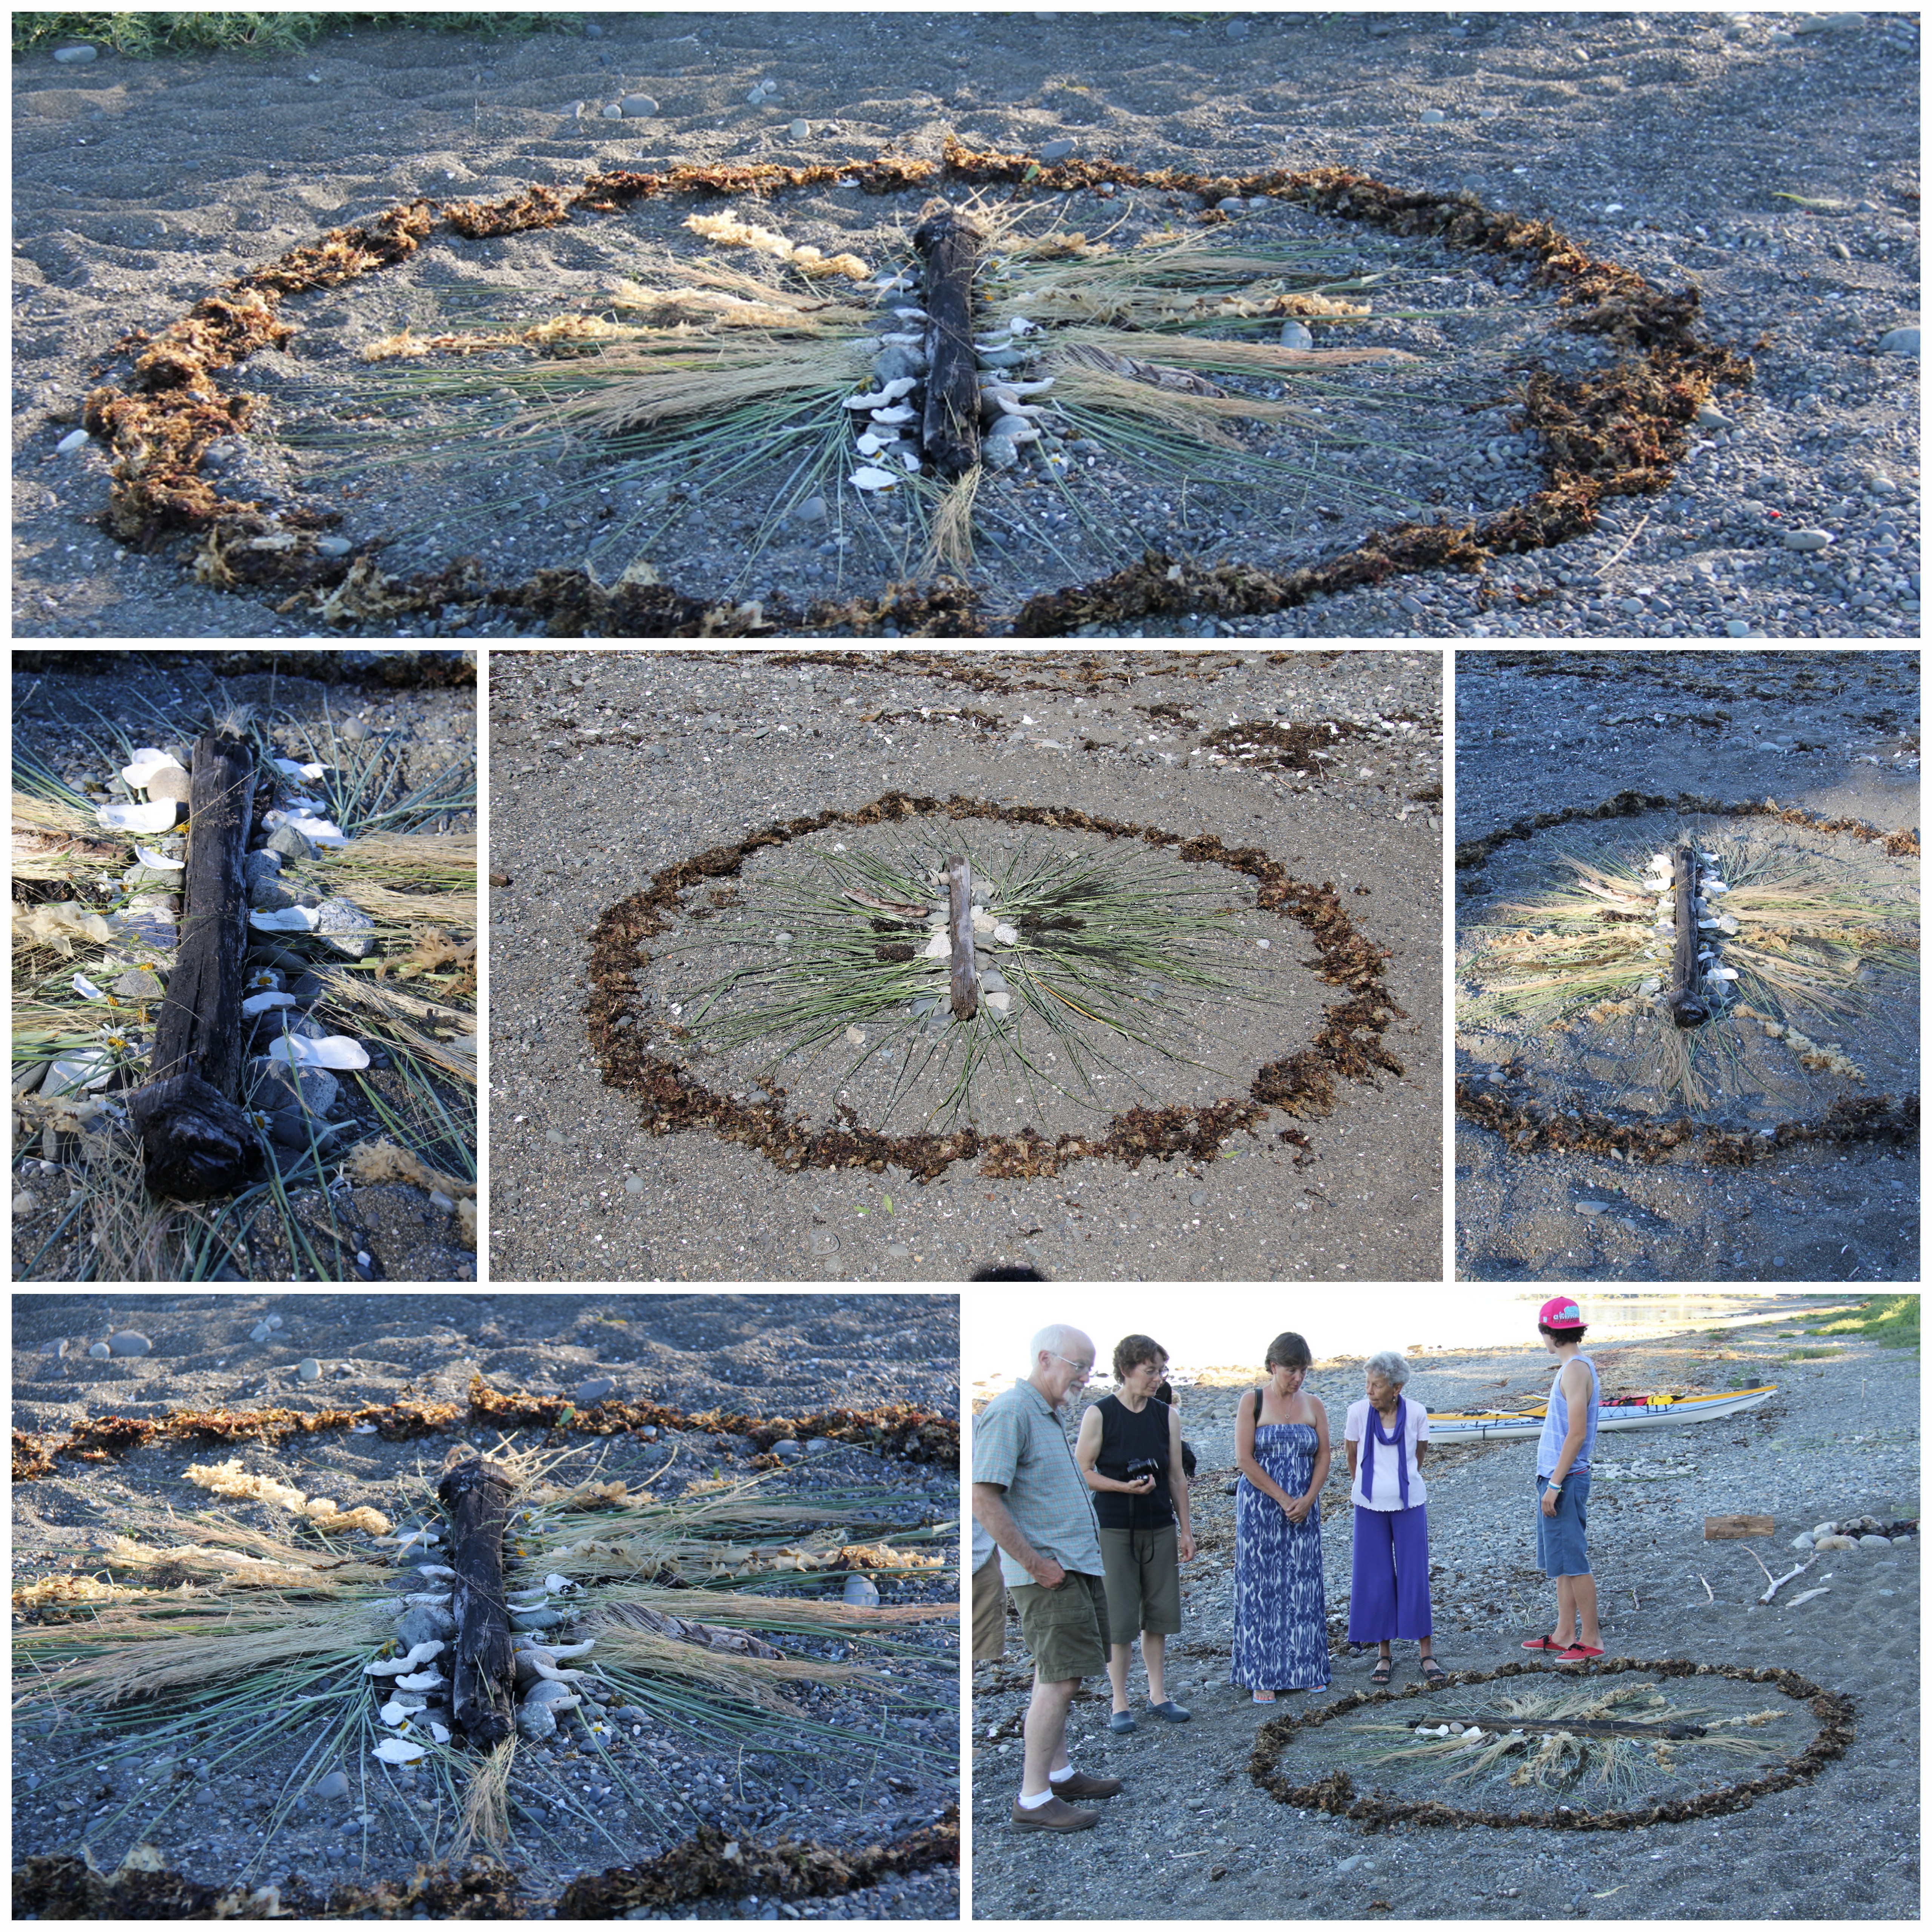
At our family reunion on Vancouver Island this past weekend, some of us made mandalas of shore materials we found in the forest and on the beach. Natural object mandalas are– by their very nature — ephemeral, and will be destroyed by the tides, wind, wildlife and time. Yet the making of these circular designs gives so much pleasure it doesn’t really matter that they won’t last long.
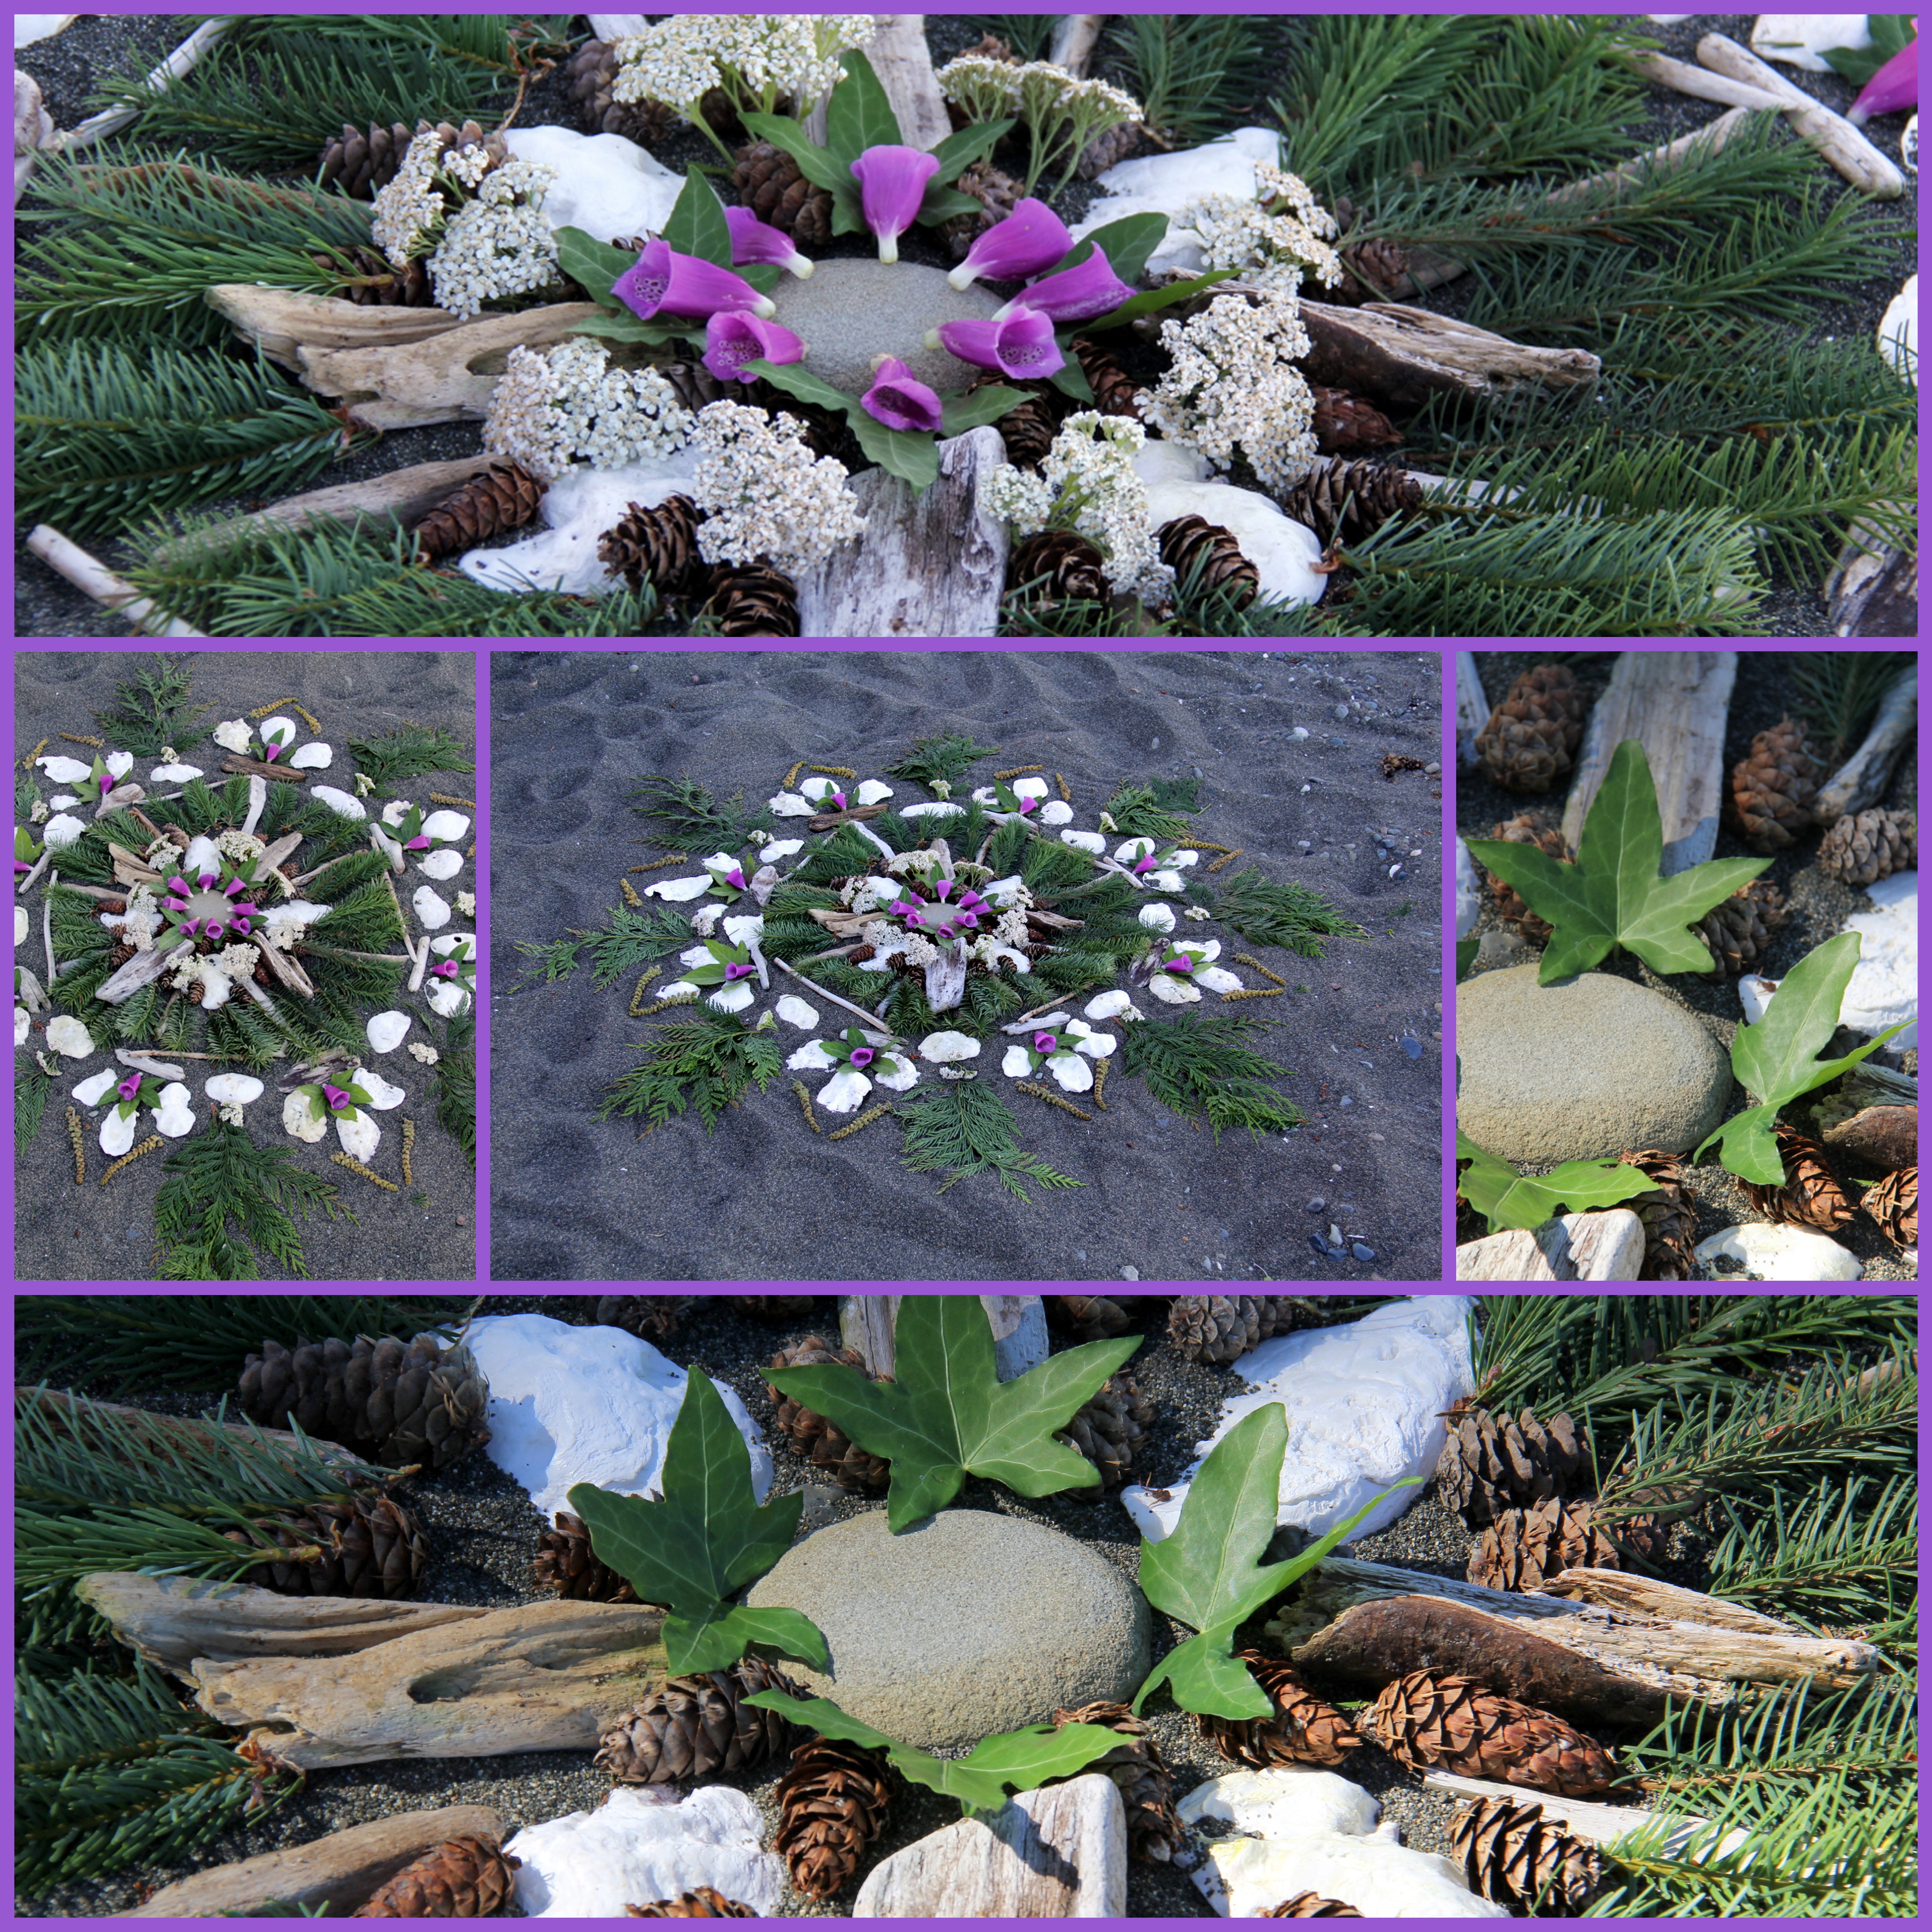
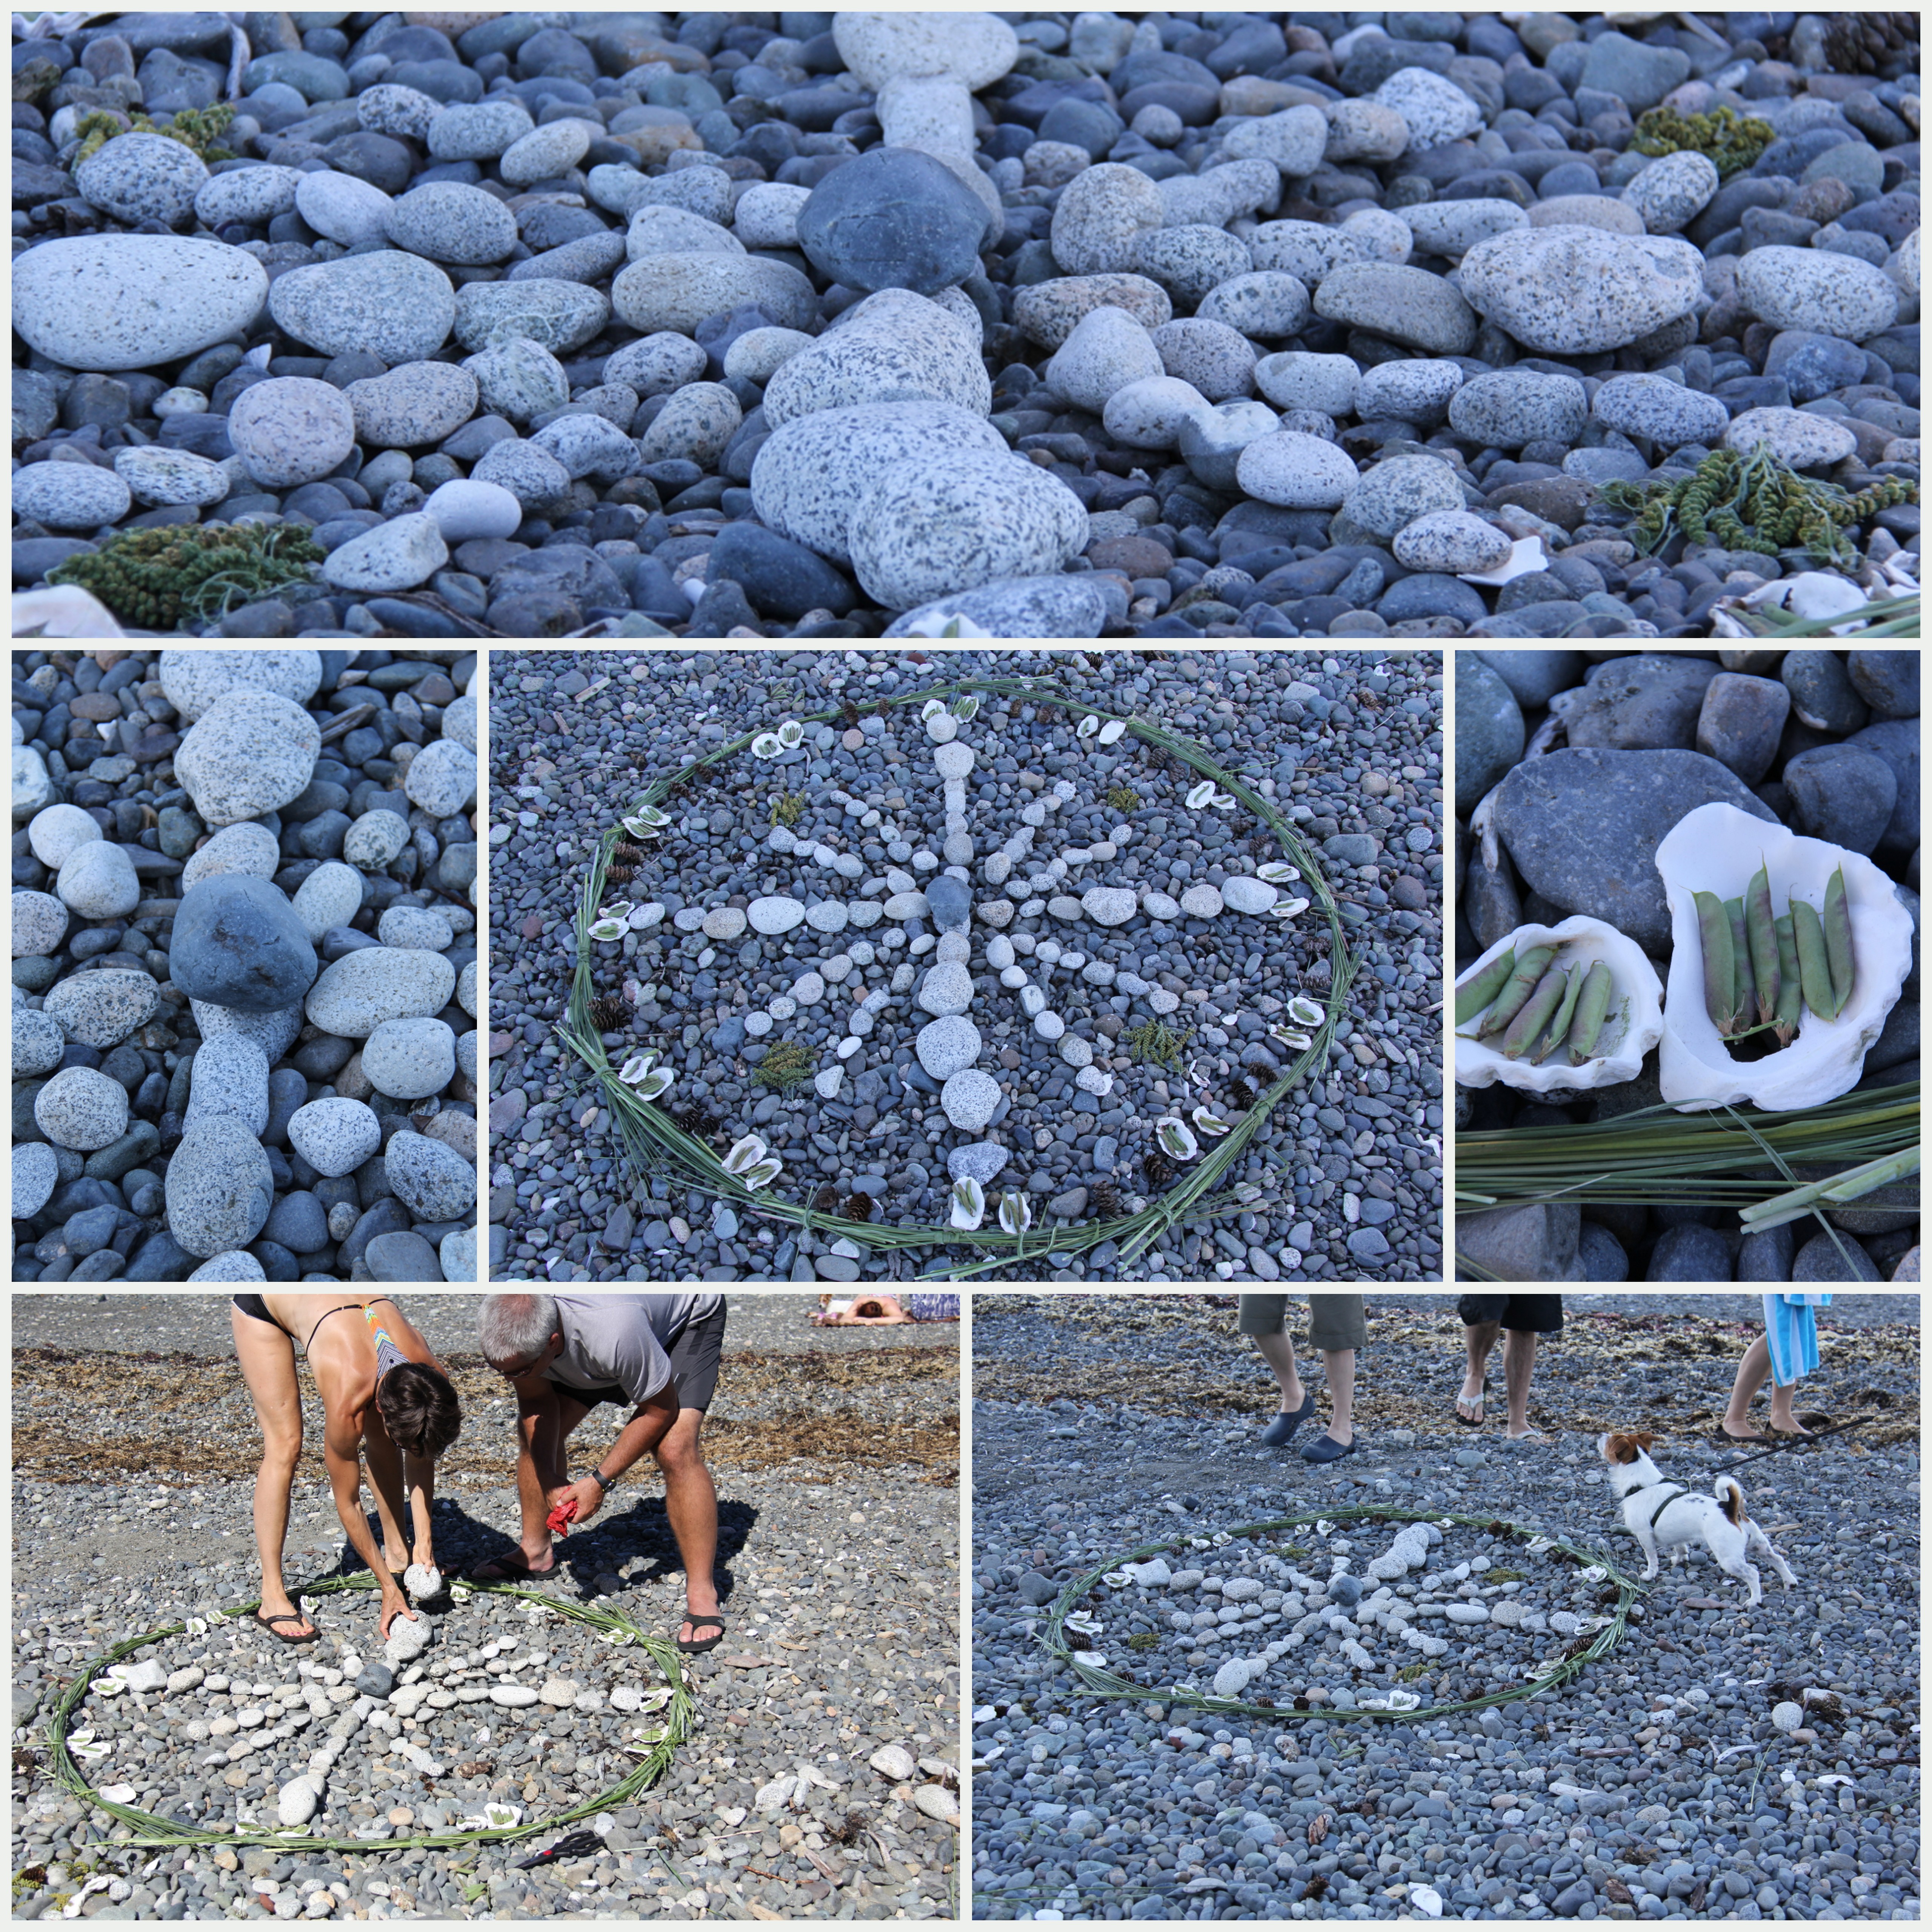
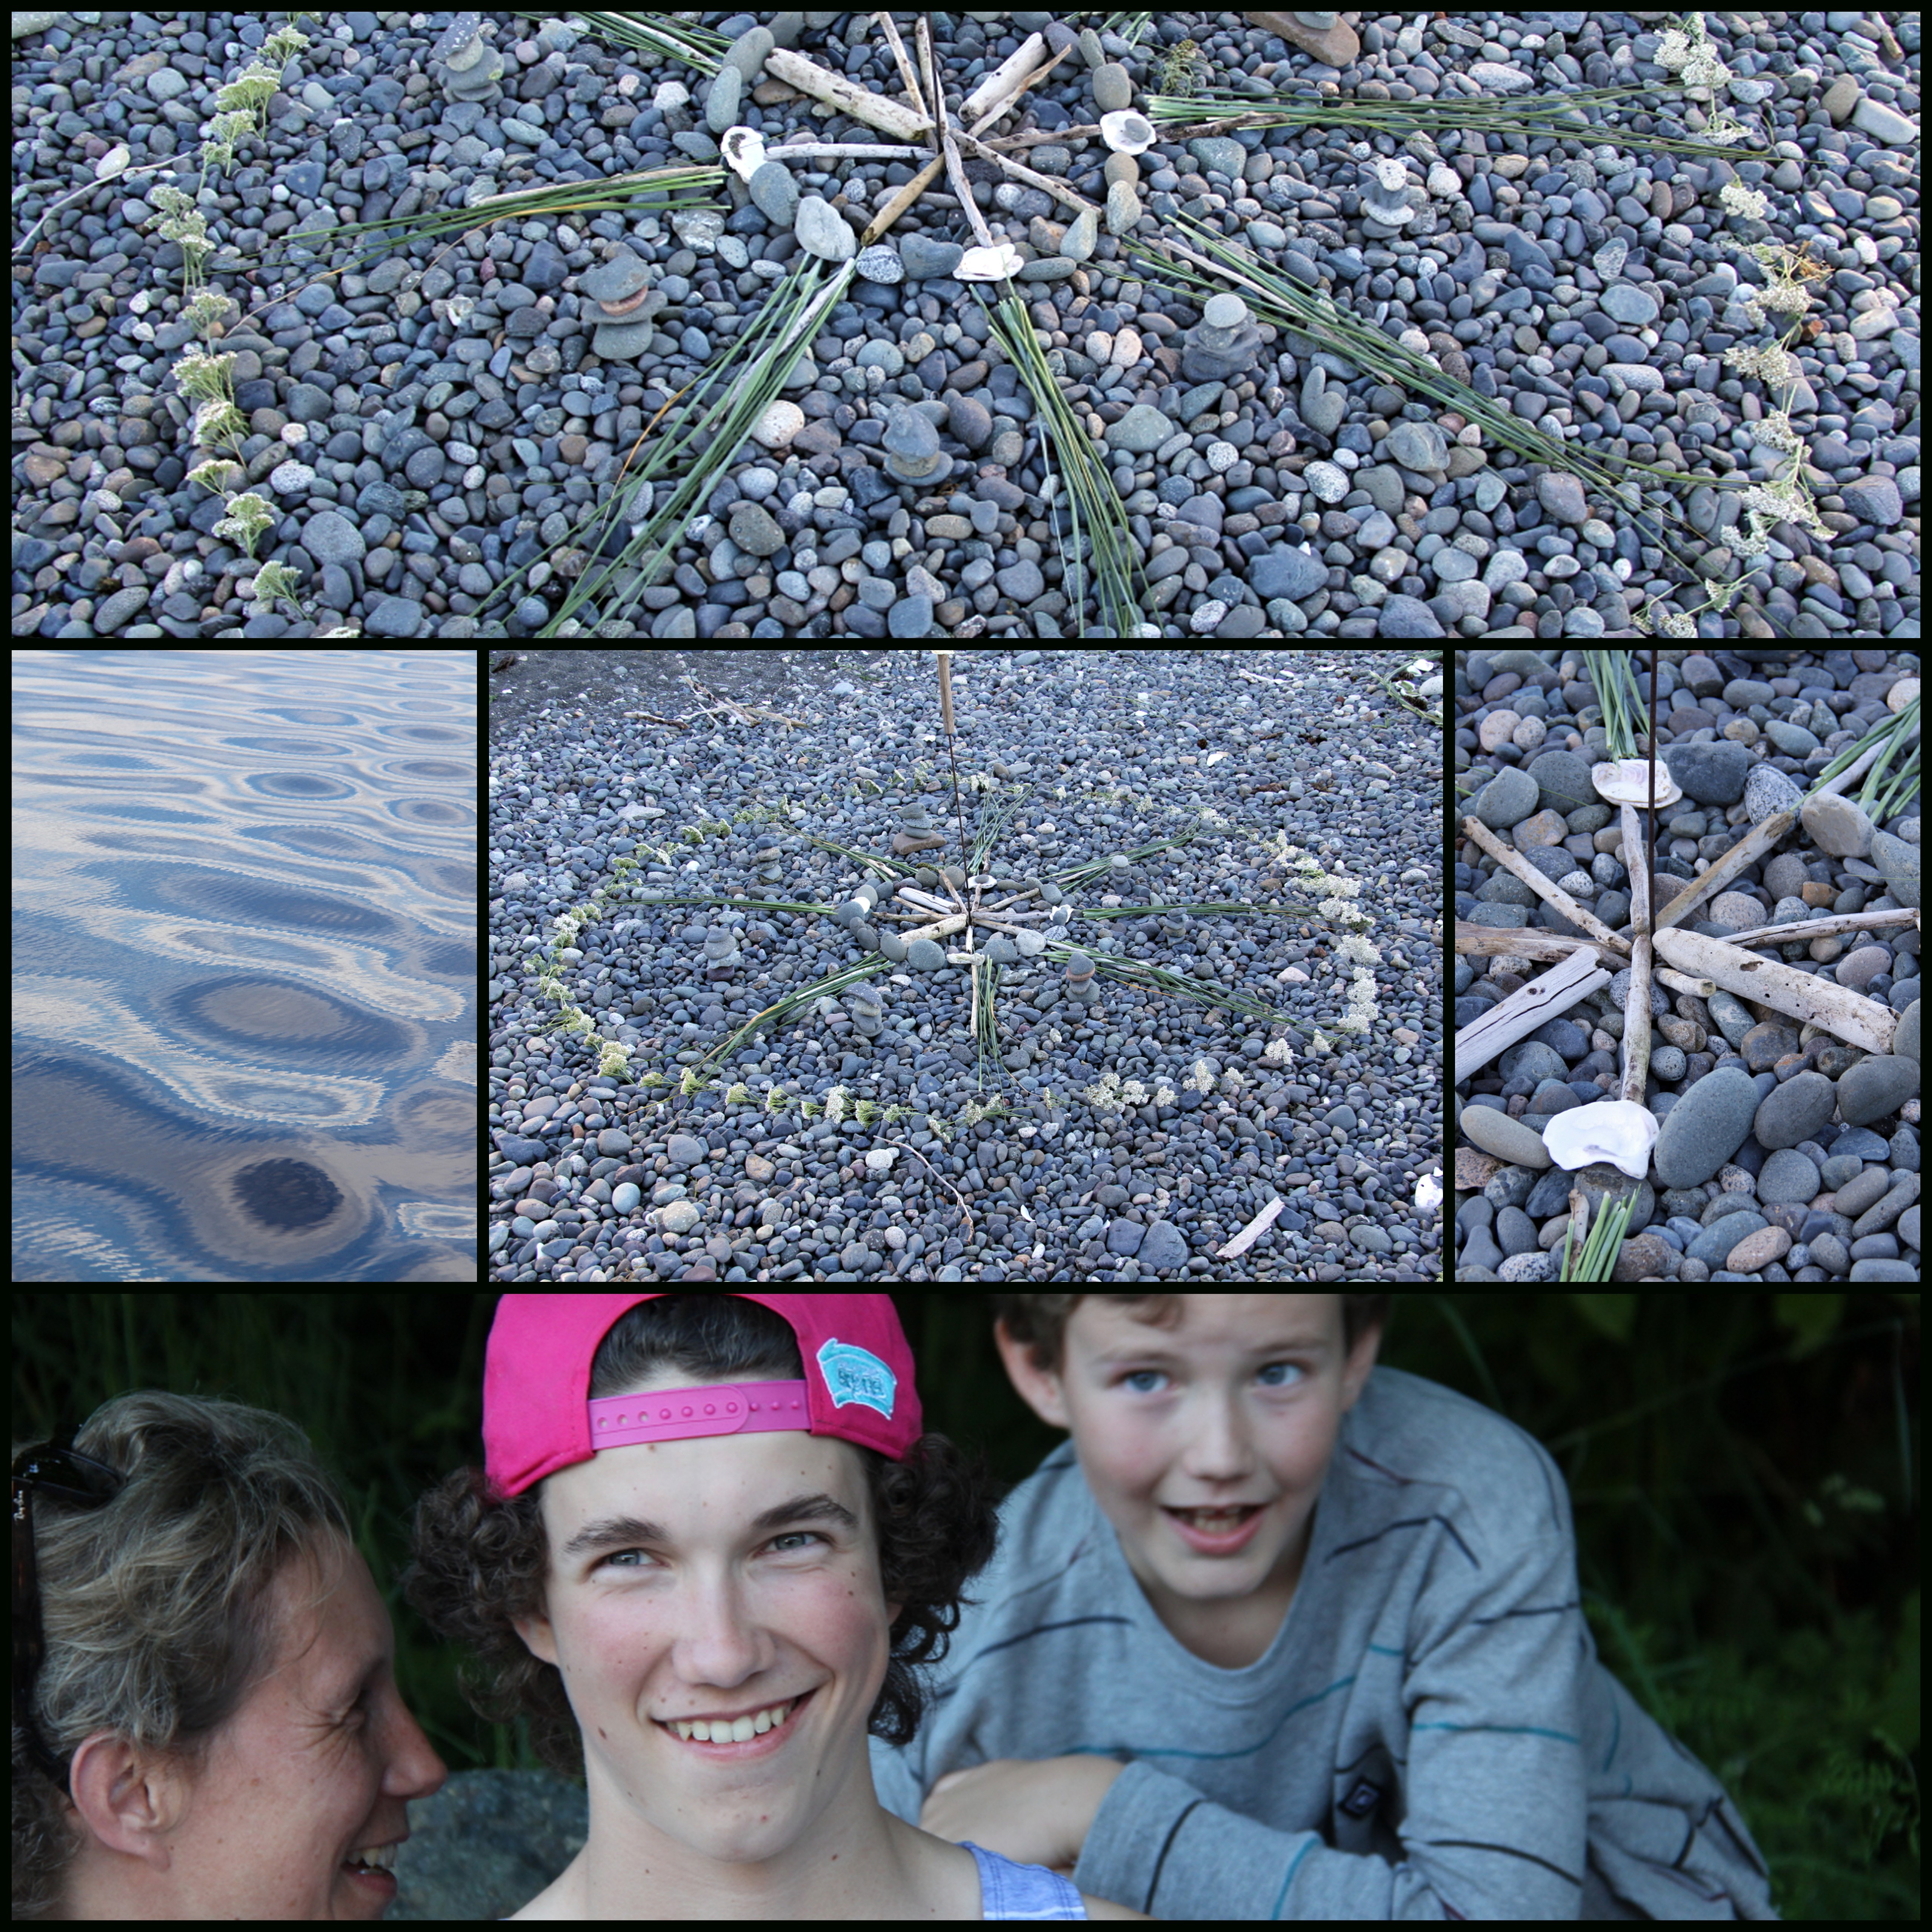
Tom and Kat made this mandala using a barnacle-covered cinder block monolith, red seaweed, driftwood sticks, oyster shells on-edge, and some wild mustard.Martina’s mandala has bilateral symmetry, and includes a border of seaweed, and in the center, she used driftwood, grasses and shells
As the evening cooled, we walked around admiring the mandalas … then later watched as Tom and Kat’s mandala was washed away by the incoming tide. I love thinking of beach-walkers stumbling across our mandalas and wondering about the makers. I hope these photos inspire you to make your own mandalas, no matter where you are.
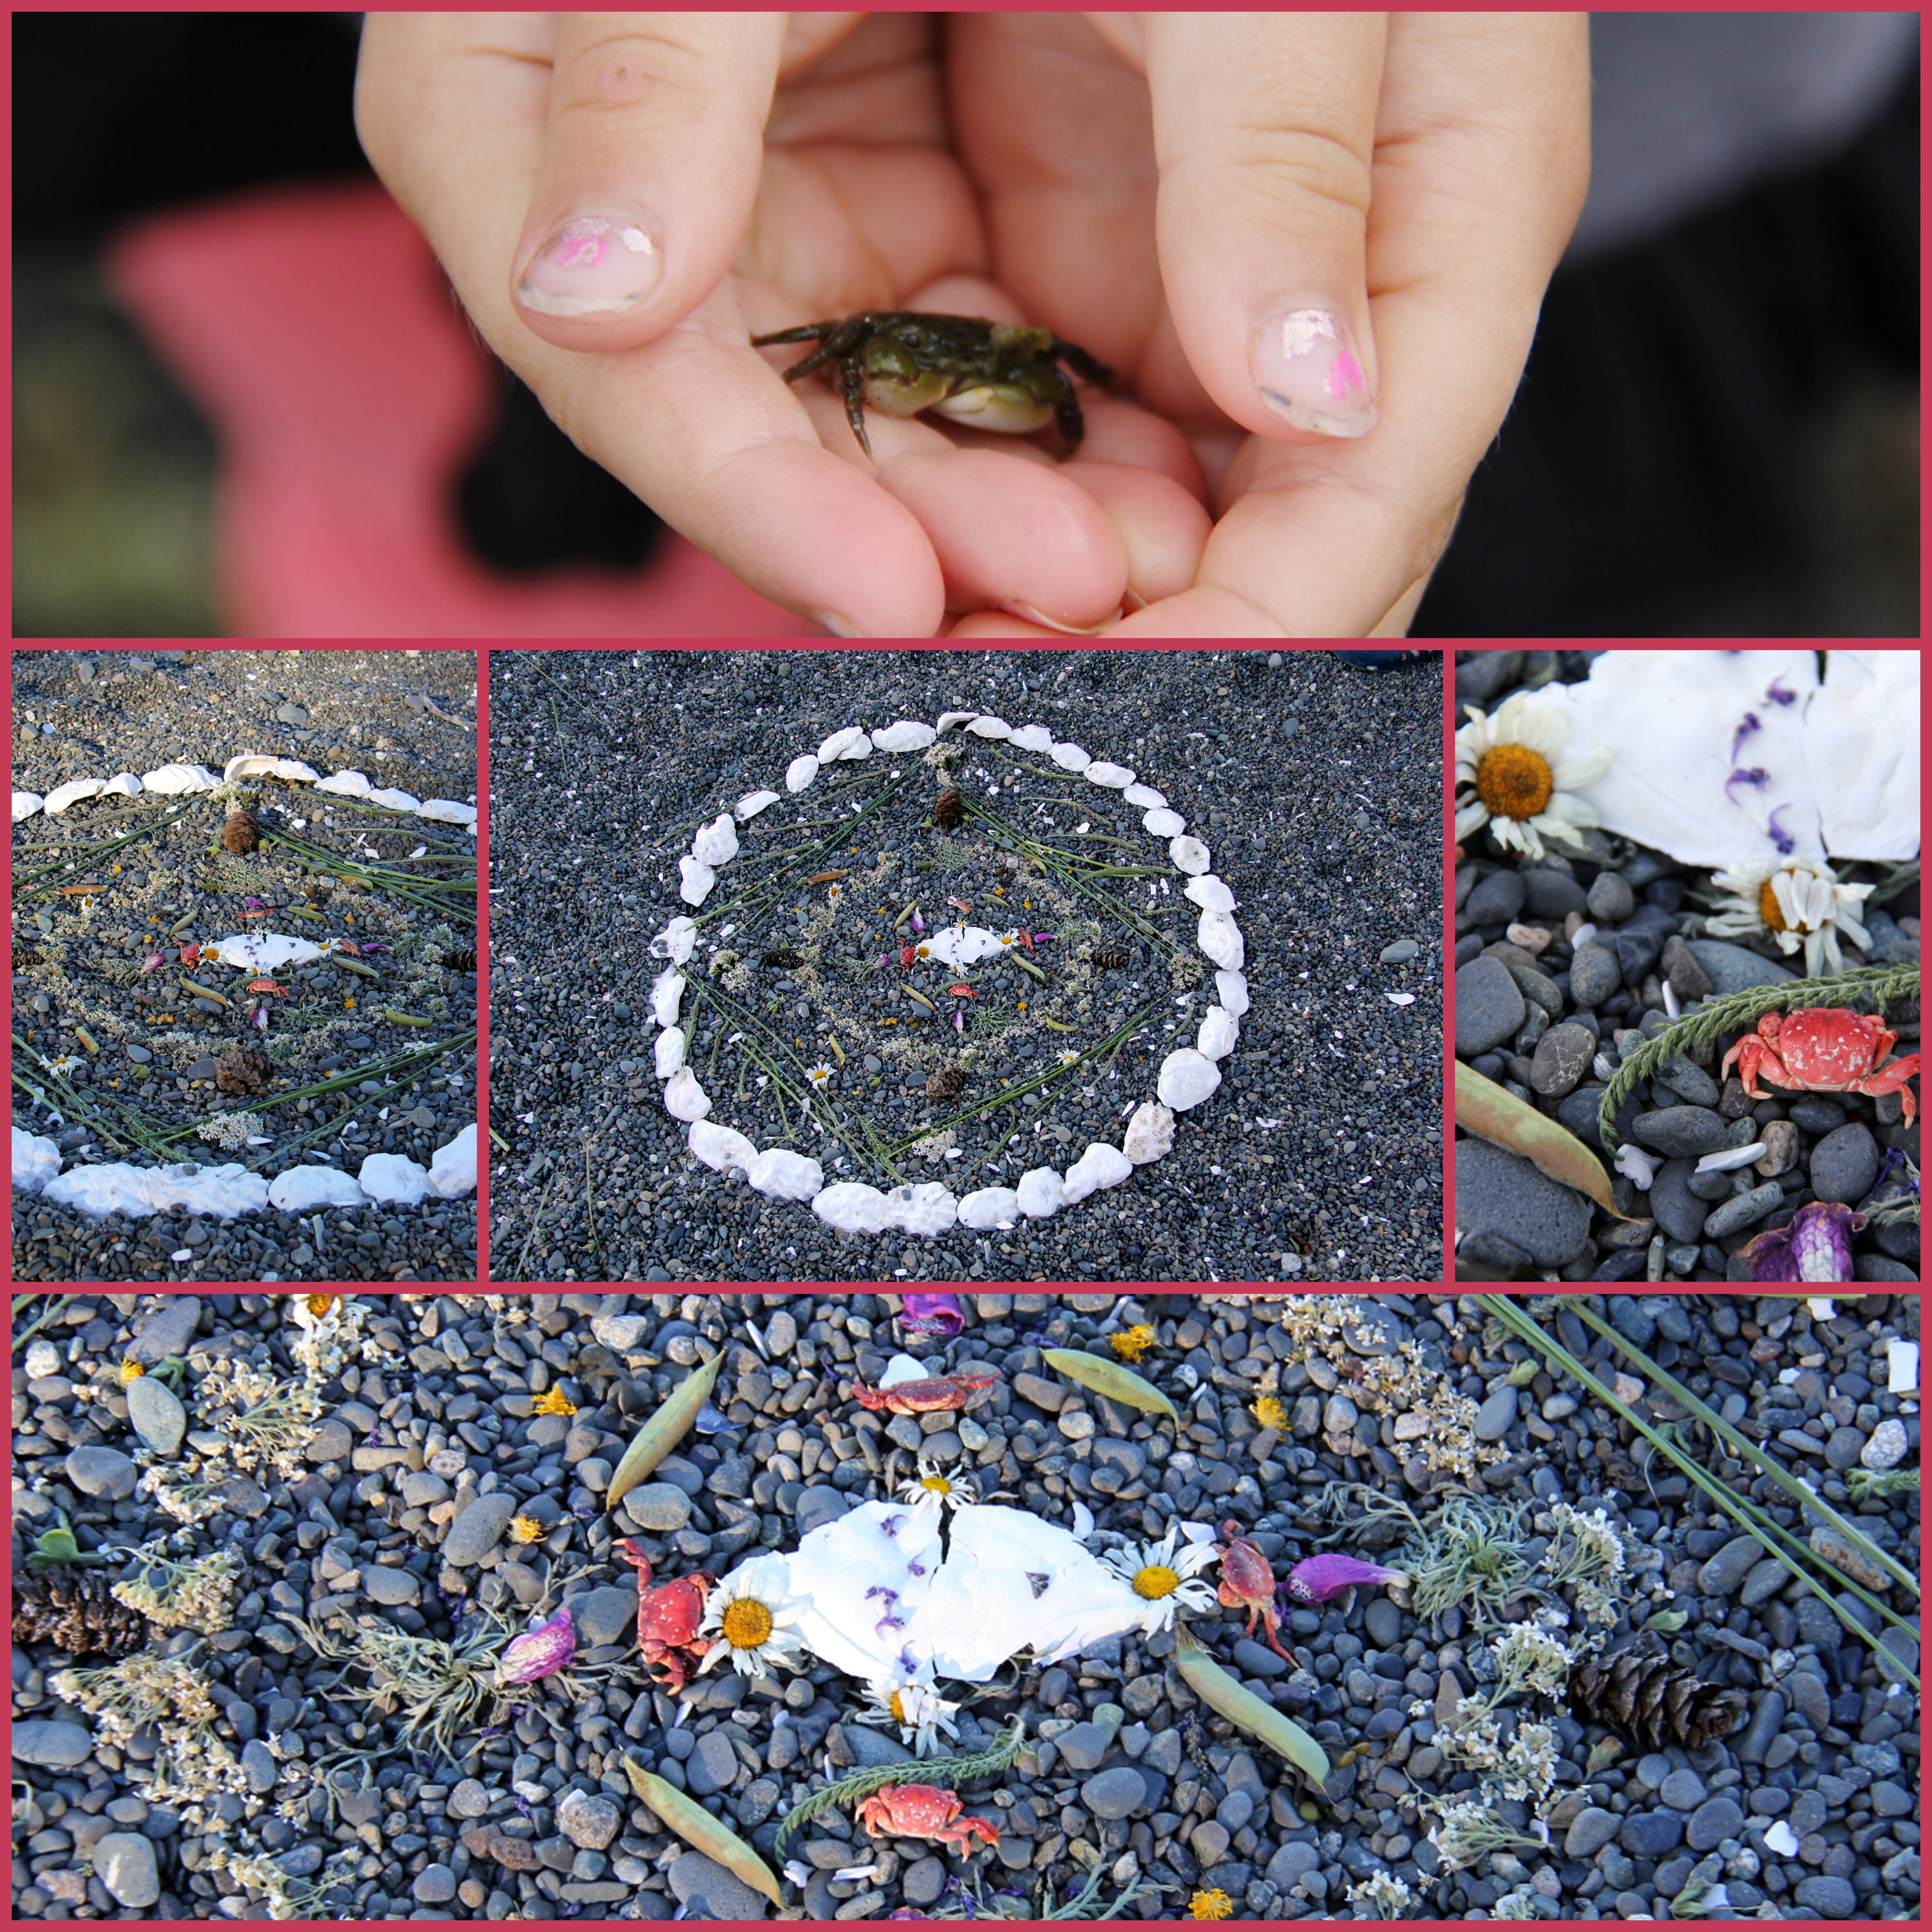
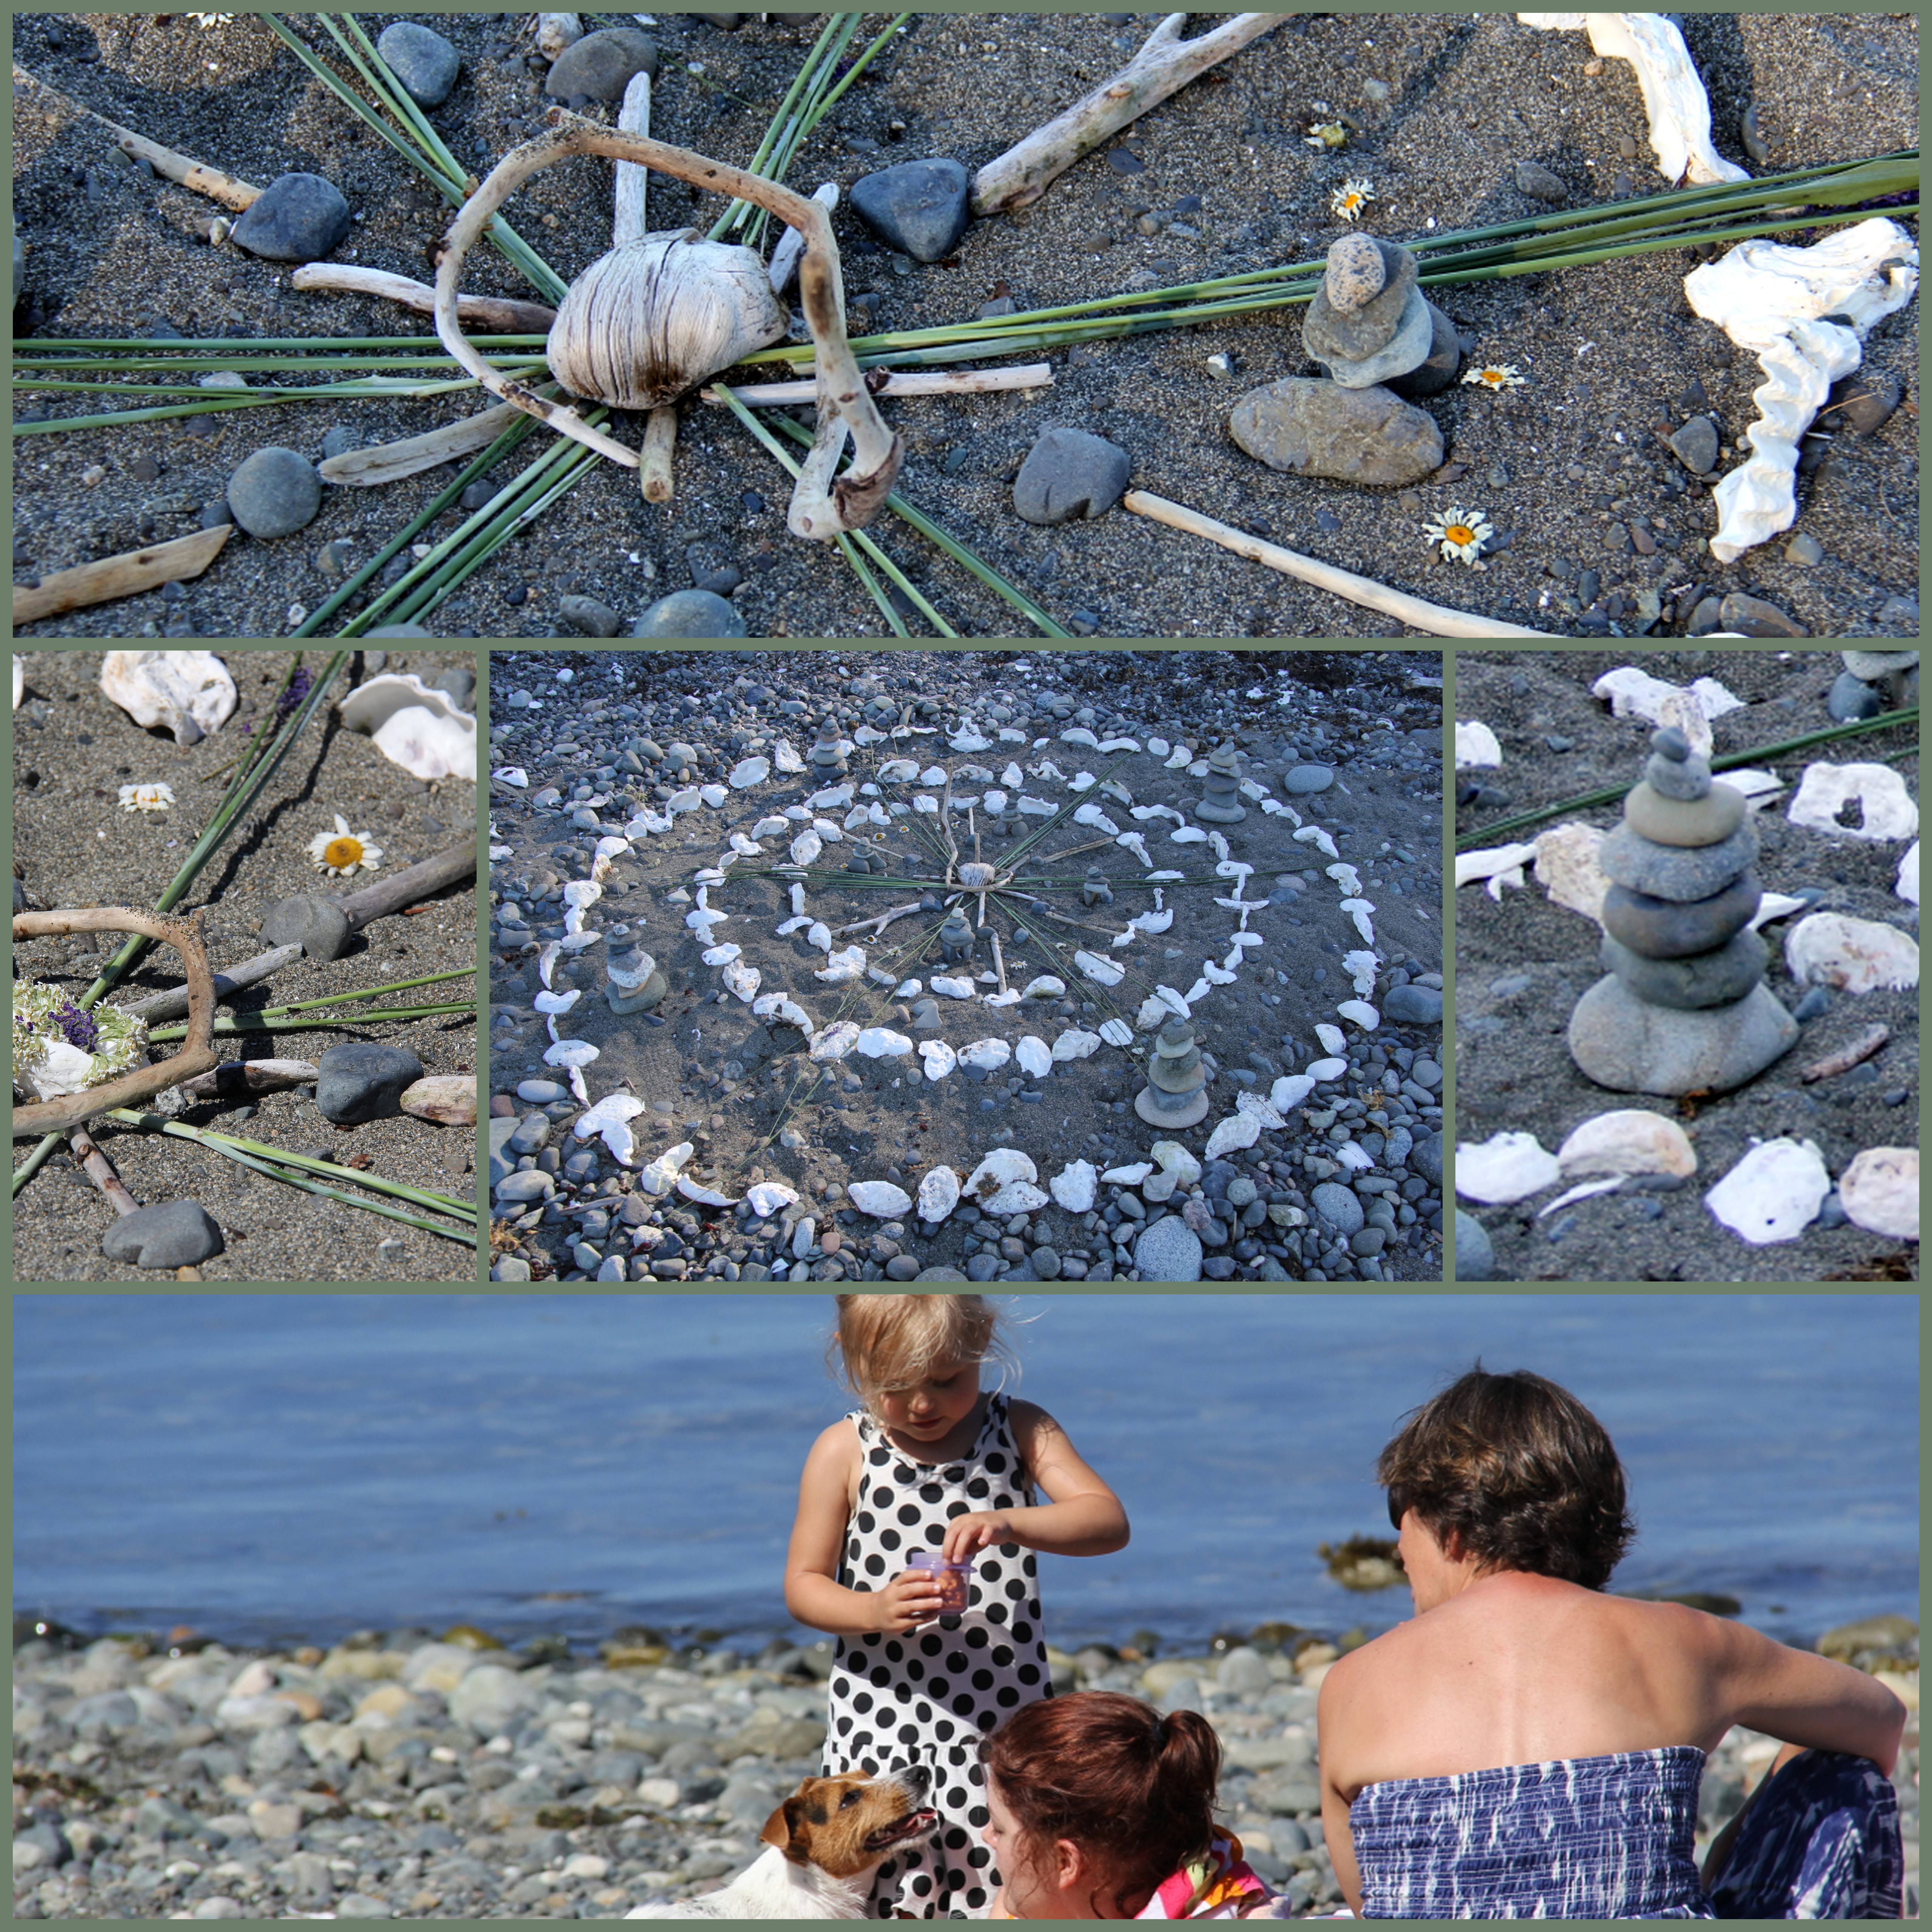
Amy and her family made this sweet circle filled with offerings from the sea… tiny crabs, shore plants, seed pods, flower petals, shells and little bits of driftwood.Margie and daughters created this wonderful mandala with concentric rings of seashells, plus driftwood, stone towers, flowers and leaves.Tim and Maureen created their mandala with oyster shells, douglas fir cones, ivy leaves, foxglove, yarrow, driftwood, fir and cedar boughs.Moira and Brian worked side by side to creaste this stony mandala on a bed of beach stones… they chose lighter colored stones to contrast with the dark shore, and added shells, seed pods, and grasses tied in bundles as a circular boundary.Marybeth and Sons …. played and worked together to create the most subtle of all the mandalas. They used stones, driftwood, shells, yarrow and shoreline grasses.
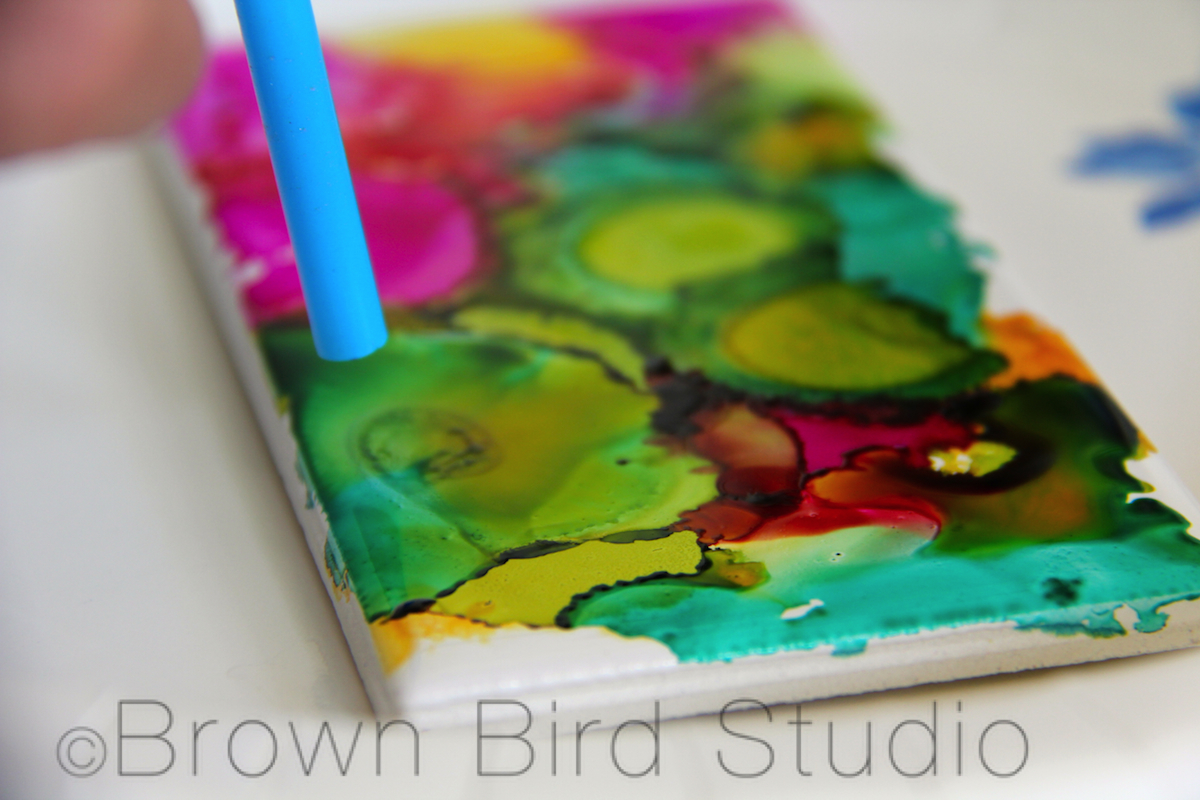
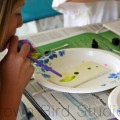
Adia using her invented tile painting technique, “Strawmania.”
Ema and Adia are spending lots of time with me this summer, just chillin, havin fun, learnin some stuff and makin some art. So far, I think we are using this first week to get used to each other, test limits, and figure out what we want to do for the rest of the summer. It’s been interesting and … I am very tired each evening. I think they might be too. I think that is a good thing.
I promised the girls I would teach them how to make blog posts, so every once in awhile Ema and/or Adia will be a guest blogger here on Water::Earth::Wind::Fire. I hope you enjoy their posts. At first, I will take dictation, typing pretty much exactly what they tell me to type. At some point, I will let them do the entire post. So, here goes, with the girls’ first ever blog post….
Ema writes:
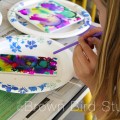
We wanted to make something nice for my mom’s office, so we made these tiles. We saw these on Pinterest, and we saved them to our summer fun Pinterest board and this is one of the projects my sister and I both wanted to do this summer. This was a creative and fun project. I would recommend this to children and their parents. To do one tile it takes about 5 minutes. Well, after you get everything set up, it goes really fast.
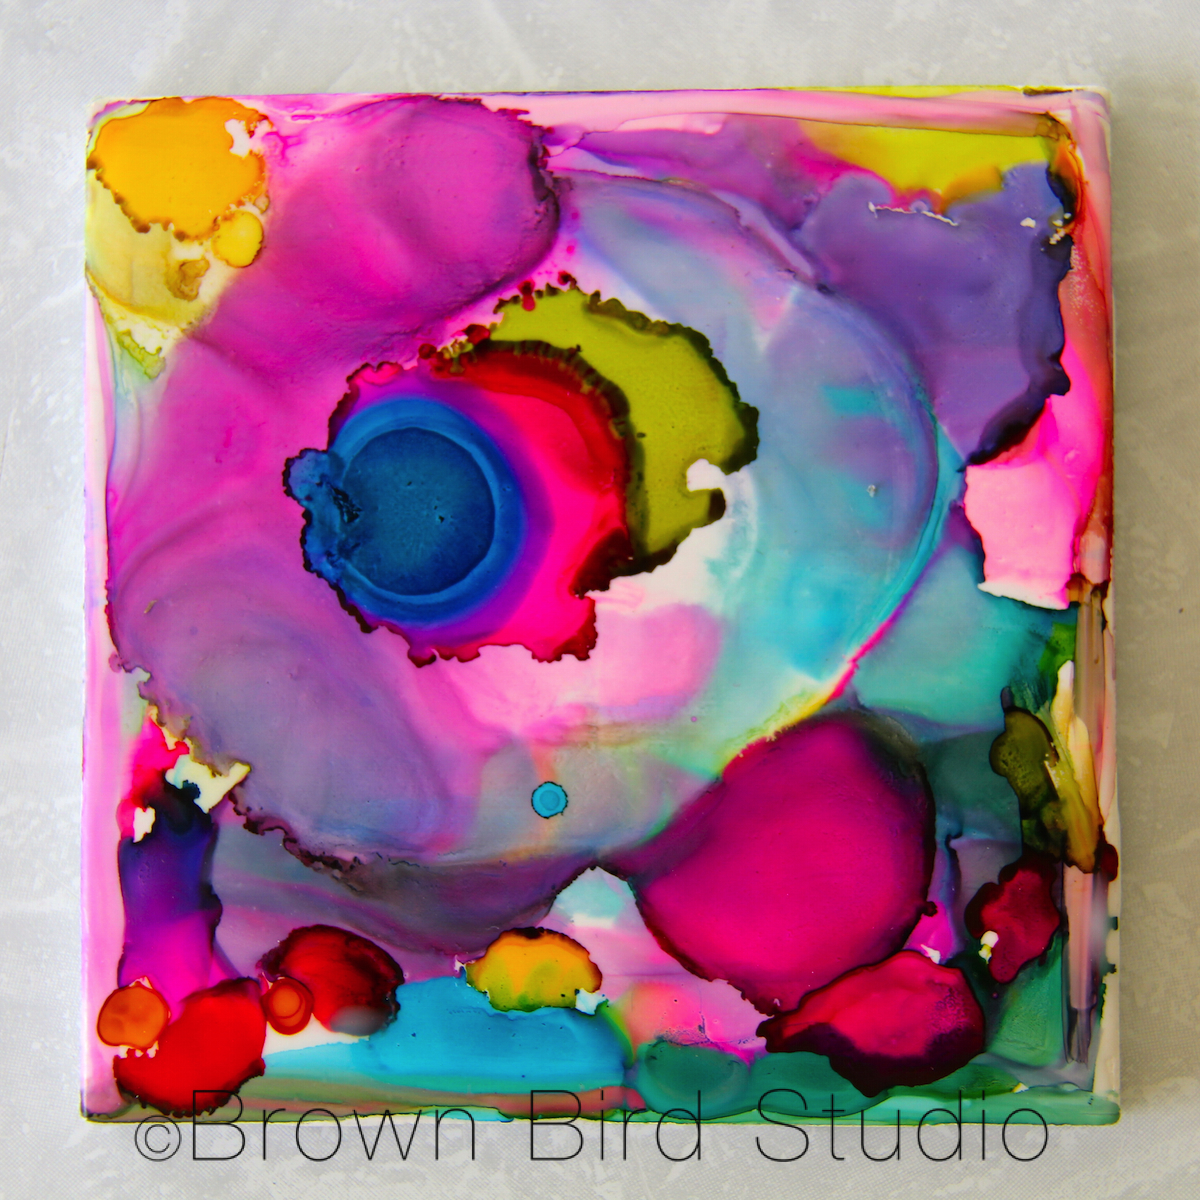
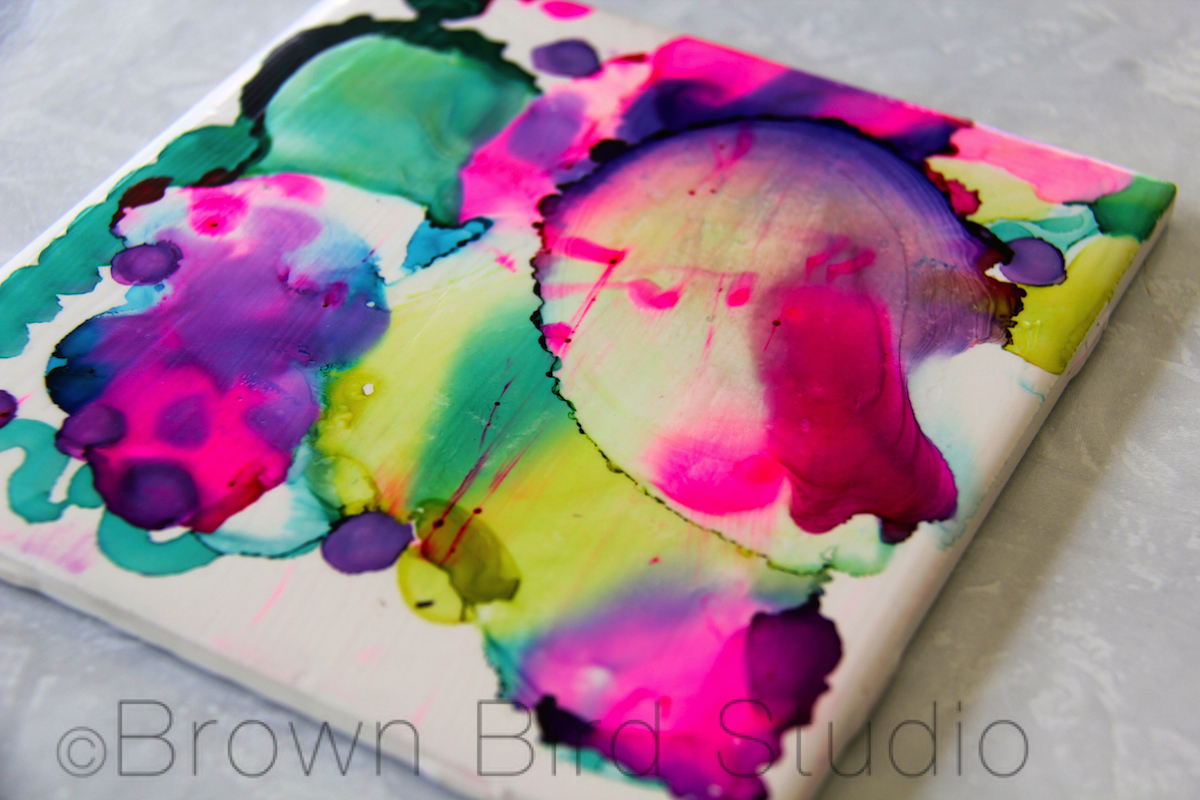
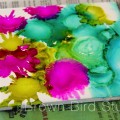
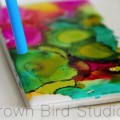
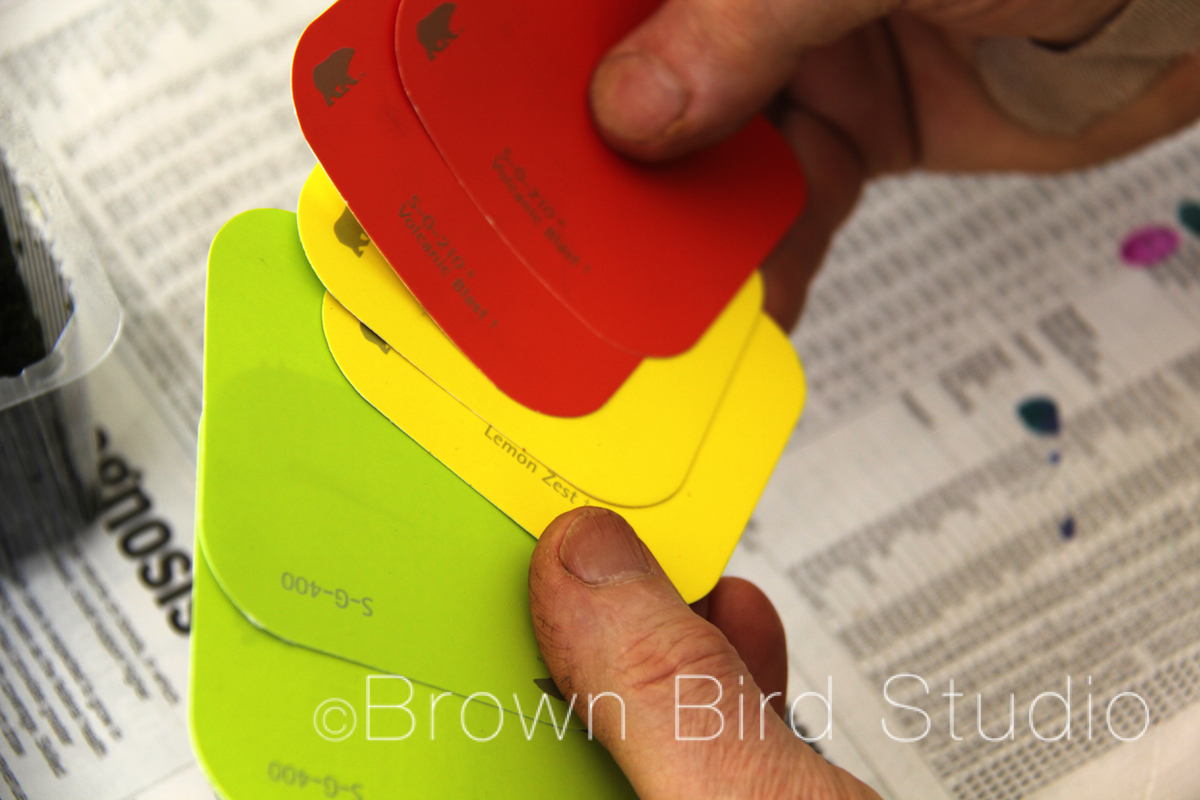
We made practice tiles first and my favorite one turned out to be my practice tile (that’s my practice tile, below.) It was my favorite because it had a lot of bright, different colors. I would describe the design as 3 different colored wax seals (like the ones on old envelopes) laying on top of each other. I really like that.
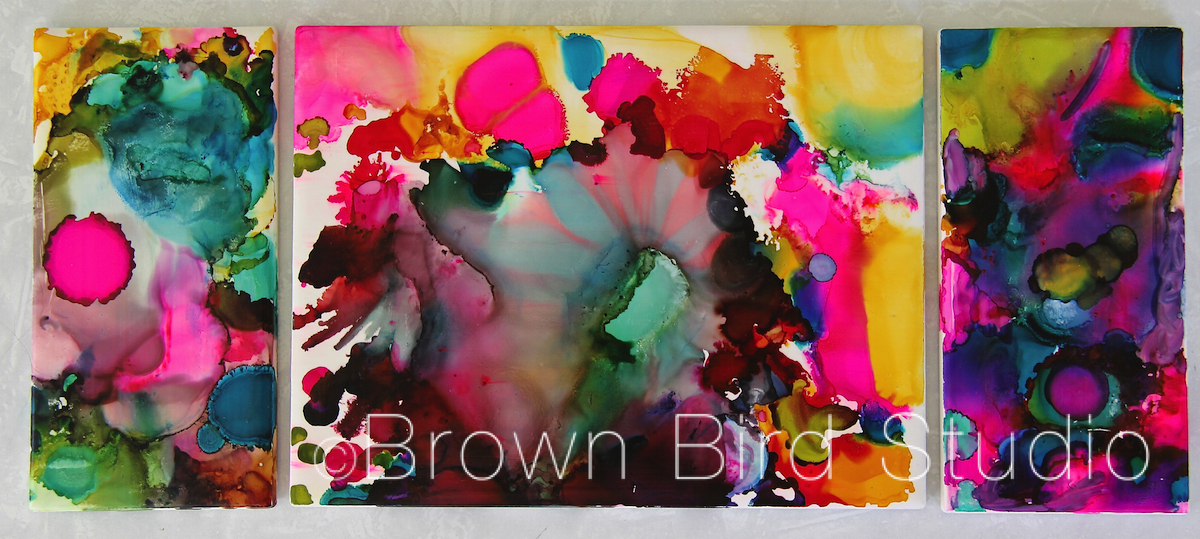
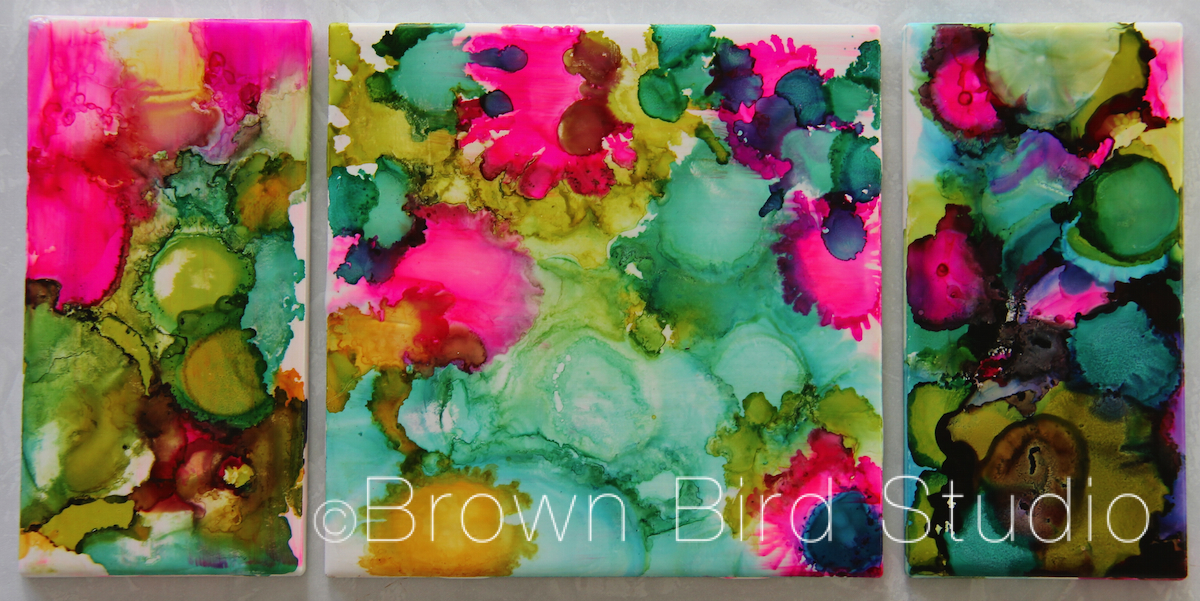
Here are the three tiles Ema made to go together as a triptych:
Editor’s note: Ema’s sister, Adia, made the list of supplies and wrote the instructions below:
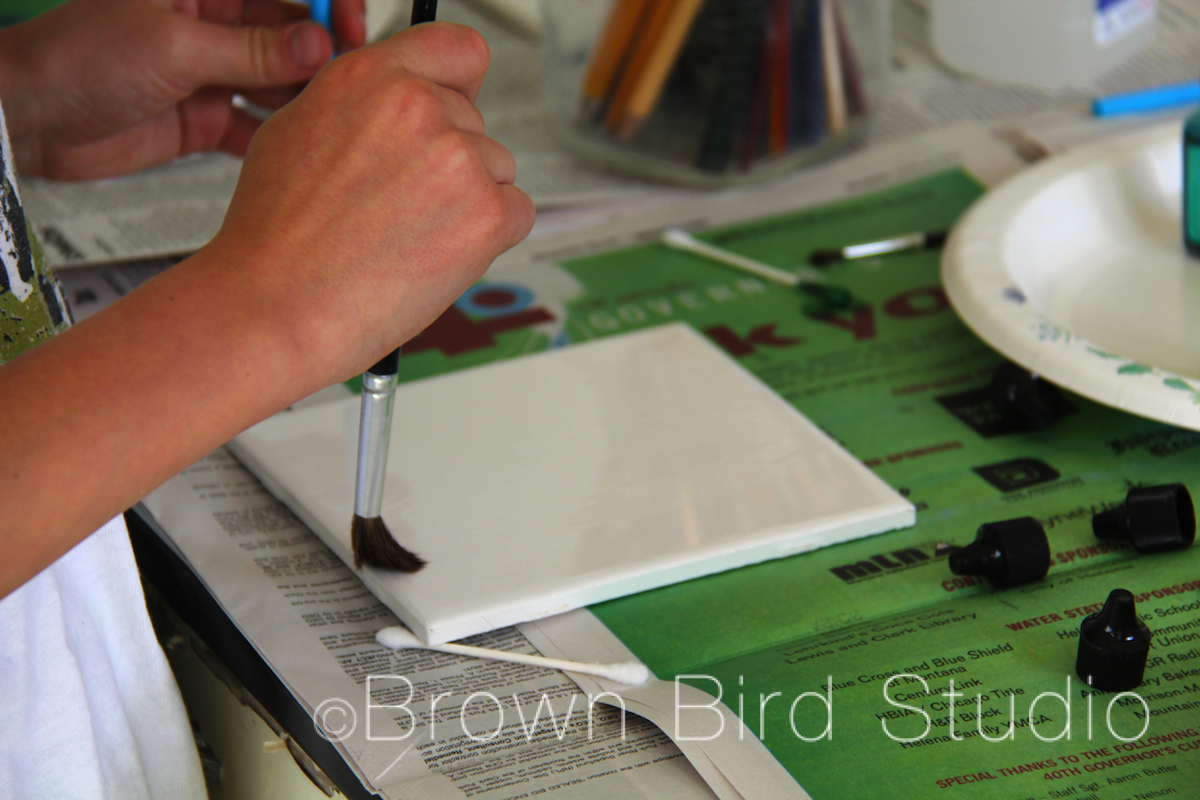
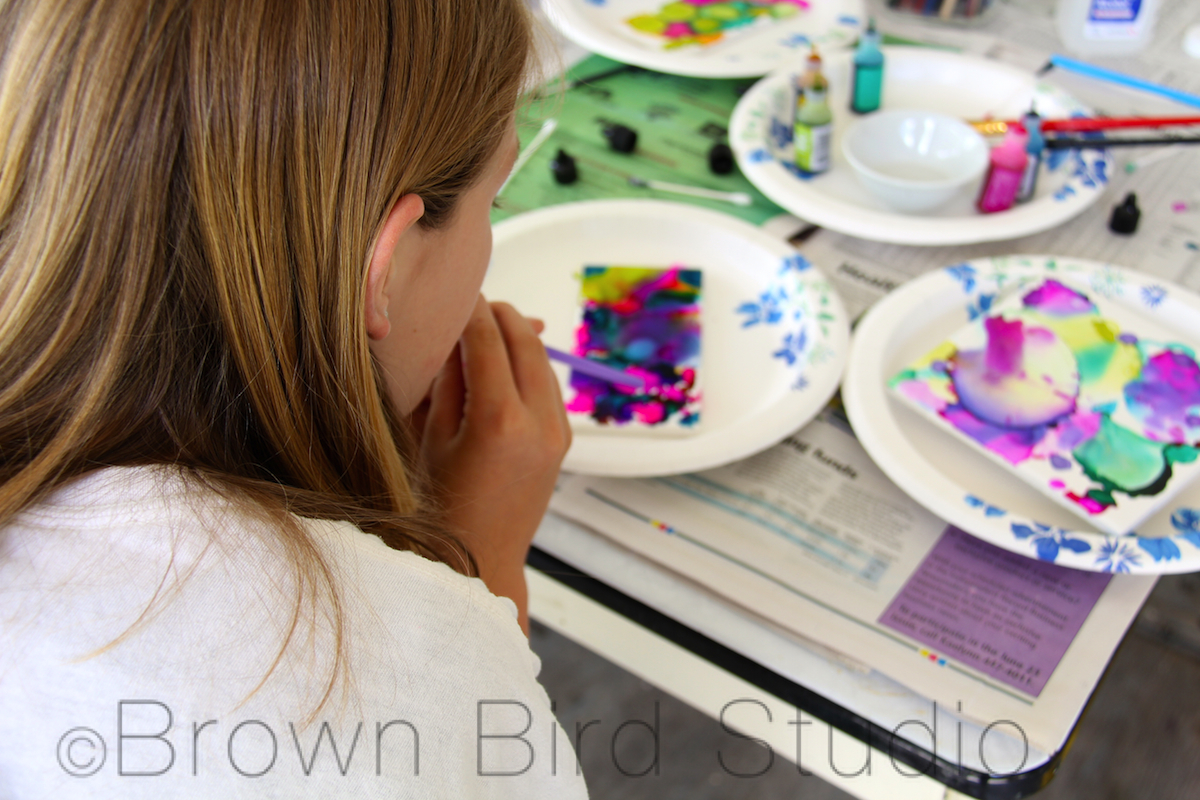
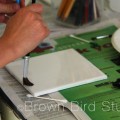
Put down newspapers so you won’t get ink all over the place Brush rubbing alcohol onto the tile. Use a lot.
Take your tile and paint rubbing alcohol all over it. Use alot because it dries up fast
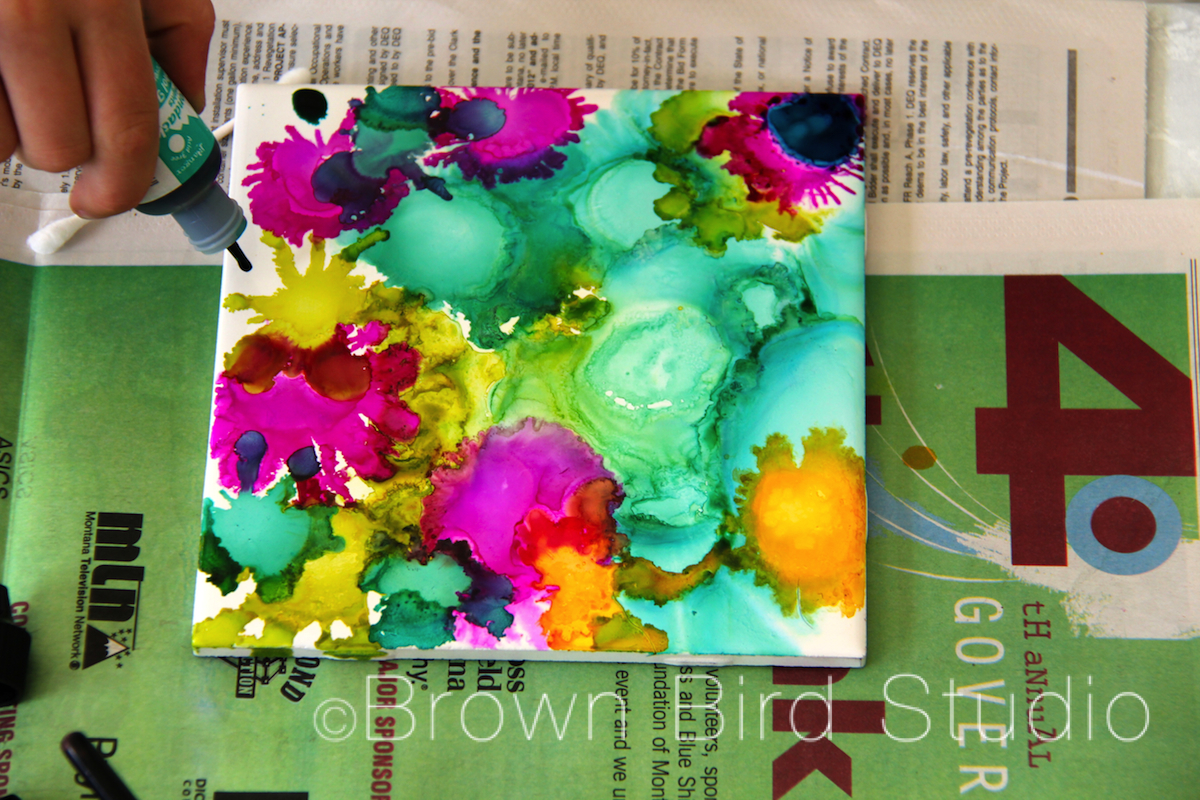
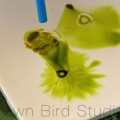
Drip little drops on ink on the tile right into the rubbing alcohol
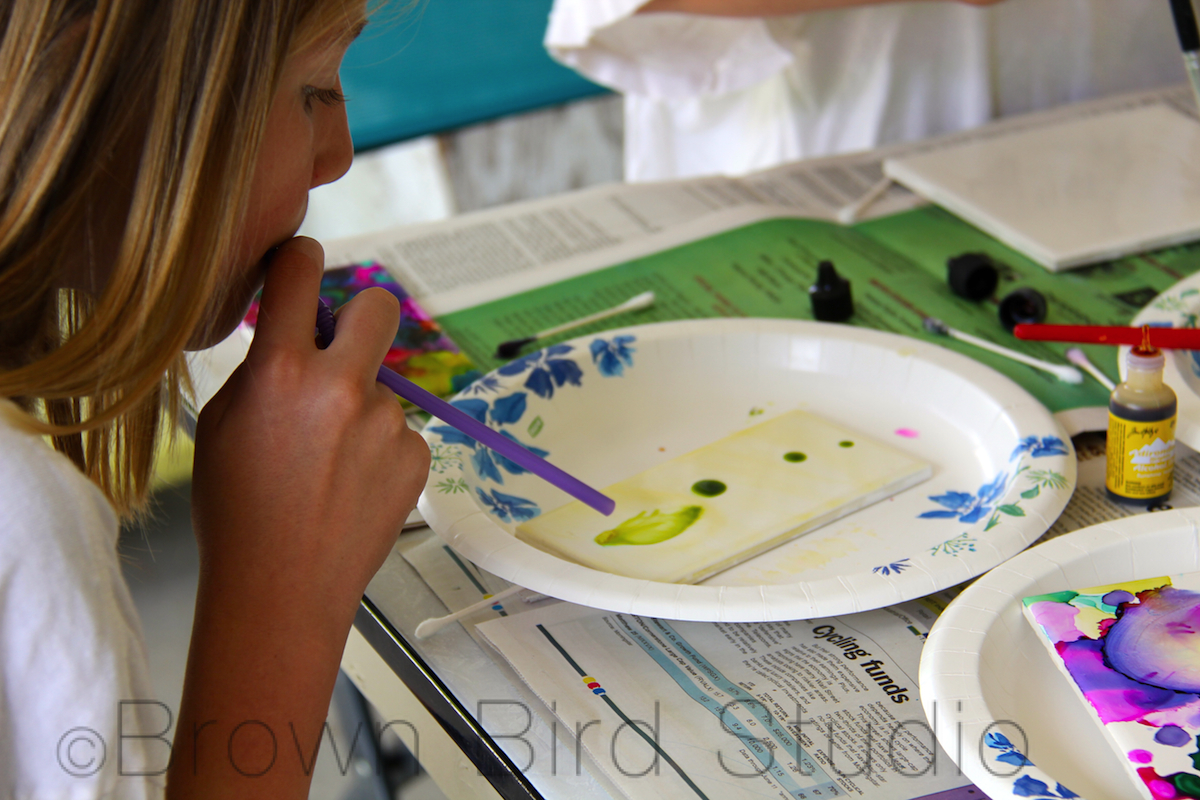
Drip ink on the tile in little drops Blow the colors around with a straw or just let them do their thing
Use your straw and blow to make the dots expand.You can play around with the straw blowing to make really cool designs in the ink. (editor’s note: Adia and Ema invented this technique and Adia named the technique, “Strawmania.”)
You can use a qtip to make shapes
You can add more colors
You can add more colors to your tile, blow them around or just let them mixAdd more colors and blow them around
You can drip more rubbing alcohol to make really cool effects in the inks
Next, let your tile dry
After it’s dry you can add more ink colors, or you can add more alcohol and play around with it.
When it’s all done and totally dry, you paint it with Modge Podge so the inks don’t disappear. Also to make it shiny. Also to protect the ink design
When the ModgePodge is dry, you turn the tile over and put the felt circles on the corners (you need these so it won’t scratch your wall or your tables or tile)
Then, glue on the hanger thingamajig with really good glue
Above is Adia’s finished triptych of tiles for her mom’s office. Adia writes:
My favorite part of making the tiles was Strawmania. That is what you do with a bendy straw when you blow through it onto the tile. It expands the ink blobs. You can blow colors together and mix them. Sometimes the color goes wherever it wants to go, which looks cool sometimes and other times it makes a big grey blob. If you get a gray blob, you can always add more alcohol and then add another color to make it colorful. That fixes it. This is something I will probably want to do again. Next time I will use less colors so my tiles don’t get big gray blobs. Here is my favorite tile (below). I am squirting the ink on it:
Well, today was Jaime’s first day at her new job — and my first full day with Ema and Adia. And whoah! did we ever pack alot of fun stuff into one day! We started out by choosing a couple of projects from our Summer Fun Pinterest board, then running around town for an hour or so gathering supplies.
Brush rubbing alcohol onto the tile. Use a lot.
Drip little drops on ink on the tile right into the rubbing alcohol
Add more colors and blow them around
You can add more colors to your tile, blow them around or just let them mix
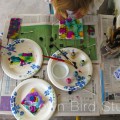
Our first project was to make ink painted tiles inspired by this link … we had to do a little googling to figure out exactly how to do it and which supplies we needed, plus we added our own spin (Adia named our technique “Straw-mania.”) I will let Adia and Ema write a blog post later this week with details on how they made their tiles.
Ema Terry’s Triptych of Painted TilesAdia Terry’s Triptych of Painted Tiles
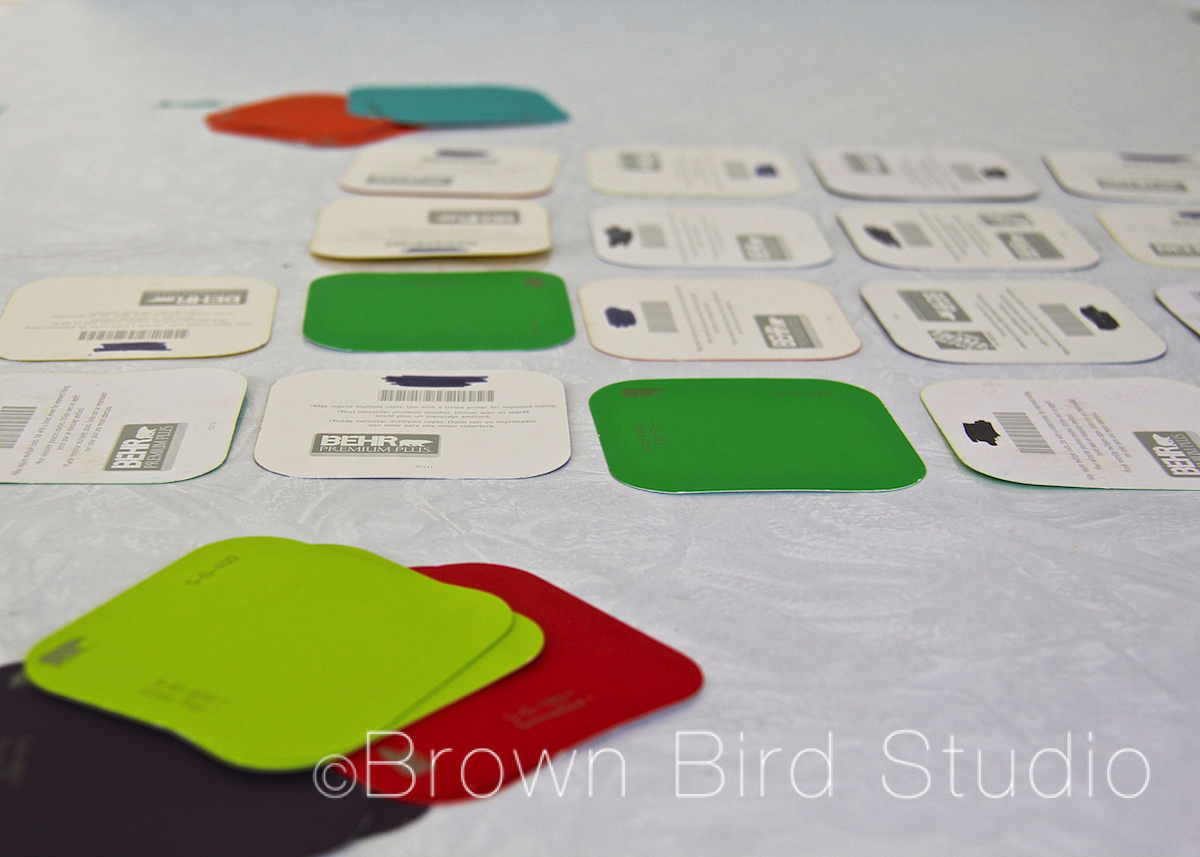
While we waited for our tiles to dry, we made smoothies (strawberry-peach-banana-amond) and sandwiches and ate lunch while playing “Memory.” We made our own Memory game with paint samples. That was a hit. I think we’ll keep the deck for other days. Then we walked down to Johns’ house to play with Tuffy for a few minutes, water Jaime’s garden a little and, oh yeah — get the marshmallows for the Rice Krispie Treats.
After lunch, we made krispie treats, then snuggled on the sofa and watched “The Lorax” on our Netflix instant-play. Sun tea and krispie treats during the movie… the girls had never made krispie treats. They got to do the whole thing themselves. (Confession: we ate almost half the pan — big grin)
We filled the rest of the afternoon with quiet activities: I taught them to make a campfire in the back yard, and the girls showed me how to make friendship bracelets . I am now wearing the one Ema made for me and she is wearing mine. I have a prediction: we’ll be making lots of friendship bracelets this summer. It’s easy, cheap, and something you can do for an hour while you are waiting for your mom to come home from work. Besides I need to make one for Adia!
Tomorrow: make Charlie’s dog food. Get goldfish for the pond. Take Charlie out to play along the irrigation canal … make some silly videos and check out the classic cars at the Montana Dept. of Transportation 100th Birthday Celebration. Another non-boring day.
I am having a glass of wine with my dinner tonight…