Hollyhock Dolls: a throwback to simpler times

Hollyhock-Dolls-09

I remember making these dolls from hollyhock blossoms in late summer. They only last for a few hours, even less if you play with them. But they’re fun to make, and really do have lots of personality. Now is hollyhock time in Montana. Do you have hollyhocks where you live? If you do, then you’re in luck. Go find a few, get out a needle and thread and go for it.

tutorial to make hollyhock dolls

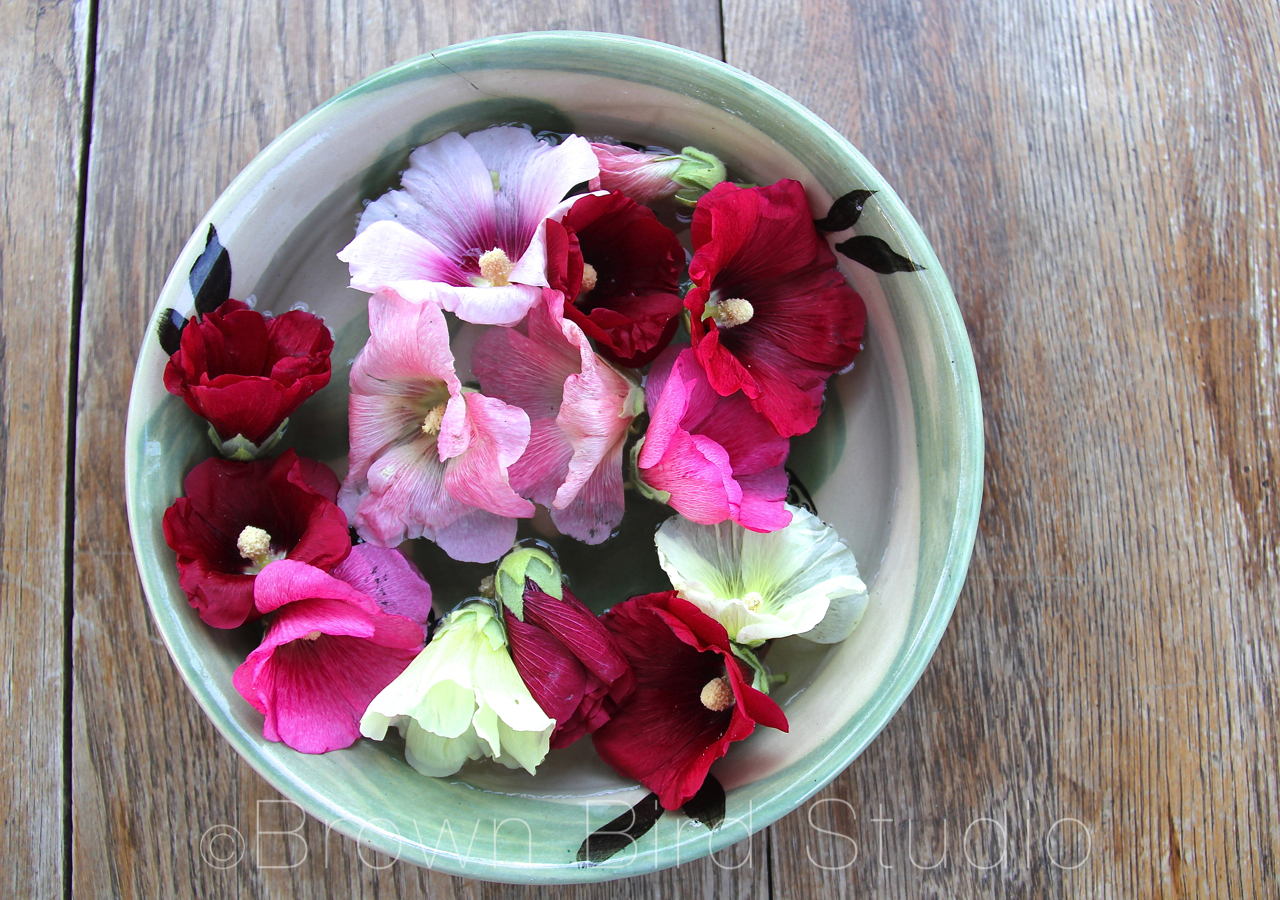
  1. Pick some hollyhock blossoms. Remember to get different sizes of buds, and a few leaves (for hats.) Sort the buds by size, making sure you have at least 3 buds for each arm.
  2. Keep blossoms fresh while you work, by placing them in a bowl of water. You can also mist them with water using a sprayer.
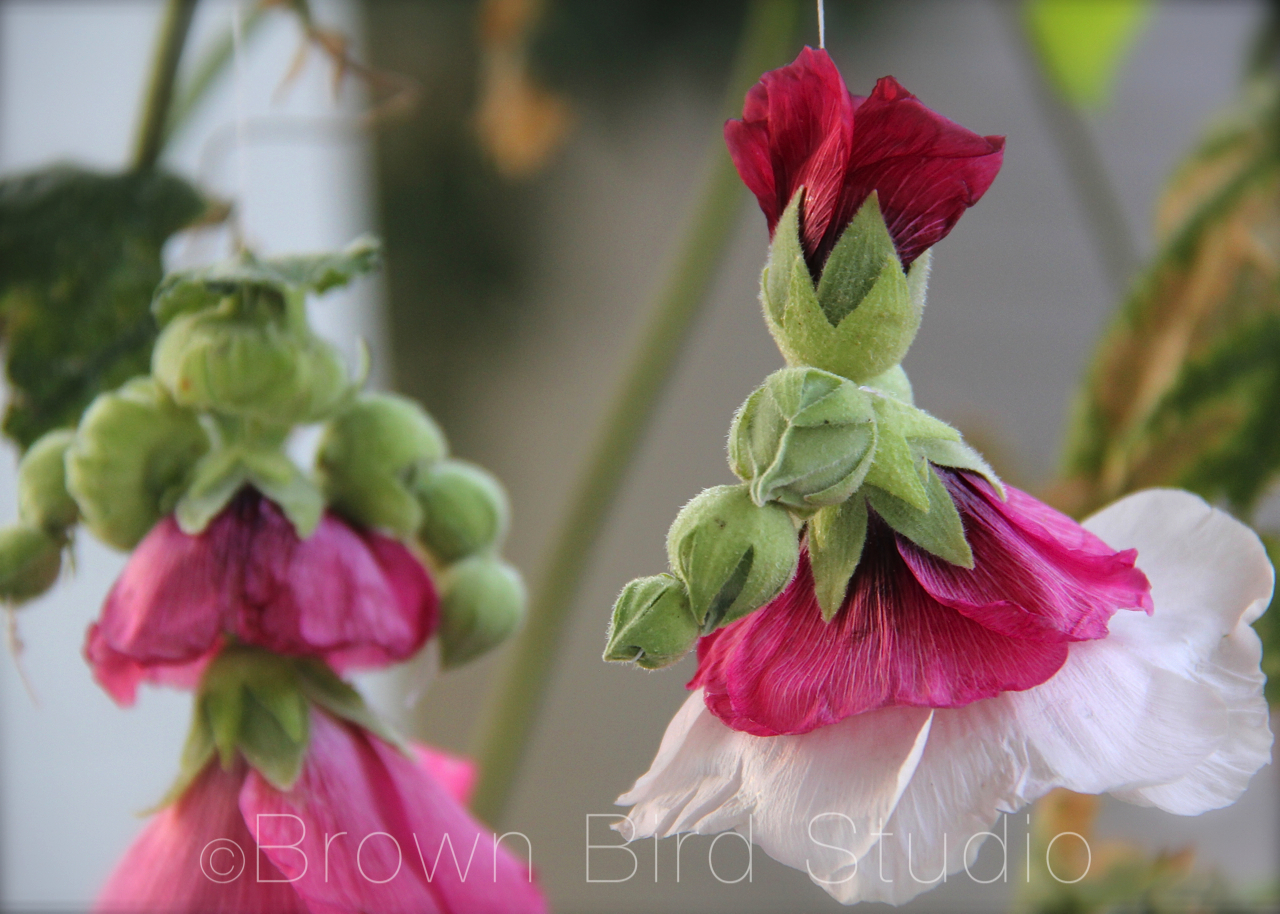
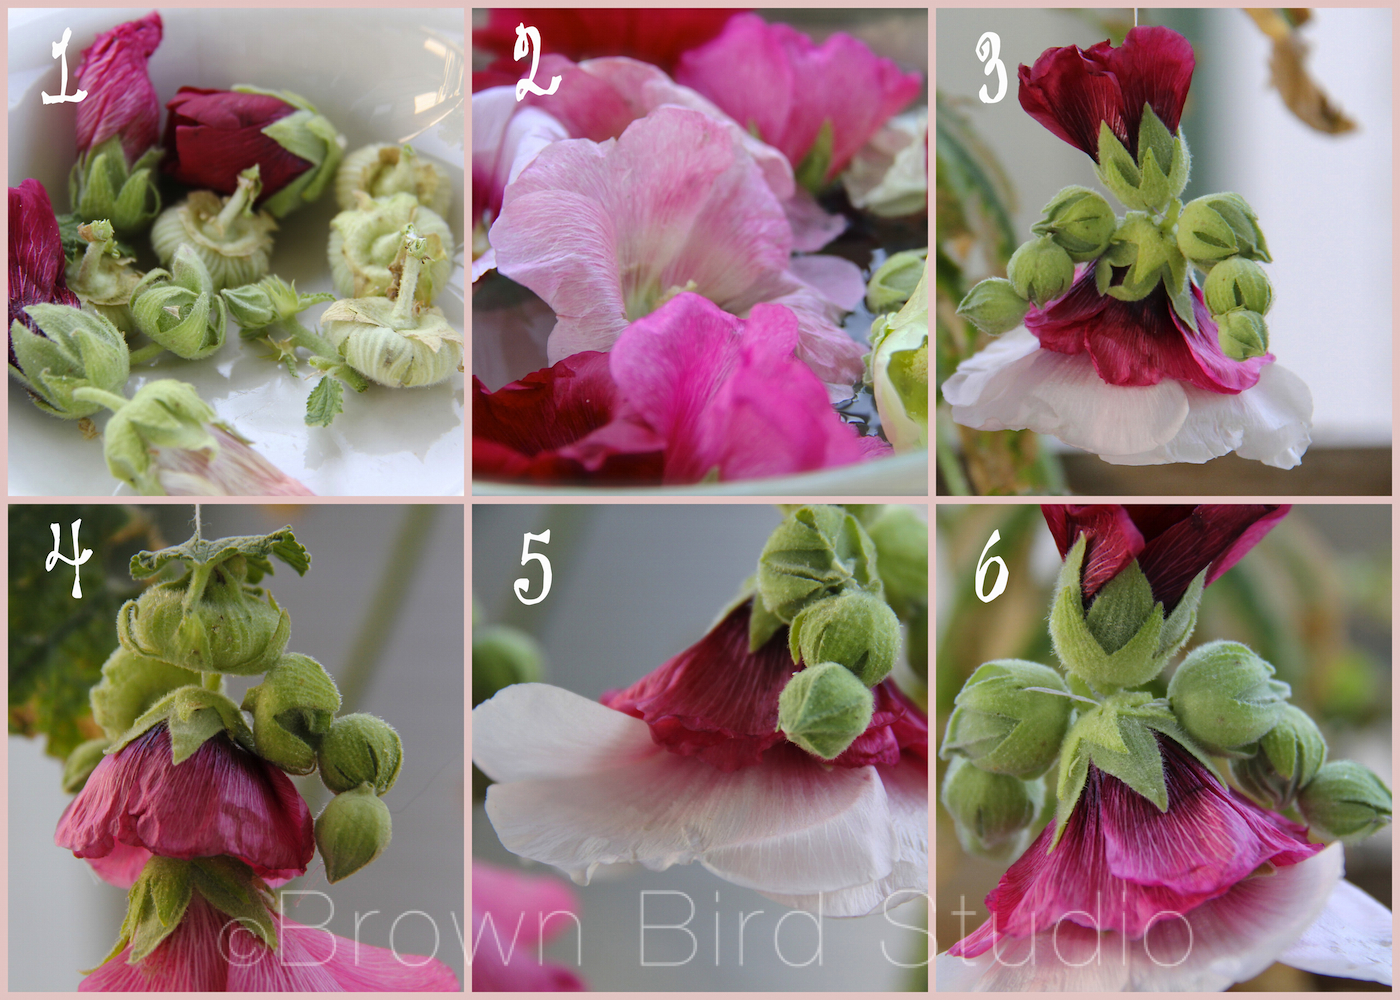
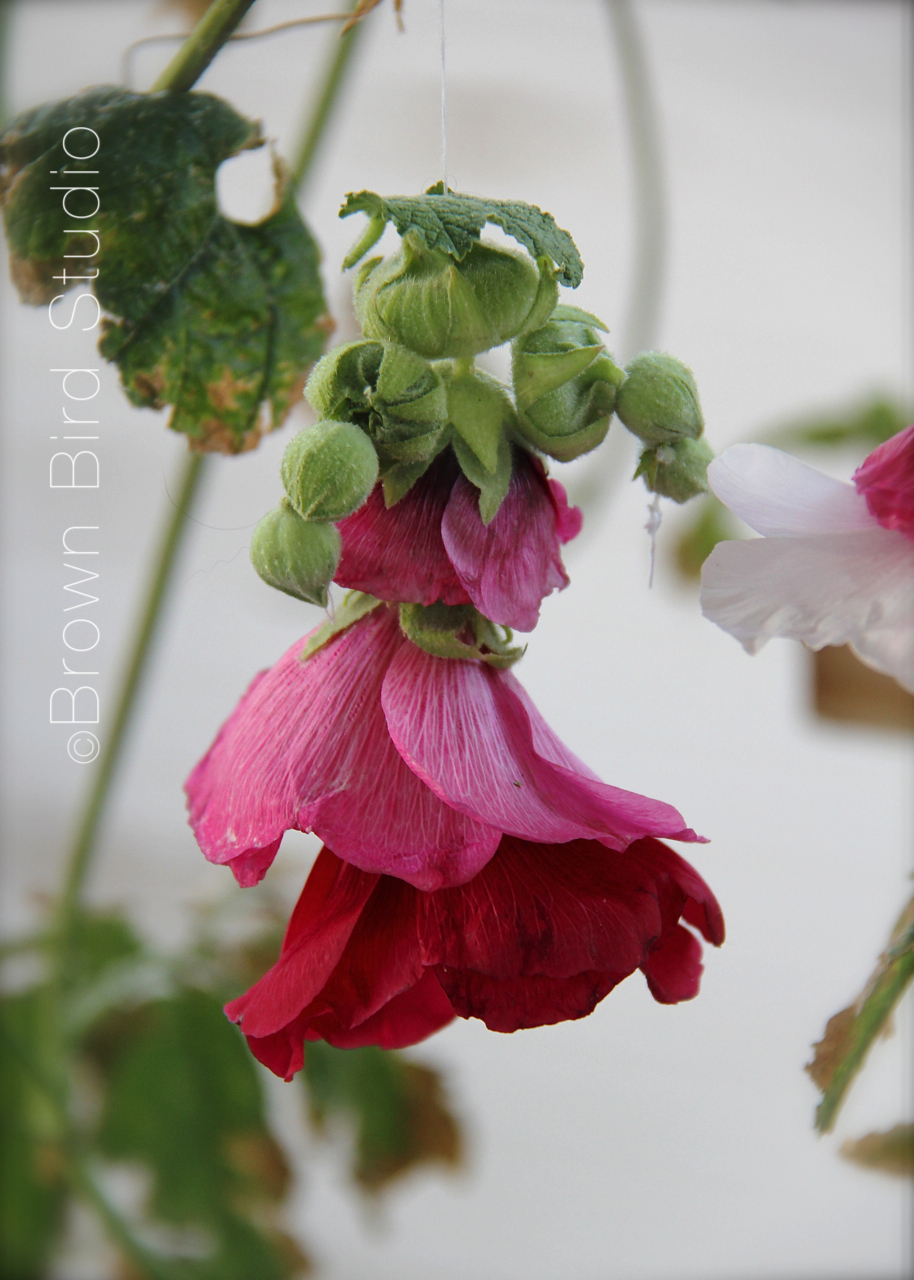
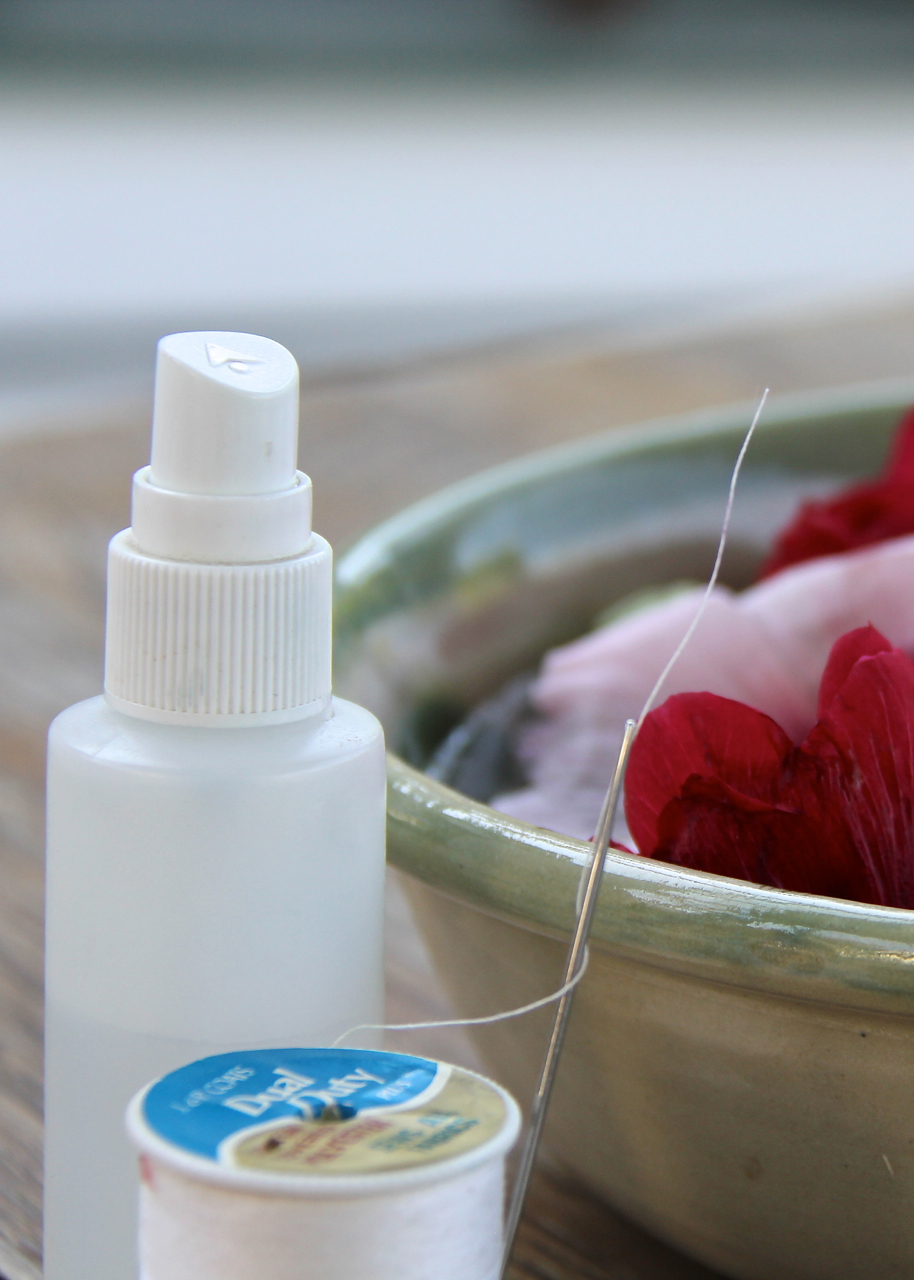
  3. Remove the large, fuzzy stamen that sticks out of the center of each flower. Using a large needle and thread, stitch up through two or three large flowers, layering them to look like a skirt.  You can make multi-color skirts with different colored flowers. Next make the head — you can use either a small blossom that hasn’t fully opened yet, or a large bud. Stitch from the bottom of the head through to the top.
  4. You can add a leaf on top of the head for a hat.
  5. Use 3 buds for each arm, a small, medium and large. I like to start at one hand, thread 3 buds together, then pierce the shoulder with the needle, and continue on the other side with 3 more buds for the opposite arm. (see photo 6)
  6. Your hollyhock doll will have personality and facial expressions if you use your imagination with her.

Swirling Personality of a Hollyhock Doll

Hollyhock-Dolls03-imp

You can add legs if you want but I kinda like them without legs. The big skirts make the dolls look like Southern Belles at a Ball, or Ballerinas Dancing Across the Stage. If you want legs, do them the same as the arms.

Hollyhock-Doll Supplies Another way to make hollyhock dolls is to use long, stiff pine needles, or toothpicks instead of needle and thread. Using the thread allows the arms, legs, neck and waist of the doll to move and jiggle, and if you hang her she will dance in the breeze.  Using pine needles or toothpicks gives you a stiffer doll that can be played with more easily. Here is a link to making hollyhock dolls with toothpicks. 

Hollyhock Buds to Make Dolls

Keep Hollyhocks Flowers Fresh in Water

a lovely vintage textile print with hollyhocks

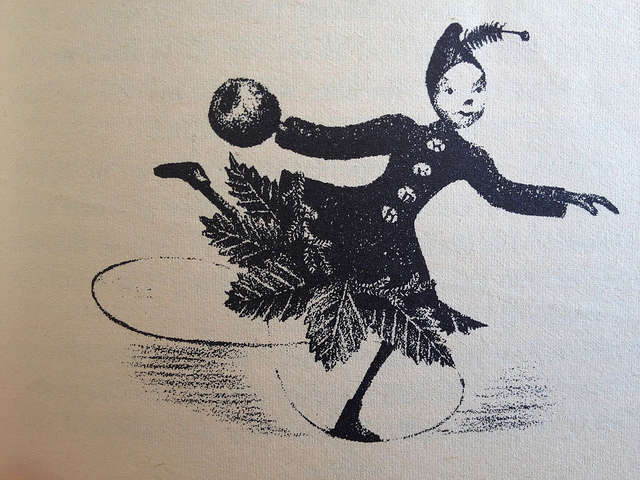
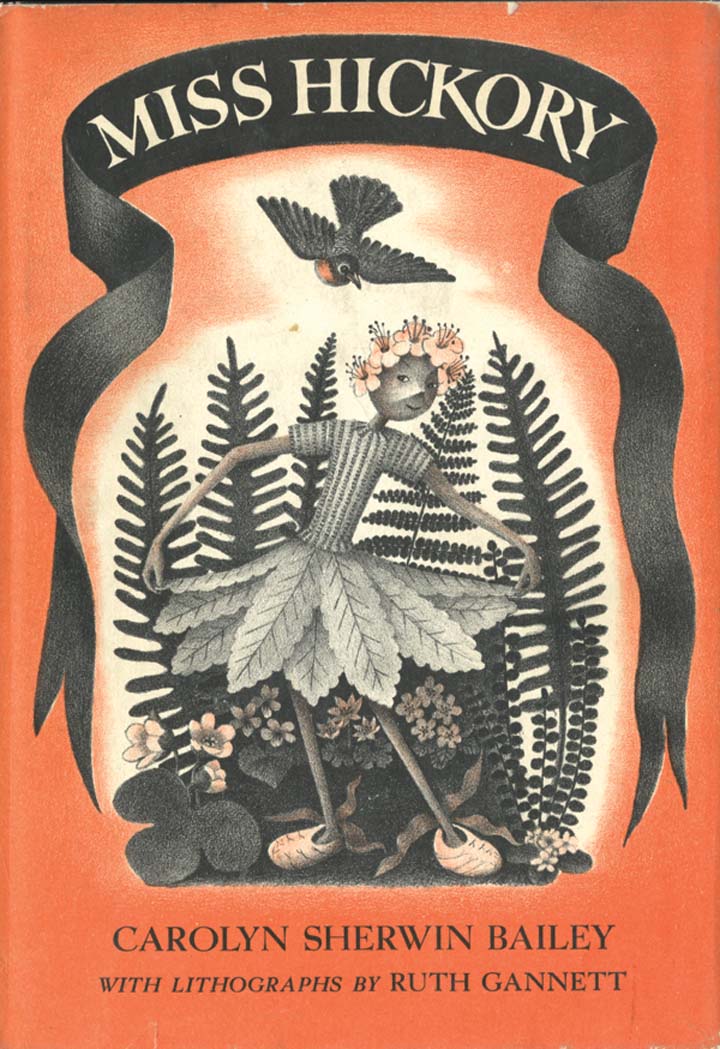
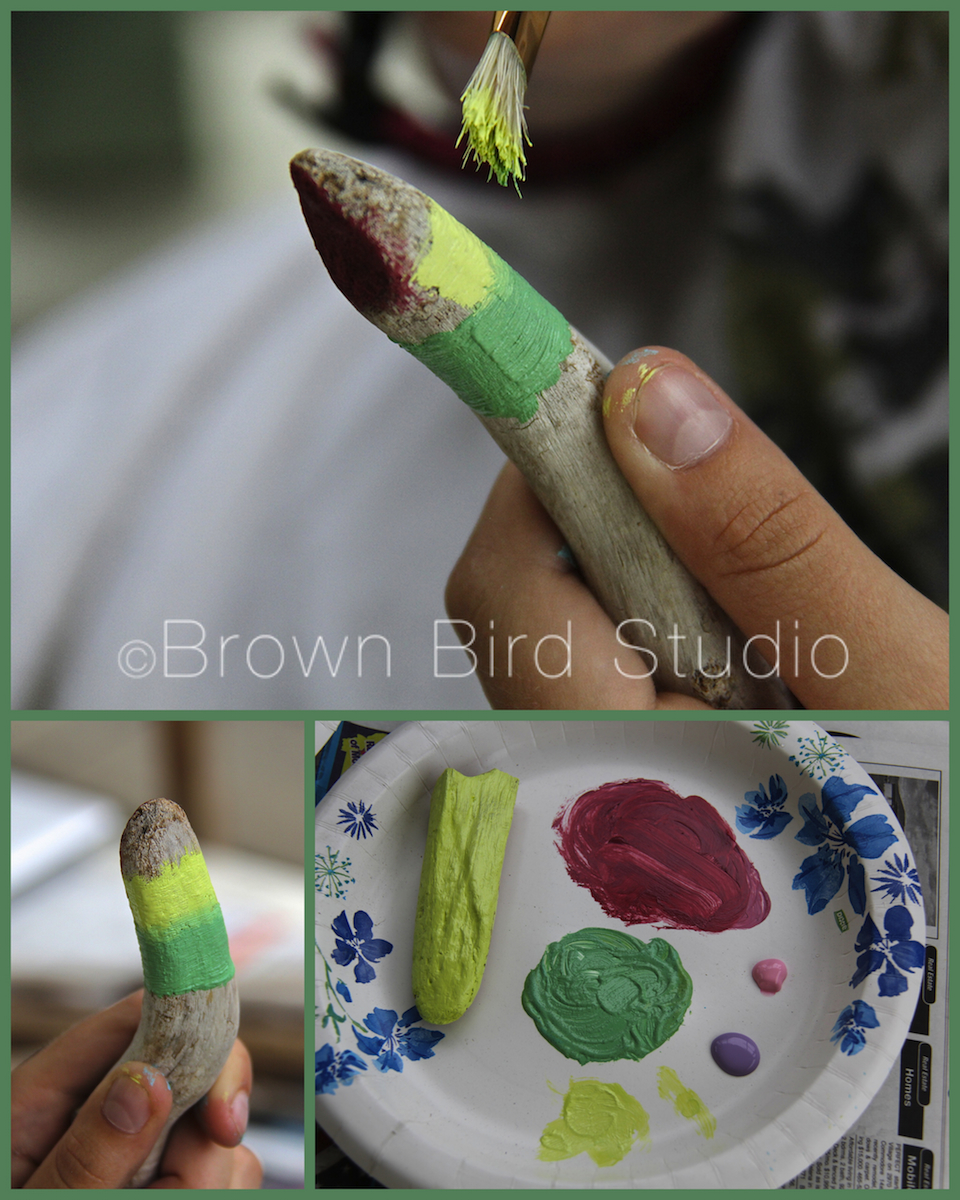
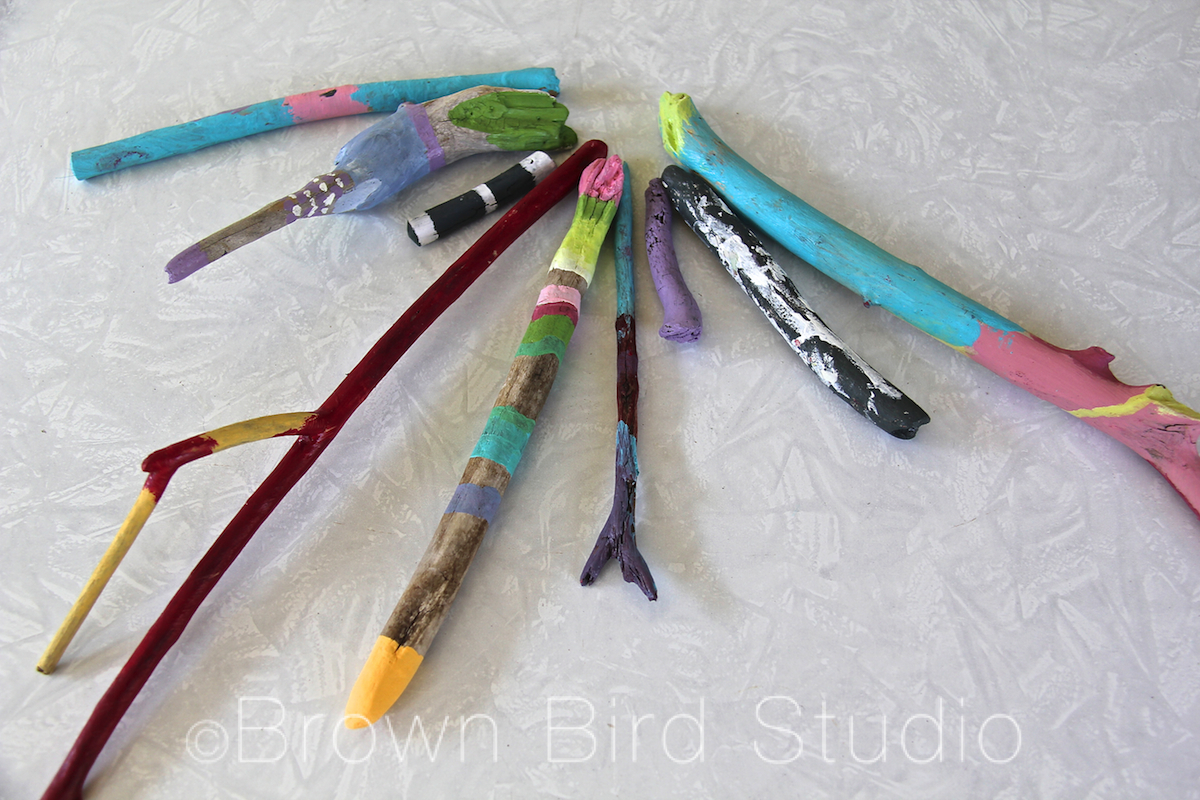
Miss Hickory is a children’s book that dates back to 1948. It is about a tiny doll made of apple twigs with a hickory nut head, so is a little similar to our hollyhock dolls, only longer lasting. The story follows her adventures through the four seasons. And eventually, the story ends with the little doll asleep on a branch of an apple tree and in the spring the apple tree blossoms all around her. Below are a couple of illustrations from the book and a link to a tutorial on how to make a Miss Hickory doll. 

Miss Hickory illustration Miss-Hickory-Book Cover

Painted Critters and Things Made of Clay

yellow ceramic elephant

painted elephant and horse

If you have access to a kiln, or a friend who does, get a chunk of clay and make some of these cute little critters with your kids. We painted them instead of glazing them this time. Next time we want to experiment with glazes. Ema and Adia have some tips on making and painting little clay objects, based on their own experiences with this project.

Thank you to Gene Hickman of the Helena Clay Arts Guild, for the clay, and teaching the girls some tricks of the trade.

tiny painted ceramic objects
Adia describes her ceramic creations by saying, “I made a moon, a dog lying down, a bead and a bowl. The bowl is about as tall as a cat’s paw, and as big around as a cherry tomato. What I might put in it is a bouncy ball small enough to fit. For the moon, I chose green because I was thinking of blue cheese — the kind you eat — and I thought of green. So that’s what I painted it.”

Adia’s advice on this project:

  • First paint your clay thing one solid color, then let it dry. Then, you can paint other colors you want on top of that.

  • When you make the shapes, try not to make them too thick or they might explode in the kiln.

Red Roan Ceramic Horse
Ema explains, “I made a small horse and a little elephant. When I made the horse, I was thinking of my favorite horse that my grandmother owns. Her name is Rosebud. The design on the back of my horse is similar to Rosebud’s design. She is a red roan, so I painted her red.

When I made the elephant, I was thinking of my mom. I think elephants are her favorite animal. I painted it gold because gold makes me feel happy. It also has pink, black and white. I made a happy accident with the eyes. I accidentally drew a black line on the eye and the black line turned into an eyelash and then I made more. So now she looks cute. I gave the little elephant to my mom.

Ema’s tips on making ceramic critters:

  • Don’t make it too thin. It might crack.

  • If you want to paint more than one color, wait until the first color dries before you paint on top of it or the colors will mix and make a different color. If you painted yellow on top of blue when it is wet, it would make green and you might not like green. And if you painted a bunch of colors on top of another it would make brown and you might not like brown. And so on.

  • If you make your creature too thick, it might explode in the kiln! And that might not be good for other pottery in the kiln, but especially not good for yours.

  • Don’t try to make it perfect. It won’t be. But you may make some happy accidents and those are good accidents. How will you know if you have a happy accident? Say you were painting an elephant and you accidentally drew a black line on it’s back. It could turn into wrinkles. Or, say you were painting a bowl and you were painting it yellow and you accidentally got blue on it. You could make it a rainbow bowl. And so on. And that’s how you would know it’s a happy accident.

yellow ceramic elephant yellow ceramic elephant

Kid’s Art: Root Creatures

crane creature made from a painted root

bird made from root and paintEma, Adia and I made some really cool creatures using roots we found on the lakeshore. We picked them up because we thought each of these looked at least vaguely critter-like. Today we painted several of the roots to try to bring out the little features in the wood that looked like something or another. How do you like them now?

Root CreaturesWe have a horse, a gnome, an elephant-deer-bird, and another bird — a long-legged crane.

The following tutorial was written by Ema and Adia:

Have you ever wanted to make an imaginary creatures? Well here’s how. All you need is a few sticks and some paint. You can make whatever you can imagine when you look at the sticks.

You will need:

  • sticks, driftwood or roots
  • hot glue*
  • acrylic paint**
  • brushes
  • something to use for bases for the creatures that will stand up*** …. or
  • tiny eye hooks and some monofilament for creatures that will fly (hang)

EmasHorseCollage-imp

I got a funky root and I kept turning it and turning it and looking at it from different angles and then I saw that it looked like a horse. So I painted it to look like a red roan horse, specifically my favorite horse, Rosebud, who lives at my Grandma’s house in Anaconda. I glued mine onto the base instead of drilling a hole because it stands up by itself.  — Ema, age 10

Gnome by Adia, age 8

I made a gnome. A gnome is a little person with a beard. Santa Claus is a gnome. My gnome has a really tall red hat and is walking across the log that is my base. One leg is shorter than the other because he is walking. He also has a really long white beard and tall white boots. I drilled a hole in the base and glued my gnome’s longest leg into the hole. He looks like Santa. — Adia, age 8

MaureensCrane-imp

One of my roots looked exactly like a long, curved-bill crane so I made a fantasy bird that I named, an “oo-ooga crane.” This is the sound it makes when it’s happy. It has green and blue feathers with white spots. Also some yellow and orange eyes. I glued one of the crane’s legs into a hole in the walnut base. — Maureen

Elephant Deer Bird Detail

Maureen's Elephant Deer-Bird

My other root reminded me of an elephant with wings. It has big long trunk, two skinny wings and a tail. I added little antlers so it’s an elephant-deer-bird. I painted the antlers blue because the Huichol Blue Deer is special to me. This one hangs from the ceiling because it’s flying. I screwed in a tiny eye-hook and hung the bird by a piece of monofilament. — Maureen

NOTES FROM THE TUTORIAL AND SUPPLY LIST:

*We used a little hot glue to attach odds and ends of roots to our creatures.

**For painting the creatures, you don’t have to completely cover the surface of the wood with paint. Leaving some of the natural wood showing looks really cool.

***If you want to make bases, cut some nice wood in a square or rectangle or any shape. Sand it so it’s nice and smooth. Sand the edges to make them roundish so they aren’t sharp. Figure out if you want to drill a hole or just glue on your creature onto the base. We made our bases out of scraps of walnut wood, the trees that grow actual walnuts on them.

root creatures11-improot creatures10-imp


Below, we have a few other roots we haven’t painted yet. We are going to keep making these creatures. One of these roots is going to become a flying dragon with a tail made of smoke and fire coming out of its mouth. What do you see in these?  Please let us know in the comments.

Driftwood Root Driftwood Root Driftwood Root

Driftwood Root


Kid’s Art: Clothespin Puppets

clothespin puppet fish

clothespin puppet fishWe had an idea on our Summer Fun Pinterest board both girls wanted to make, so here’s what we did:

Clothespin Puppets

What you need:

  • clothespins (the kind you pinch to open)
  • heavy weight paper or lightweight cardboard *
  • acrylic paints, markers or other tools to decorate the puppets **
  • hot glue, regular glue (like Elmer’s) ***
  • scissors
  • paint brushes if you decide to use paint

hatching egg clothespin puppet clothespin puppet fish clothespin puppet chameleon clothespin puppet chameleonHow to make the puppets:

  1. Decide what you want to make. We liked the idea of a mouth opening to reveal something inside. Ema also made an egg that “hatches.” You could choose to make a person whose mouth opens to show a word-bubble, or an envelope that opens to show a letter inside. We mostly got our ideas from this lovely Flickr user, Molas & Company, but I can think of lots more ideas… get creative!
  2. Draw your shapes on heavy weight paper and cut out.
  3. Cut through the middle of the shape so you have two halves to glue to the two parts of the clothespin
  4. Paint or otherwise decorate your puppet shape.
  5. Make the inside piece and attach to the bottom of the puppet shape.
  6. Figure out the best placement of the two halves, on your clothespin.
  7. Hot glue the two halves of your puppet shape onto the bottom and top of the clothespin.

Have fun with your puppets:

clothespin fish puppet
Headline: Very brave whale tries to eat prehistoric sea dinosaur even with mouth full of boat!

Adia played with her puppets while watching Fantasia, above. They are interacting with the movie. That’s what I call active-watching (and a brave puppet whale!)

clothespin puppet fishNotes & Tips:

* One of the puppets we made using a lighter weight paper because Adia liked the color. The paper sort of curled, so I would suggest a heavier weight (cover stock is perfect) paper.

** We used acrylic paints and I limited the girls to just black and white (and gray mixed from the two colors.) Use brushes or any other tool you can think of, to apply the paint. The tan chameleon has a texture made by stamping white paint with the tip of a sponge brush (see photo below.) You could also use a pencil eraser to make polka dots. Get creative!

If you use a heavy weight paper, or light cardboard, you could decorate the puppets with glued on buttons, sequins, beads, felt, bits of fabric, ribbons, or pieces of magazine photos.  Very young artists could use stickers.

*** We used Elmer’s glue to attach paper bits to the paper puppet shapes. Hot glue to attach the puppet shapes to the clothespin. Use whatever glue you think will work best with the stuff you’re applying to your puppets.

Clothespin Puppet Critters
An egg that hatches, a whale swallowing a boat, a big fish eating two smaller fish, two chameleons eating flies and a frog eating a butterfly. Your imagination is the limit!
This texture was made by stamping the tip/edge of a sponge brush filled with white paint, on tan paper
I made this texture by stamping the tip/edge of a sponge brush filled with white paint, on tan paper

Links for Clothespin Puppets:


3 Ways to Have Fun in One Summer Day

Painted Driftwood Sticks

Painted Driftwood Sticks

  1. Attend the Exploration Works/Holter Science of Art Day Camp. Then have french fries and other unmentionable deliciousness.
  2. Head out to Lake Helena Reservoir to collect driftwood sticks of a certain size and smoothness. Take Charlie along for sweetness and chuckles.
  3. Paint your sticks while eating dried seaweed on the porch, all the while enjoying an afternoon thunderstorm.
solar ovens by kids
Teams of kids made solar ovens at Exploration Works

It has been 10 days since Ema and Adia and I spent the day together making art, playing with Charlie and doin other summer kid stuff. I actually missed them. And I think maybe they might have missed playing with me too. When I picked them up at the Exploration Works Science Museum at noon, they both gave Charlie and me big hugs and smiles.

So … we went to a fast food place for lunch (it shall remain unnamed — grin) just to do something totally unexpected and different. The girls liked it. (I remembered why I don’t eat there.)

Lake Helena
After lunch we headed out to the lake to collect sticks for our afternoon art project. Charlie also wanted to get in the water and show us his favorite trail. We could tell there was a thunderstorm brewing over the town.
drill press
Back in town, Tim let us use his shop’s drill press to make holes in our sticks.
painting sticks
Adia stayed absorbed in this activity for a long time — she’s the one who colors outside the lines. 🙂

Thunder and a sweet summer rain kept us company while we painted our sticks. It’s my favorite kind of weather — a warm thunderstorm when you’re nice n’ dry on the porch so you can feel the hairs rising on your skin but you don’t get drenching wet. Welp, that was fun! And definitely something 8 to 10 year olds can handle.

painting stick art
Ema is meticulous … taking her time and considering each brush stroke. Her color choices are fun!
painted stick art
Ema’s finished artful sticks, ready to be threaded and hung tomorrow
Painted Stick Art
Adia’s awesome finished sticks, ready to be threaded and hung as a sculpture tomorrow

Tomorrow it’s time to turn in our Chalk It Up Helena applications. We will have a cooking lesson (Pepperoni Pizza Puffs) and try to finish our stick projects. We’ll show you the finished results next time, okay?