Public Art of a Temporary Nature
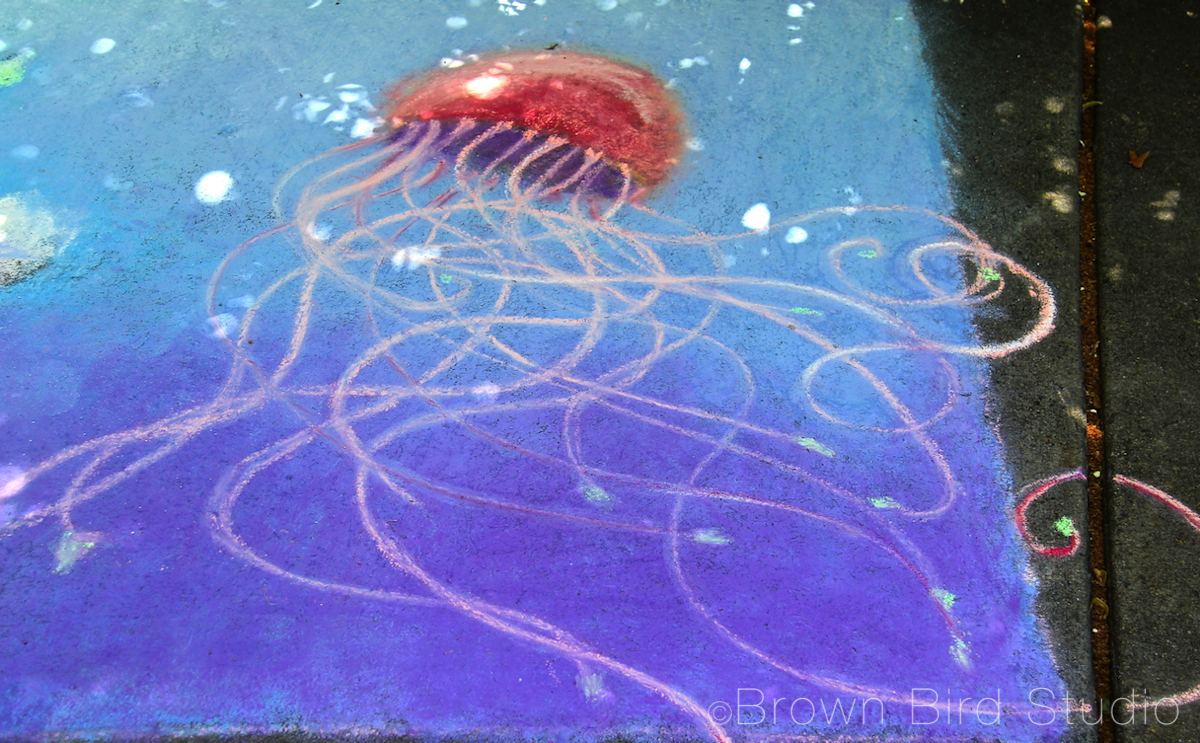

Water :: Earth :: Wind :: Fire
Art and Art Education with the Elements
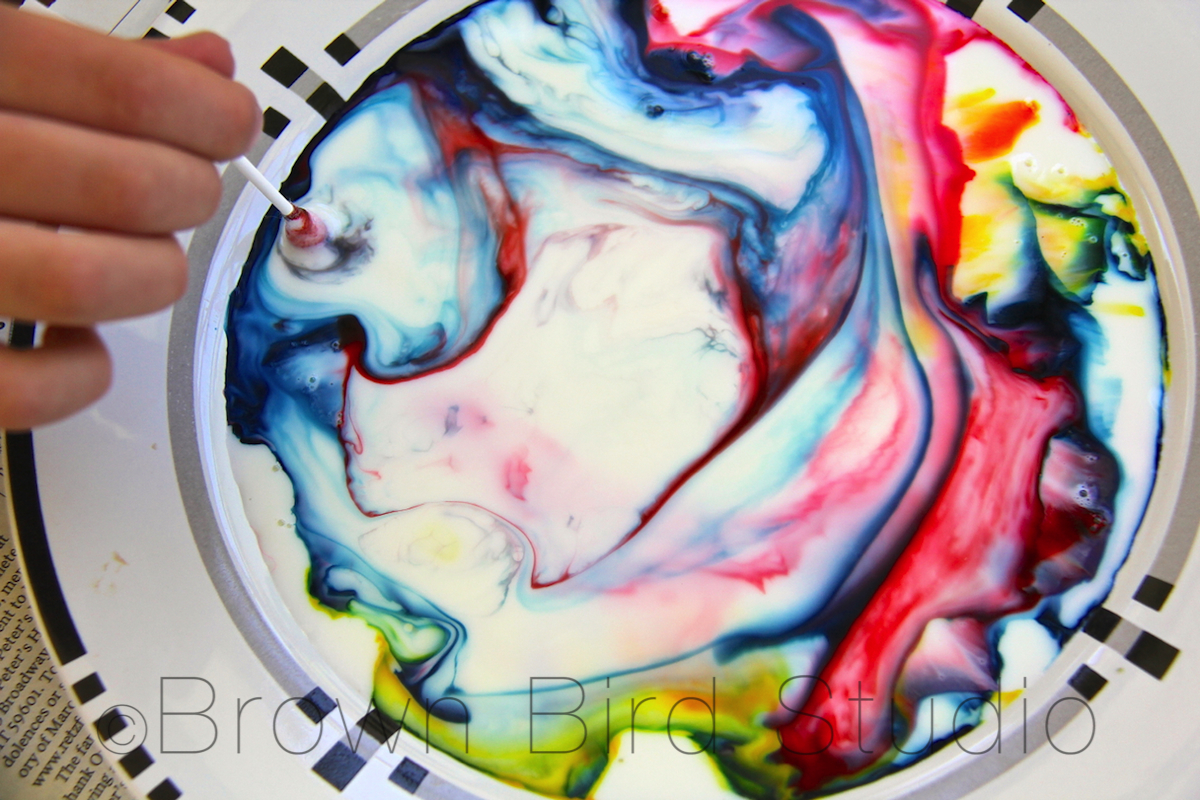
 I saw this idea on Photojojo a couple of days ago and immediately thought of doing this with Adia, who is very good at math and science. When I suggested this fun experiment for today, she was all over it! She remembered seeing the project on a website she called “Science Steve.” Here is an excerpt from Steve’s post about this Color Changing Milk:
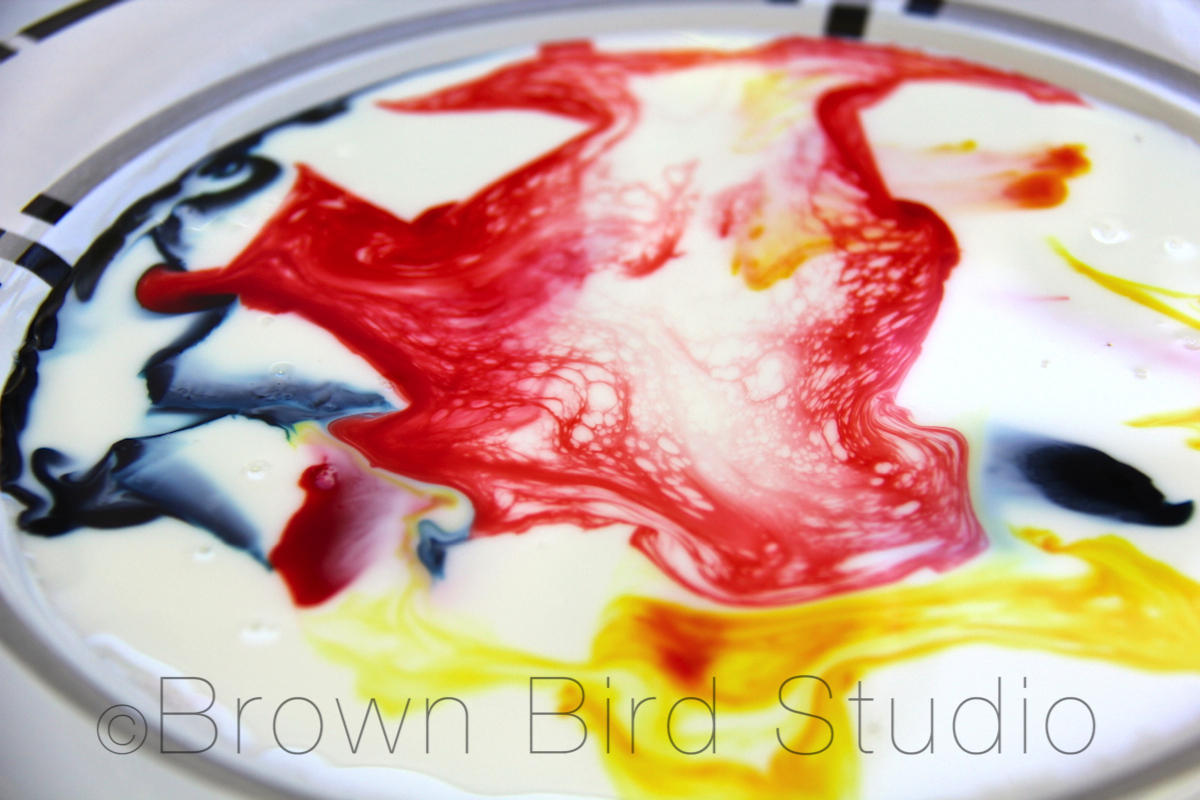
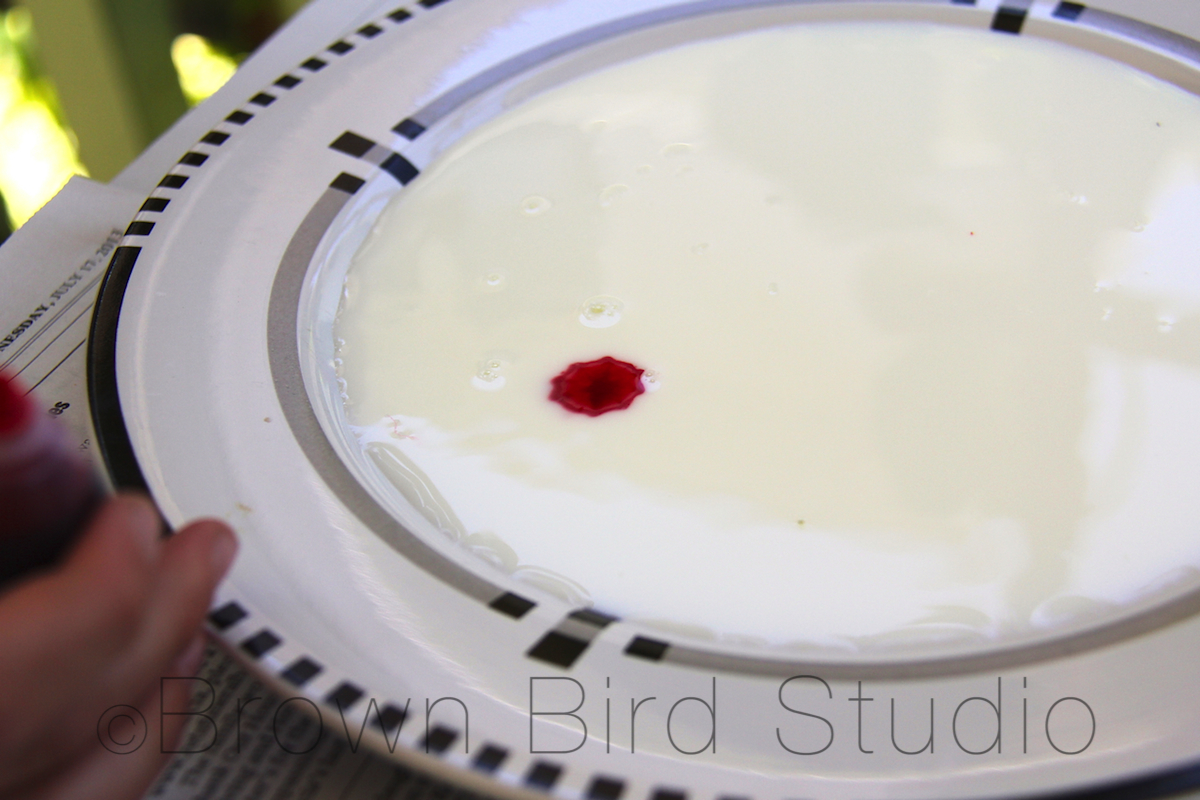
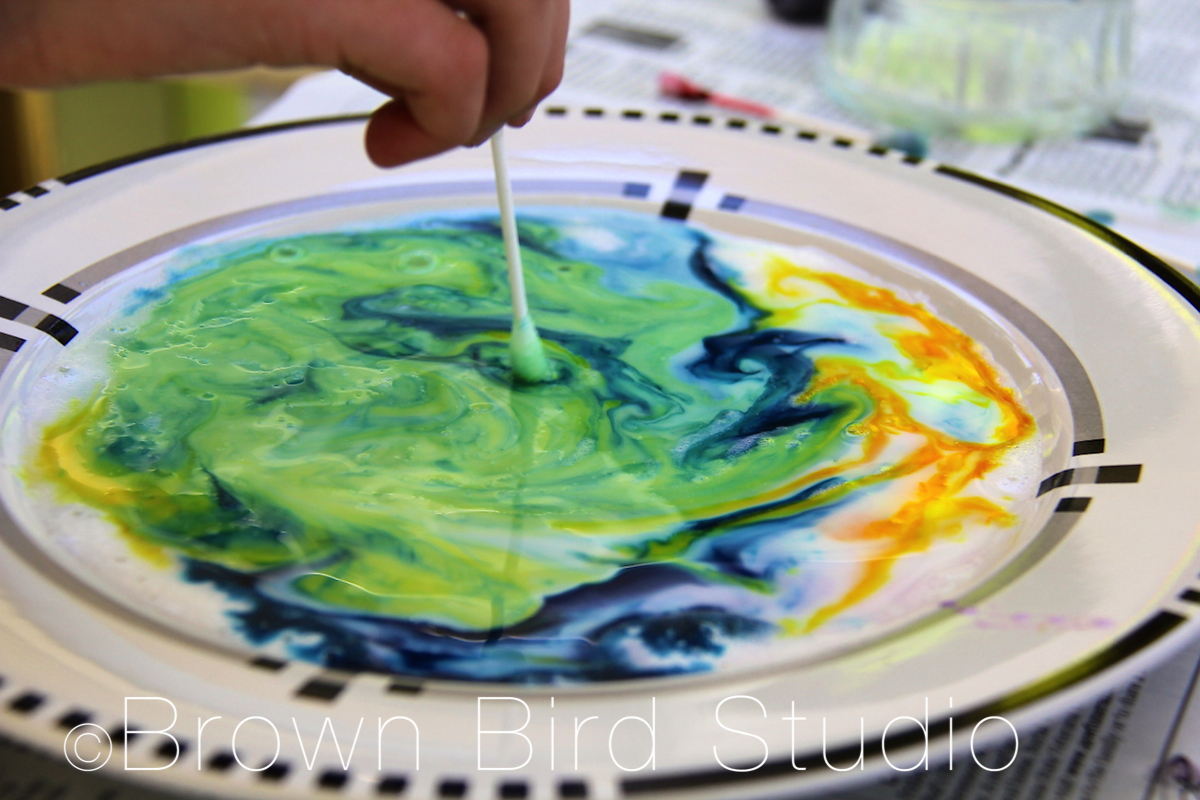
The secret of the bursting colors is the chemistry of that tiny drop of soap. Dish soap, because of its bipolar characteristics (nonpolar on one end and polar on the other), weakens the chemical bonds that hold the proteins and fats in solution. The soap’s polar, or hydrophilic (water-loving), end dissolves in water, and its hydrophobic (water-fearing) end attaches to a fat globule in the milk. This is when the fun begins.
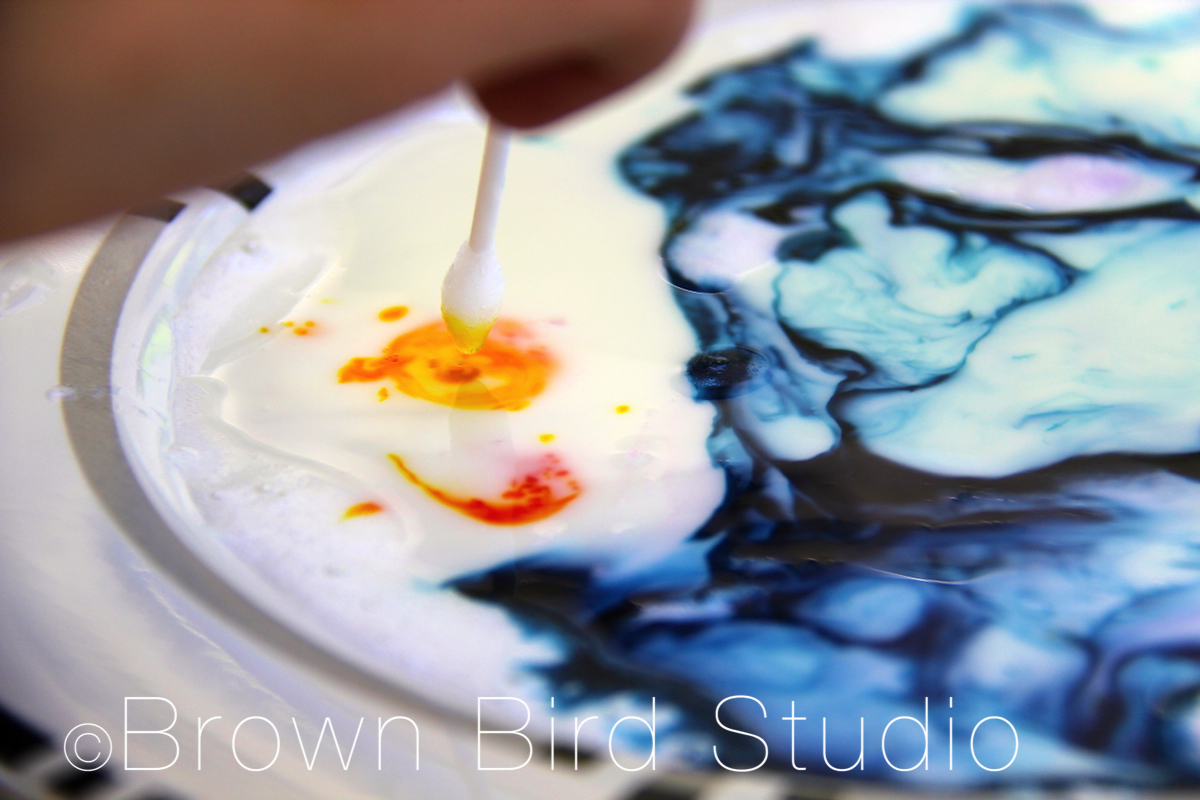
The molecules of fat bend, roll, twist, and contort in all directions as the soap molecules race around to join up with the fat molecules. During all of this fat molecule gymnastics, the food coloring molecules are bumped and shoved everywhere, providing an easy way to observe all the invisible activity. As the soap becomes evenly mixed with the milk, the action slows down and eventually stops.
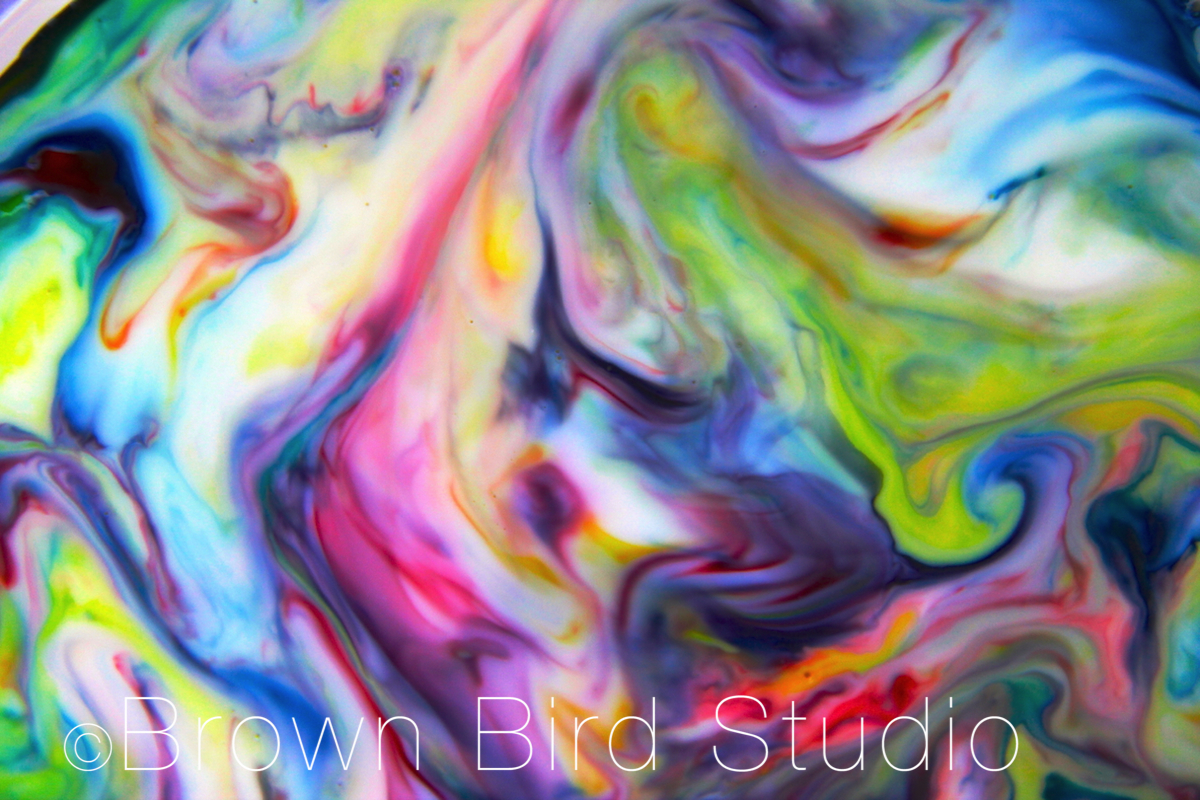
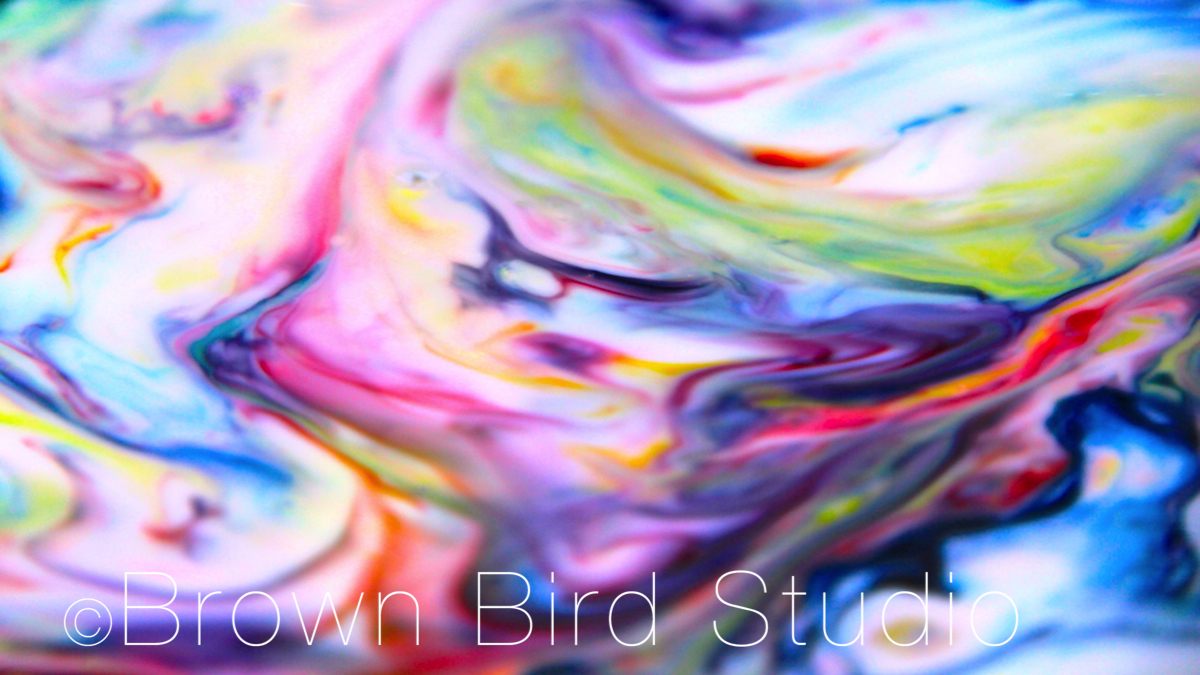
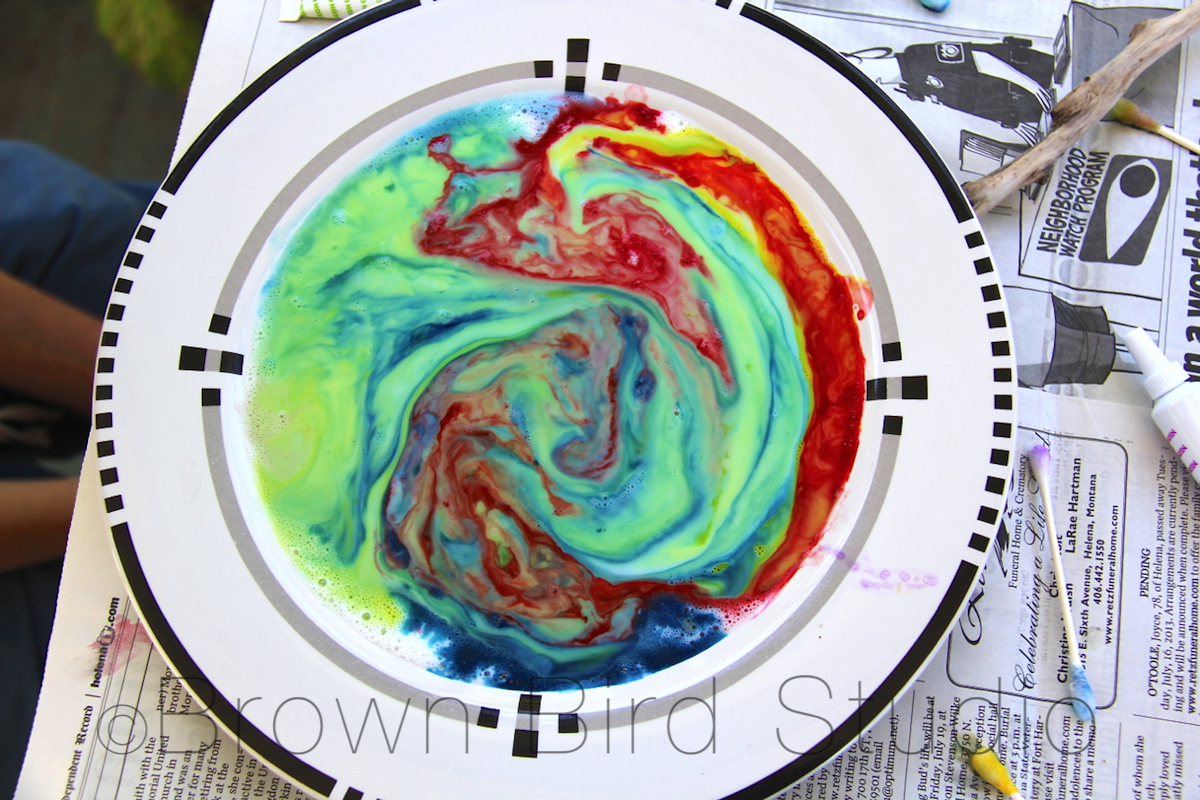
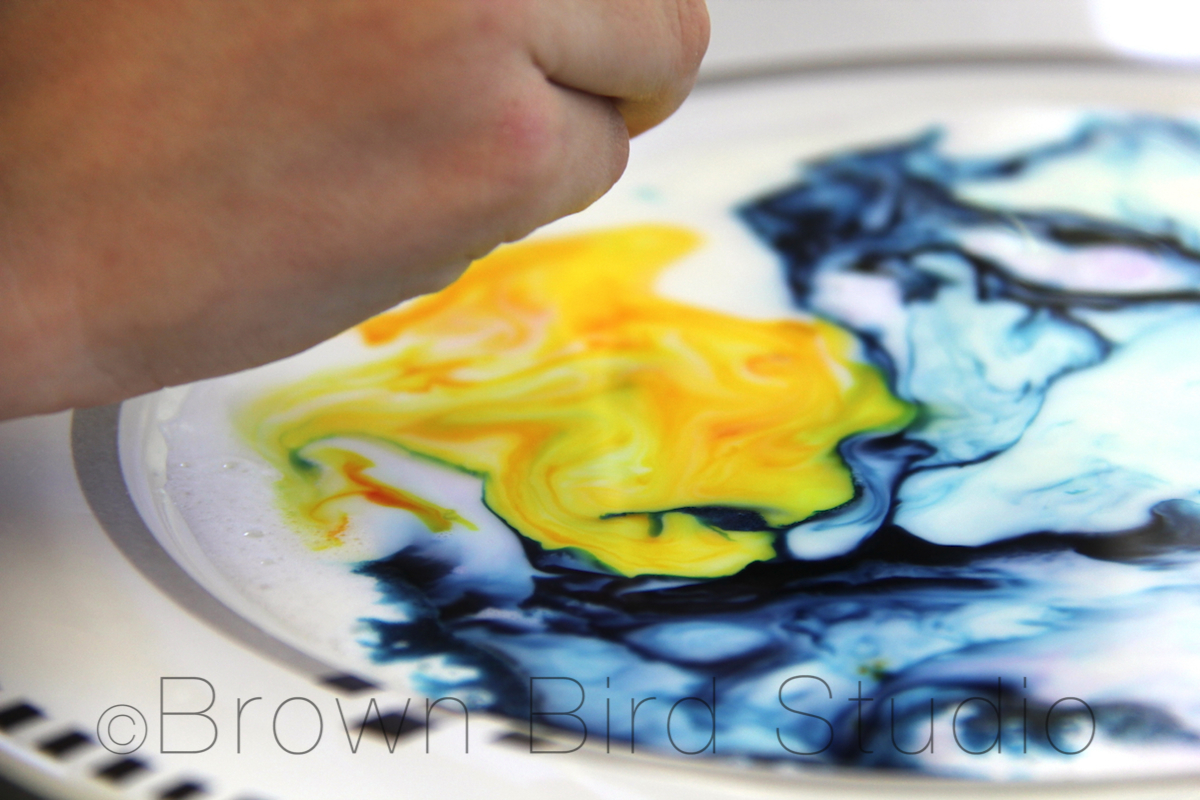
 Steve’s description of this experiment explains that it’s important not to stir the colors and the milk with the cotton swabs, but Adia couldn’t stop herself. She seemed much more interested in seeing what would happen when you stir all the colors together (you get a grayish tan color that looks totally unappetizing!)
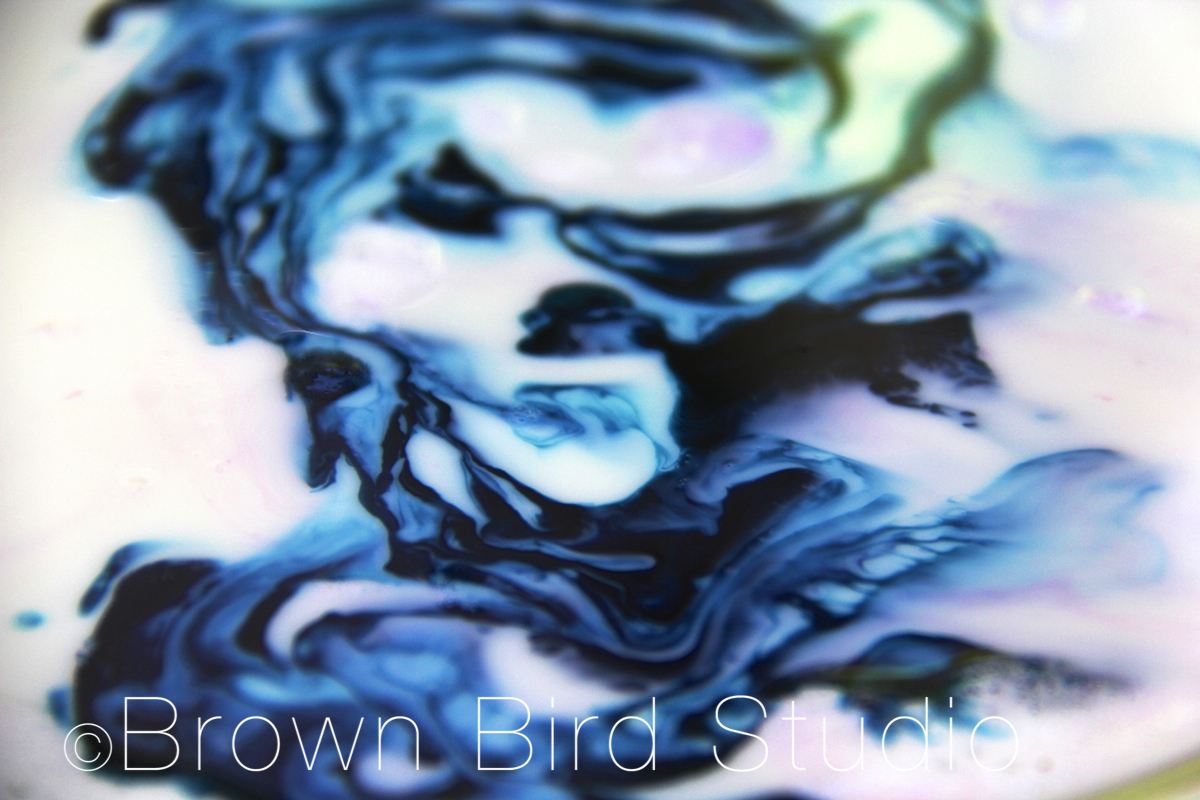
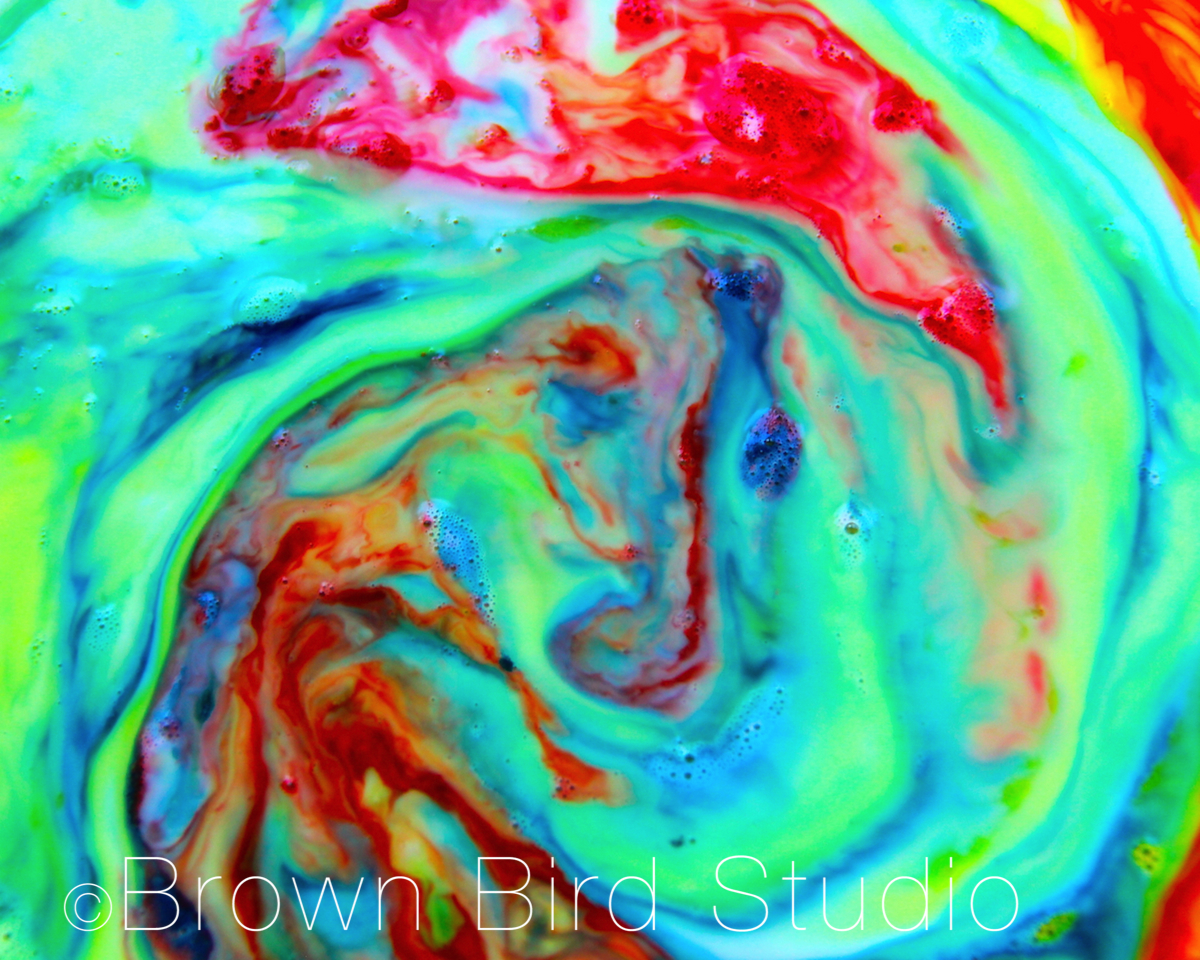
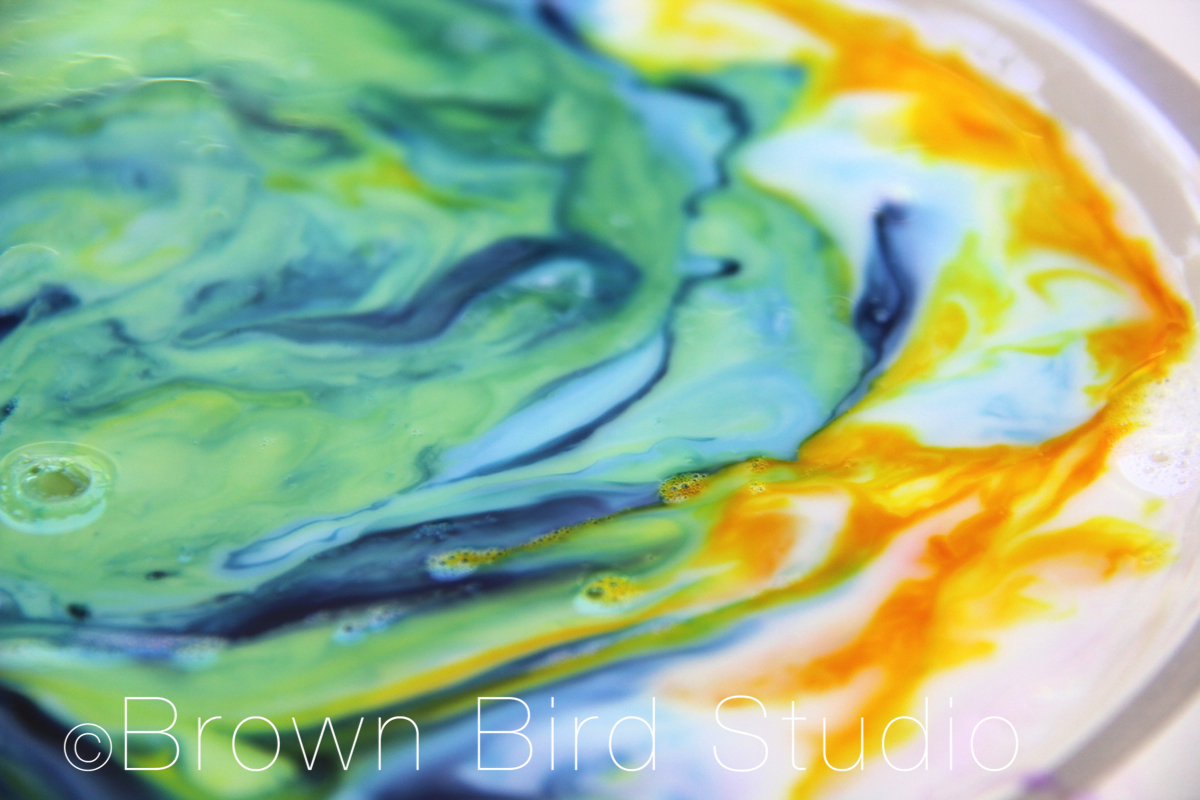
I convinced Adia to let me to take photos along the way, before the colors were all mashed together. Aren’t these cool? The blue one looks a little like an angry face.
What You Will Need
How to Make your Milk Swirl Paintings

LINKS AND IDEAS:
Photojojo has a very clear, short video showing how to do this science/art project
Steve Spangler’s Science Experiment, Color Changing Milk. He even has a section on tips to turn this fun activity into a science fair experiment.
Here is a detailed description with great progress photos, of Steve’s color-changing-milk experiment.


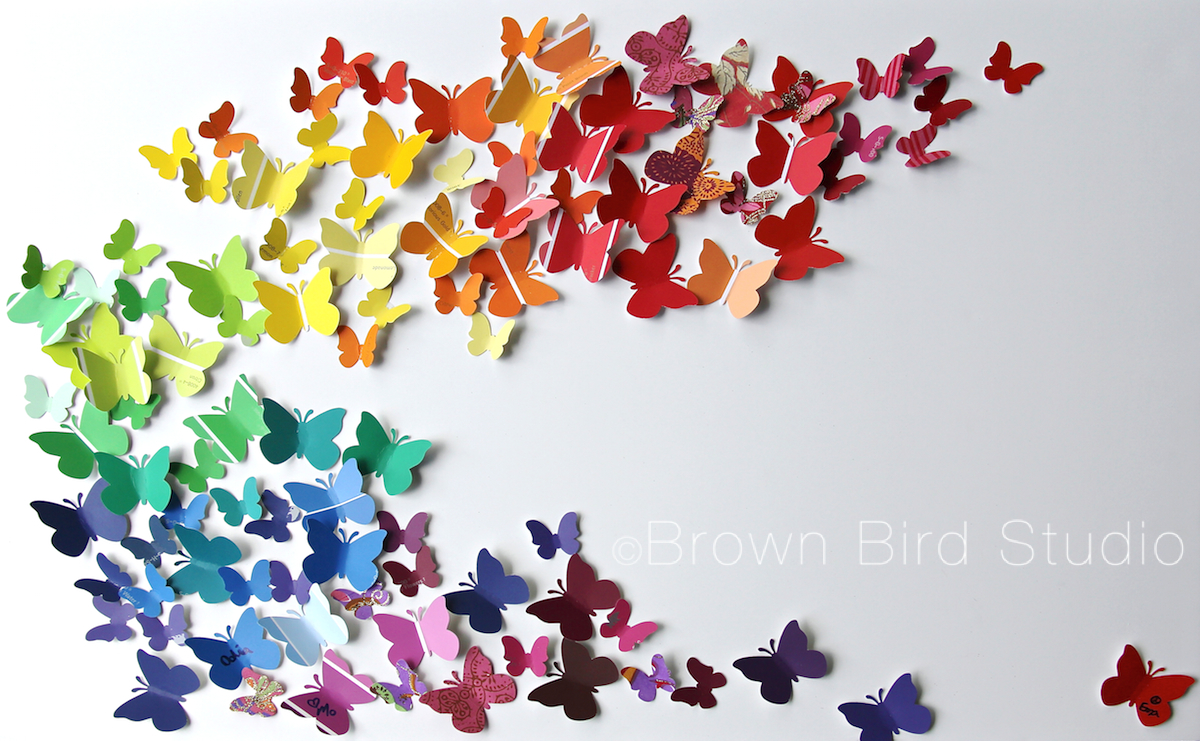
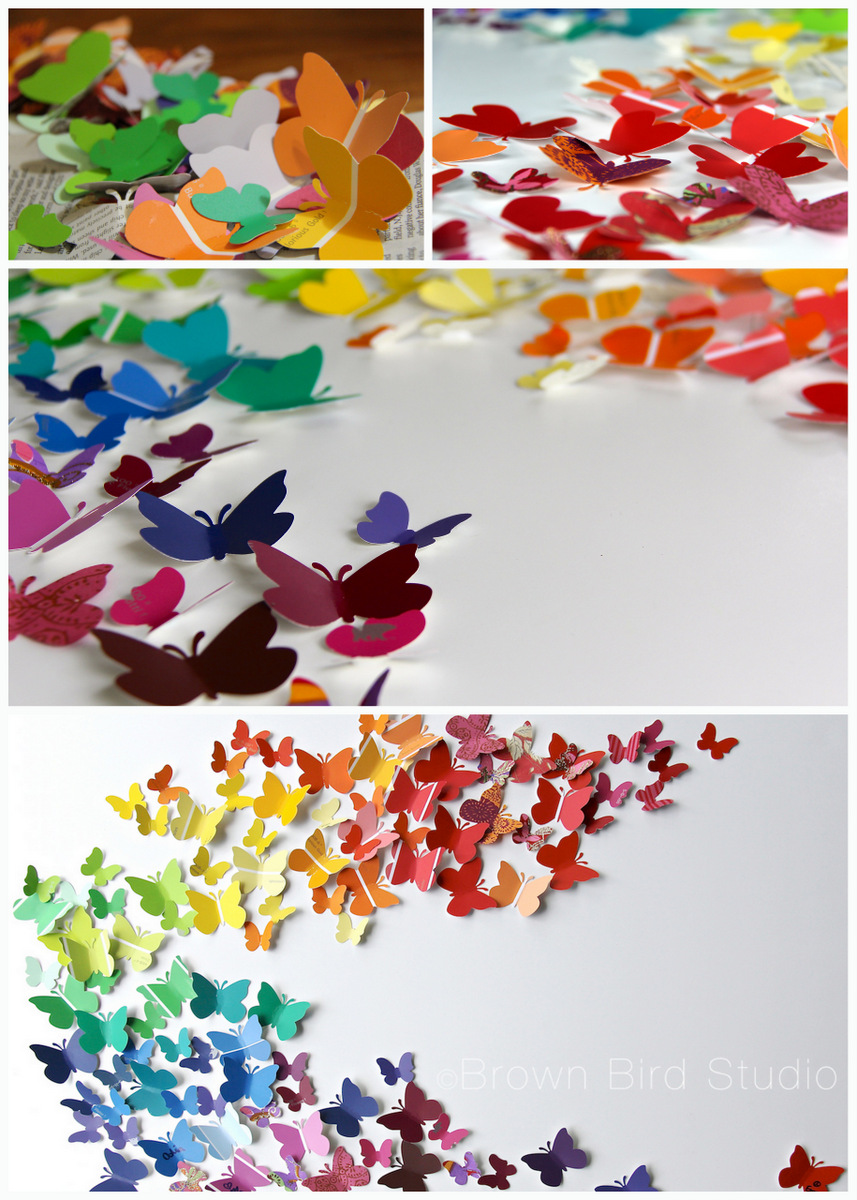 One of the projects I did with the girls this week was to create this piece of wall art for their mom’s office wall. (Her office is so totally in need of bright beautiful art to cheer up the grayness. heh.)
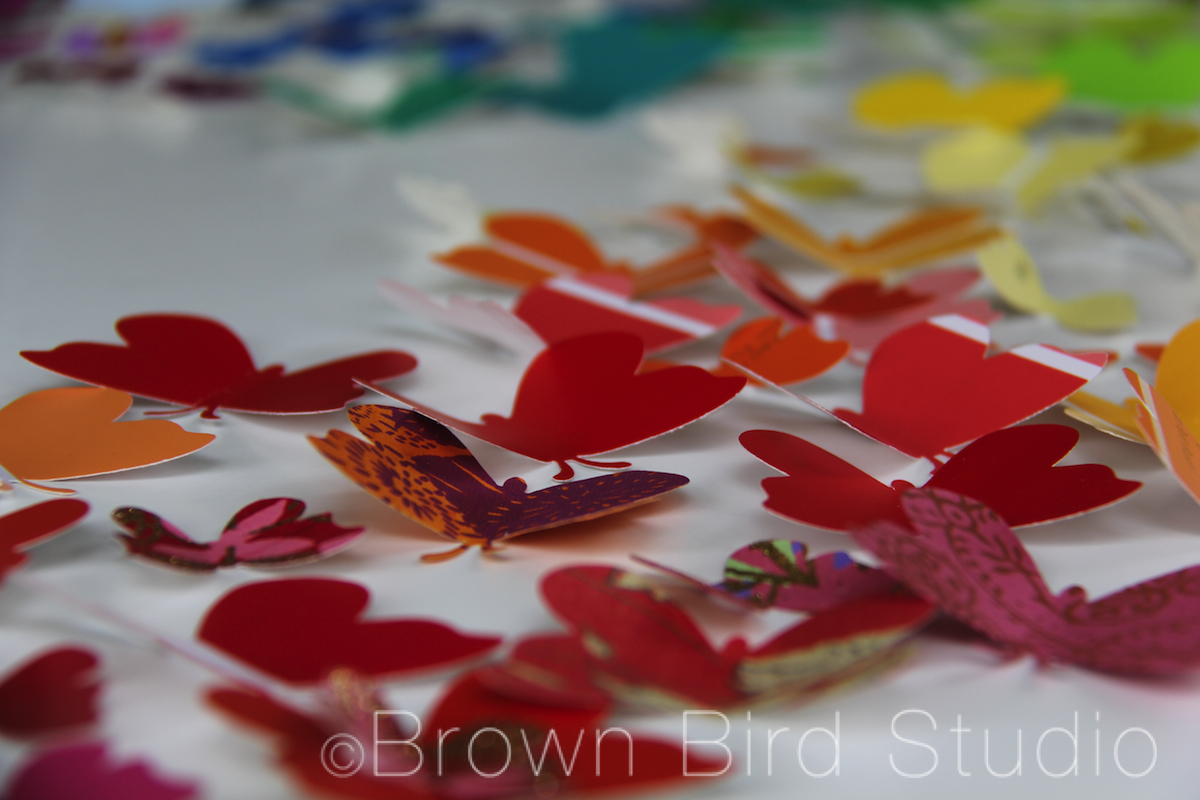
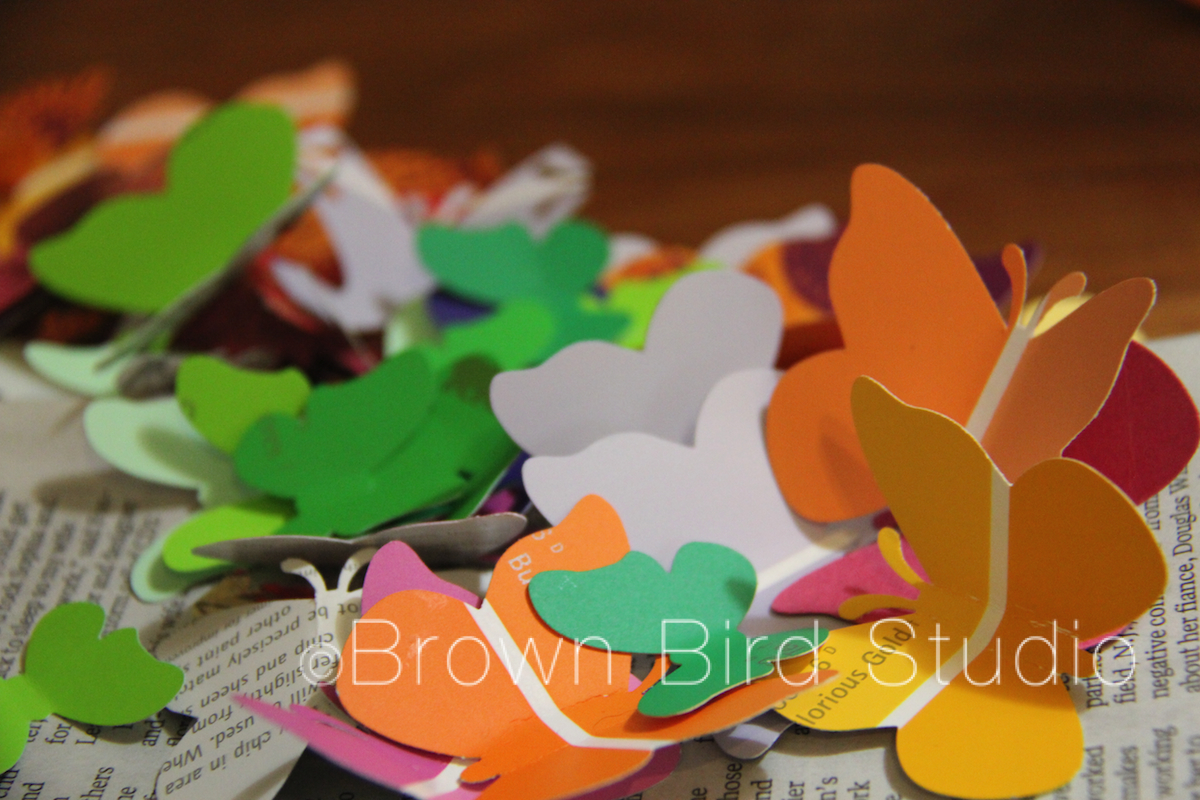 We used the paint samples you can get at hardware stores. Home Depot was kind enough to let us have a big handful of samples for free. The girls picked out the colors, punched the shapes with paper punches and bent the wings to make the butterflies look three dimensional. We also used some leftover pieces of printed papers I had lying around, to add variety.
Next we worked together to come up with the swoosh shape and I glued them onto a large piece of foam core. I wanted to use a large stretched canvas, painted white, but my supply budget for the summer wouldn’t stretch quite that far and I didn’t feel like stretching my own canvas. You could also use a piece of nice 1/4 inch birch plywood with sanded edges … maybe leave the natural wood color, or paint with white acrylic or indoor wall paint.
 We used Craft Glue to attach the butterflies to the foam core. I thought about using hot glue but decided it would be too messy and overkill, since the little butterflies are so lightweight.
We have a rainbow thing goin’ on in this butterfly swarm, but we could as easily have chosen to use a different color scheme. You could even do an “ombre” design — the great thing about paint samples — there are so many colors, and if you get the sample cards that have 4 or 5 shades of color on each, well that would be just easy!
Glue or stick some hangers on the back and voila! You have a colorful work of happy art. Total cost for this project: $3.00 (I already owned the paper punches. These are expensive, but maybe find someone who would lend you theirs … or plan to spend many evenings hand cutting hundreds of shapes.)
Supply List: craft glue, foam core (stretched canvas or 1/4 inch plywood panel may also be used), lots of paint sample chips, paper punches, one or two picture hangers for the back