
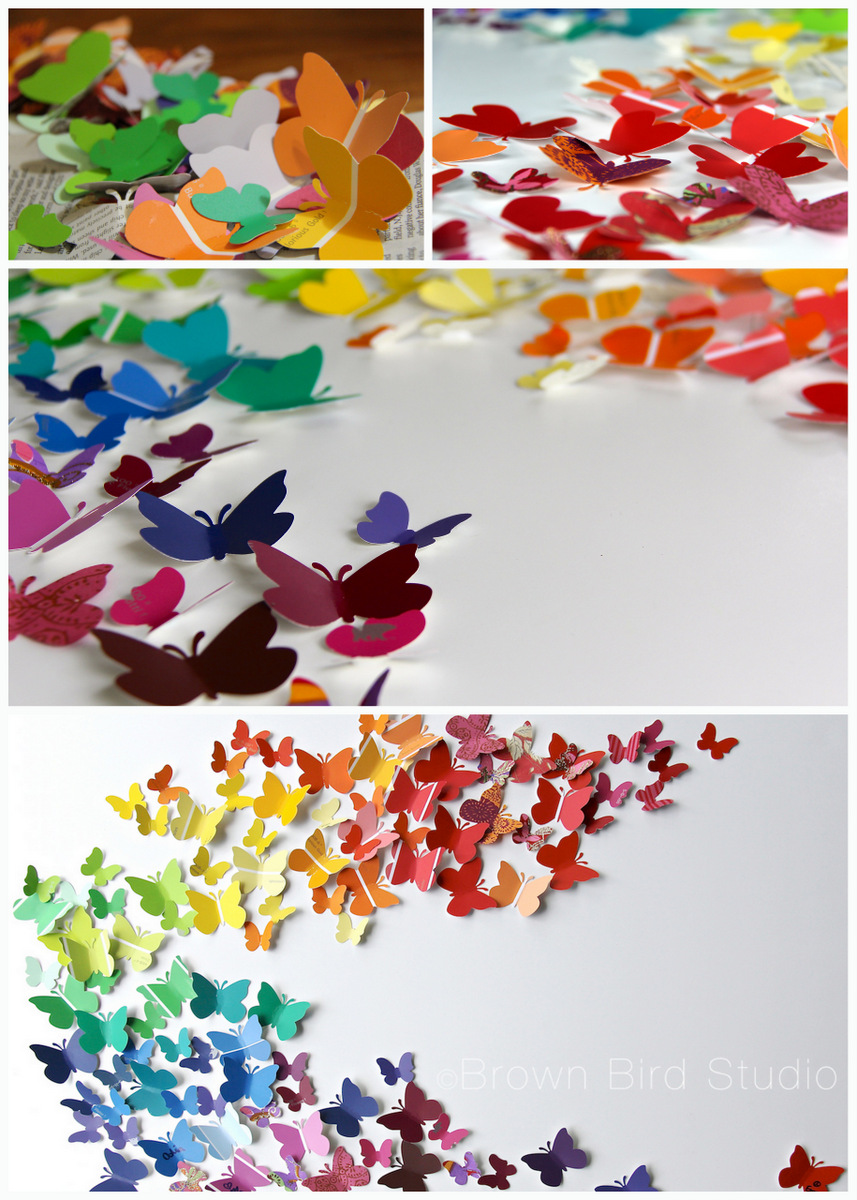
 One of the projects I did with the girls this week was to create this piece of wall art for their mom’s office wall. (Her office is so totally in need of bright beautiful art to cheer up the grayness. heh.)
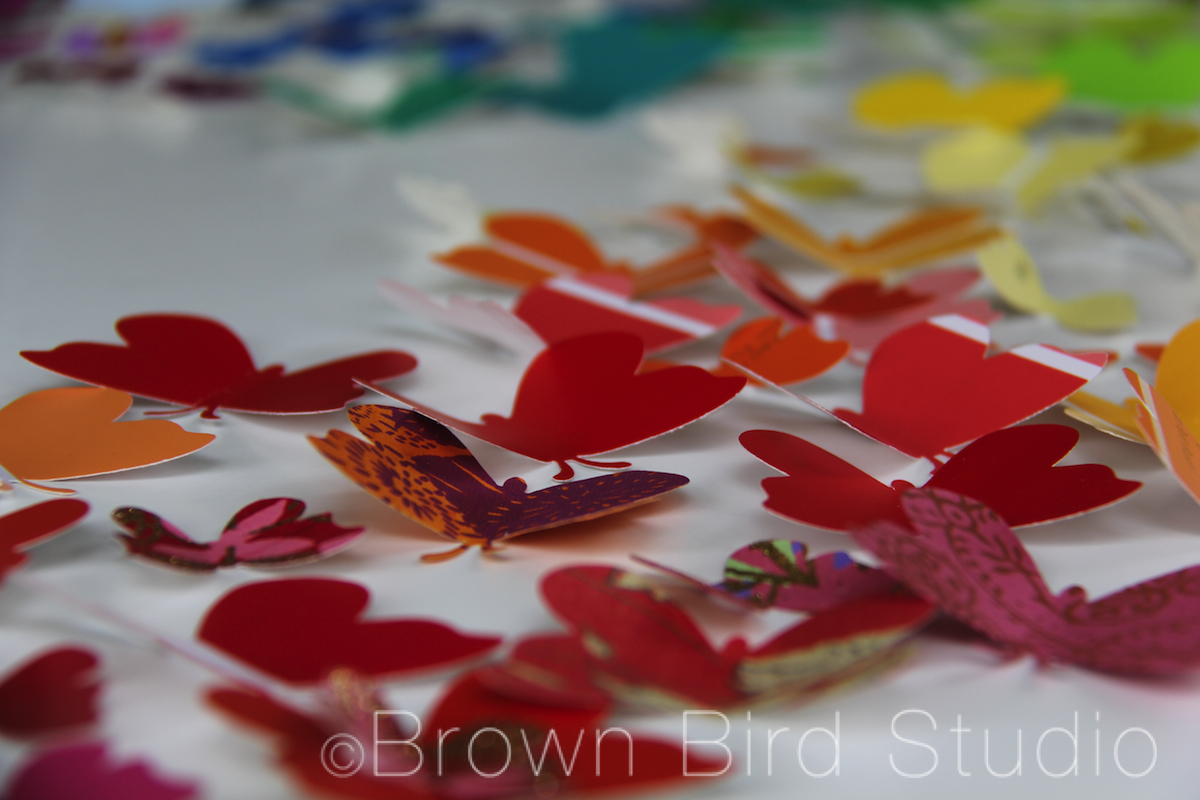
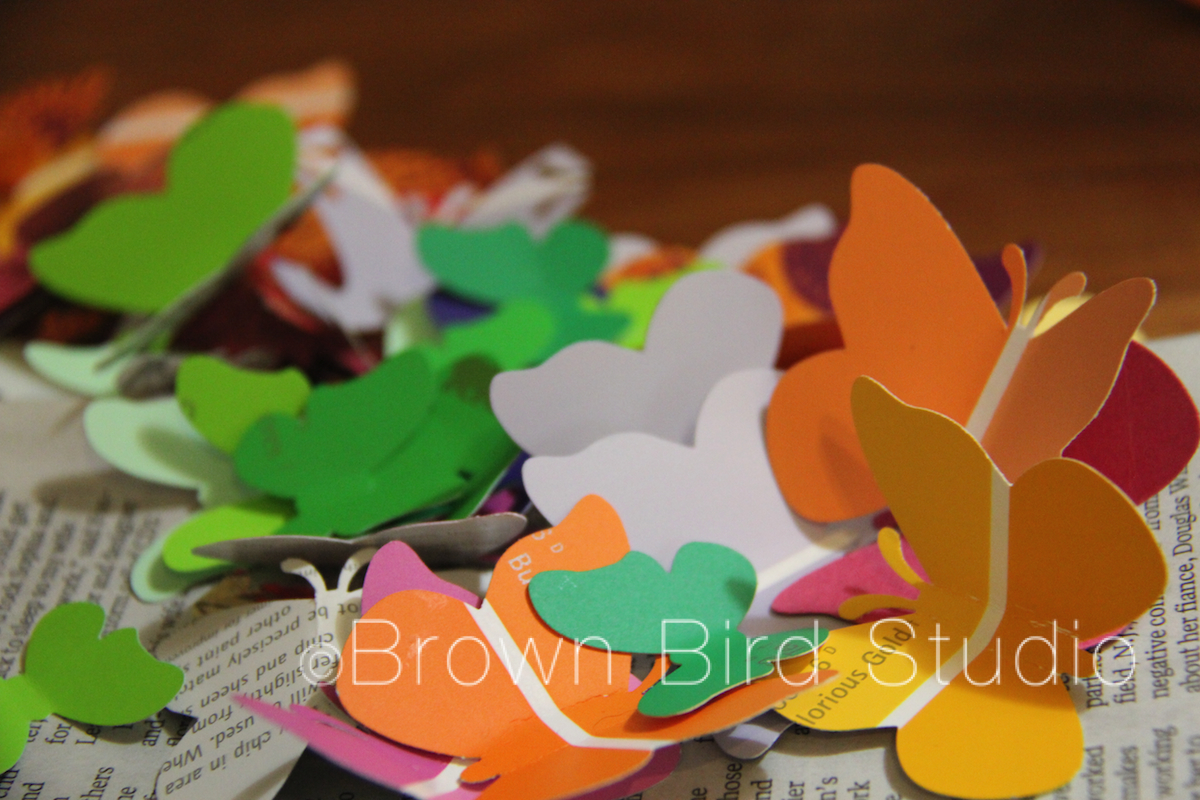 We used the paint samples you can get at hardware stores. Home Depot was kind enough to let us have a big handful of samples for free. The girls picked out the colors, punched the shapes with paper punches and bent the wings to make the butterflies look three dimensional. We also used some leftover pieces of printed papers I had lying around, to add variety.
Next we worked together to come up with the swoosh shape and I glued them onto a large piece of foam core. I wanted to use a large stretched canvas, painted white, but my supply budget for the summer wouldn’t stretch quite that far and I didn’t feel like stretching my own canvas. You could also use a piece of nice 1/4 inch birch plywood with sanded edges … maybe leave the natural wood color, or paint with white acrylic or indoor wall paint.
 We used Craft Glue to attach the butterflies to the foam core. I thought about using hot glue but decided it would be too messy and overkill, since the little butterflies are so lightweight.
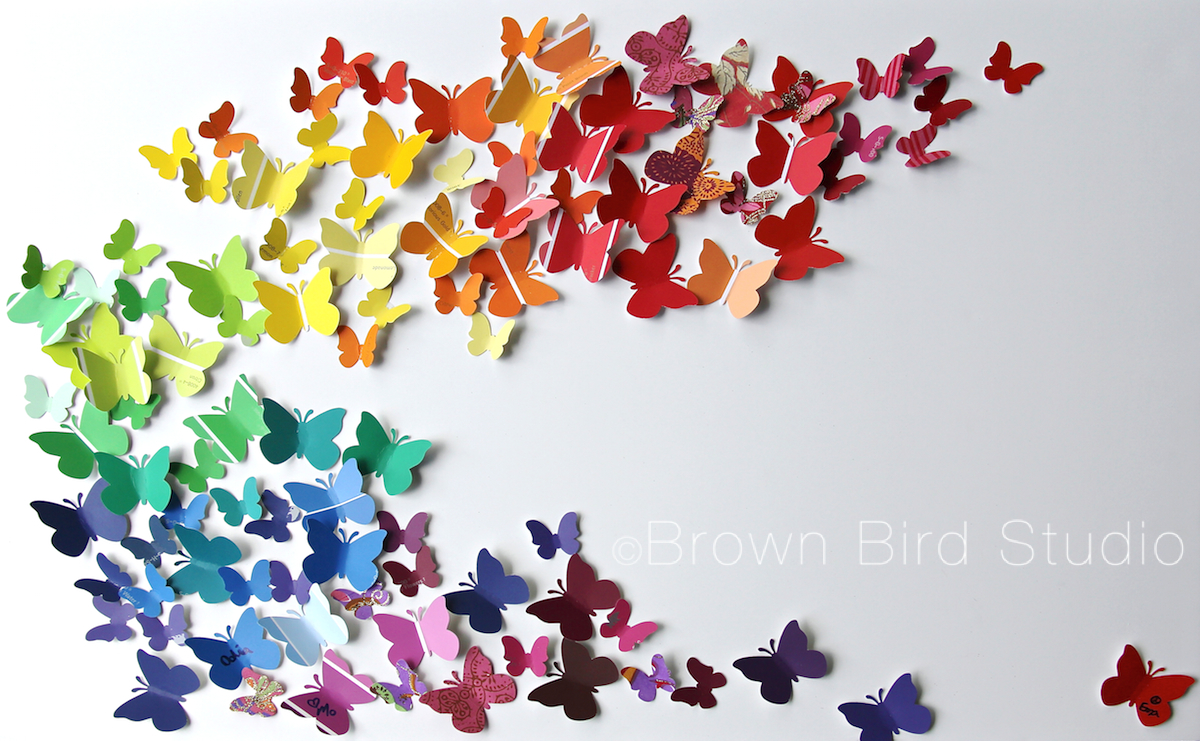 We have a rainbow thing goin’ on in this butterfly swarm, but we could as easily have chosen to use a different color scheme. You could even do an “ombre” design — the great thing about paint samples — there are so many colors, and if you get the sample cards that have 4 or 5 shades of color on each, well that would be just easy!
Glue or stick some hangers on the back and voila! You have a colorful work of happy art. Total cost for this project: $3.00 (I already owned the paper punches. These are expensive, but maybe find someone who would lend you theirs … or plan to spend many evenings hand cutting hundreds of shapes.)
Supply List: craft glue, foam core (stretched canvas or 1/4 inch plywood panel may also be used), lots of paint sample chips, paper punches, one or two picture hangers for the back
how large are those butterflies? 2 inches or bigger?
this is really cool! i wanna do this in my room… can u email me back exactly what to do simply please? <3
Erin, the butterflies are about 1 1/2 inches wide at the widest spot. It’s a large butterfly punch. I had to special order it.
The text of the post above pretty much tells you exactly what to do, NK. The only thing I didn’t include in the post was that we folded the wings just slightly, to give the piece a 3 dimensional feeling. It’s so simple, I didn’t think I needed instructions. Hope it helps to read the post. 🙂
Love this idea…could you let me know where you ordered your punch from? Thanks!!!
that’s a great idea. COOL!!!
where did you get your butterfly punch and what brand is it? This is such a great idea!
How large was your foam board and can you point us in the direction of your special order punch. Thanks for sharing!
Hi Zinga, the foam board I used was 24 x 36 inches, standard available at office supplies and art supplies stores. You could also use a wood panel, as long as you paint it on both sides so it doesn’t warp …. or cradled wood panel of any size. The punch I used (two different sizes) was one I special ordered through a scrapbooking store and I have since given it away, so not sure of the brand. Sorry I can’t help more.
I apologize for taking so long to reply, Claire. The punch I used was one I special ordered from a local scrapbooking store. I also had a small butterfly punch. Used two sizes. I have sine given them away so I can’t tell you the brand. A google search should turn up some options for you. Good luck. 🙂
Sorry it has taken me forever to respond to you, Jo. The punch I used was one I special ordered from a local scrapbooking store. I also had a small butterfly punch. Used two sizes. I have since given them away so I can’t tell you the brand. A google search should turn up some options for you. Good luck
The text of the post above pretty much tells you exactly what to do, NK. The only thing I didn’t include in the post was that we folded the wings just slightly, to give the piece a 3 dimensional feeling. It’s so simple, I didn’t think I needed instructions. Hope it helps to read the post. 🙂
The butterflies are two sizes: 1.5 inch at widest part of the wings and 2 inches.
Hi. Is it possible to stick these butterflies directly onto the wall?
What type of craft glue did you use? Beautiful picture!
It’s been so long, Jennifer, that I can’t remember for sure, but I think we used just a pvc type of glue, like Elmer’s. The piece is still holding up perfectly. You could also use glue dots.
You could. The glue would leave a residue, but that wouldn’t stop me. I’ve been known to do things to walls that require me to sand them down when I want to change it up. No big deal. Just try it! 🙂